Journey with Confidence RV GPS App RV Trip Planner RV LIFE Campground Reviews RV Maintenance Take a Speed Test Free 7 Day Trial ×


Go Back   Hi-Lo camper travel trailer forum > Hi-Lo Tech > Exterior
Click Here to Login
Register FAQ Community Calendar Today's Posts Log in

Exterior Roof, doors, windows, awnings, etc
Reply
 
Thread Tools Search this Thread Display Modes
 
Old 10-21-2017, 02:49 PM   #1
Member
 
Join Date: Mar 2017
Location: Sanderson in Far West Texas
Posts: 57
Default Rubber Roof Billows; troubleshoot and repair

First a great big thank you to all who have helped me with every problem or challenge I have had in the last week or so with the 2002 19L I purchase in Arizona and towed back to West Texas. We left Sanderson this morning before dawn and after an hour on the road my wife noticed the rubber roof material was "inflating" on the front drivers side corner. It has not pulled out or torn loose from the trim piece yet. We in a campground outside Alpine Texas. What the heck do I do...short term to get home and then long term ? We are considering removing the exterior trim on the front of the top and applying some sort of adhesive underneath, pulling it snug and putting the trim back on. All this while we are on a "time out" long weekend. Do we need to replace the entire rubber roof...? Help !!!

As Always Thanks !!!
Mark
__________________

Mark2cars is offline   Reply With Quote
Old 10-21-2017, 04:49 PM   #2
Site Team
 
JackandJanet's Avatar
 
Join Date: Jul 2010
Location: Pine, AZ
Posts: 4,691
Default

If you could buy some tie-down straps (the wide ones with ratcheting length adjusters, you might be able to run a couple of those over the top where it's lifting and anchor them down the sides to something underneath.

I've seen these things in Home Depot, Harbor Freight, etc. Measure the length you need. You might have to splice two together to reach a suitable anchor point, although you'd need only one ratcheting style in the spliced length.

The other possibility would be a length of rope that could go over the top twice at least to hold down some "flattening" thing like a piece of plywood.

You might find such things in Alpine.

I suspect there IS an opening along the front edge that if sealed, will stop the billowing.

- Jack
__________________

__________________
Hi-Lo 1707T - Tire Minder TPMS on Tow Vehicle and Trailer, 300W Solar Battery Charger, Equal-i-zer WDH, Progressive Dynamics Converter, Fan-Tastic Fan, LiFePO4 battery 12V DC Electrical System, SoftStartRV mounted on A/C
2024 F150 Platinum FX4 3.5L PowerBoost SCrew
JackandJanet is offline   Reply With Quote
Old 10-22-2017, 11:39 AM   #3
Member
 
Join Date: Mar 2017
Location: Sanderson in Far West Texas
Posts: 57
Default A Temporary Repair

Jack
Thanks for your input ! My brilliant wife Alex who is very talented came up with this fix to get us home. She found a roll/box of kitchen plastic wrap in the kitchen supplies. We are going to take a continuous piece of that and pull it tight across the roof and over the leading edge. Then use duct tape pulled tightly to hold it in place on the roof and coming down the sides and attaching to the side of the trailer. Will use as many "strips" of tape as we can fit on the plastic wrap. I will let you know how this works.
Next problem will be attaching the original rubber roof with some adhesive. Then hoping there are no more issues with the roof. I would hate to have to locate the material to completely recover the roof.
Mark2cars is offline   Reply With Quote
Old 10-22-2017, 12:33 PM   #4
Site Team
 
JackandJanet's Avatar
 
Join Date: Jul 2010
Location: Pine, AZ
Posts: 4,691
Default

Alex IS brilliant! That sounds a good (and fairly easy) temporary fix!

If you can locate the opening, I suspect something like EternaBond tape would cover it and keep the wind from getting in underneath.

- Jack
JackandJanet is offline   Reply With Quote
Old 10-22-2017, 01:42 PM   #5
Member
 
Join Date: Mar 2017
Location: Sanderson in Far West Texas
Posts: 57
Default New Roof

In the mean time this morning I found complete rubber roof kits with the new roof material,adhesive,sealer, tape for the trim and AC etc. for under $350 !!!! Not bad. Would rather not have to do this however a brand new roof at this price is great.
Mark2cars is offline   Reply With Quote
Old 10-22-2017, 06:45 PM   #6
Site Team
 
Treeclimber's Avatar
 
Join Date: Feb 2015
Location: SWFL Bonita Springs/Andrews, NC
Posts: 1,264
Default

WHERE? cheapest I've found a rubber roof complete is $600!
__________________
Treeclimber
2703 Tow Lite
2002 Escalade
Bonita Springs, Fl. &
Andrews, NC
Treeclimber is offline   Reply With Quote
Old 10-22-2017, 08:01 PM   #7
Member
 
Join Date: Mar 2017
Location: Sanderson in Far West Texas
Posts: 57
Default Roof

A goggle search turned up several places and the only one I stuck my nose in was RV Parts Nation. Check them out.
Mark2cars is offline   Reply With Quote
Old 10-23-2017, 10:56 AM   #8
Site Team
 
Treeclimber's Avatar
 
Join Date: Feb 2015
Location: SWFL Bonita Springs/Andrews, NC
Posts: 1,264
Default

Will do. Amazon has the entire roof system for a 32' trailer, right down to the caulk for about $550. The good stuff.
__________________
Treeclimber
2703 Tow Lite
2002 Escalade
Bonita Springs, Fl. &
Andrews, NC
Treeclimber is offline   Reply With Quote
Old 10-23-2017, 09:53 PM   #9
Member
 
Join Date: Mar 2017
Location: Sanderson in Far West Texas
Posts: 57
Default Finally !

Glad I could be a contributor !!
Mark2cars is offline   Reply With Quote
Old 10-24-2017, 09:37 AM   #10
Member
 
Join Date: Mar 2017
Location: Sanderson in Far West Texas
Posts: 57
Default Home Safe

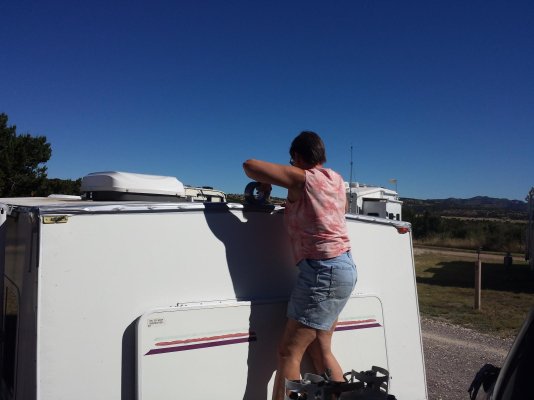
Alex's fix got us home !!! We are definitely going to have to replace the old original roof. On close inspection the very edge of the entire roof is very "sun aged" and cracking. No interior leaks yet. We have never done this however are very familiar with large expanses of vinyl from our upholstery shop. I am a little nervous about the remove and replace of the AC unit. An extra bonus here (lol) is we could not get the refrigerator to run on shore power !!! I will post in the proper forum on this issue !! I attempted to add a picture of Alex "adjusting" her fix.
Attached Images
File Type: jpg 20171023_114230 (1).jpg (141.2 KB, 11 views)
Mark2cars is offline   Reply With Quote
Old 10-24-2017, 10:15 AM   #11
Site Team
 
JackandJanet's Avatar
 
Join Date: Jul 2010
Location: Pine, AZ
Posts: 4,691
Default

I don't think there is anything particularly difficult about removing and replacing the AC, except that it is HEAVY! Hope you have some neighbors willing to help. I think Treeclimber did this recently? Anyway, one of our members did and will have some good advice for you.

Glad you made it home without further damage.

- Jack
JackandJanet is offline   Reply With Quote
Old 10-25-2017, 10:18 AM   #12
Member
 
Join Date: Mar 2017
Location: Sanderson in Far West Texas
Posts: 57
Default

Update...ordered the 20' kit from RV Parts Nation yesterday. Now the wait. We will probably begin the removal of all the roof mounted vents etc. before the kit arrives. We are also going to repair the awning fabric at this time. Will post pics when we begin.
Mark2cars is offline   Reply With Quote
Old 10-25-2017, 11:15 AM   #13
Site Team
 
Treeclimber's Avatar
 
Join Date: Feb 2015
Location: SWFL Bonita Springs/Andrews, NC
Posts: 1,264
Default

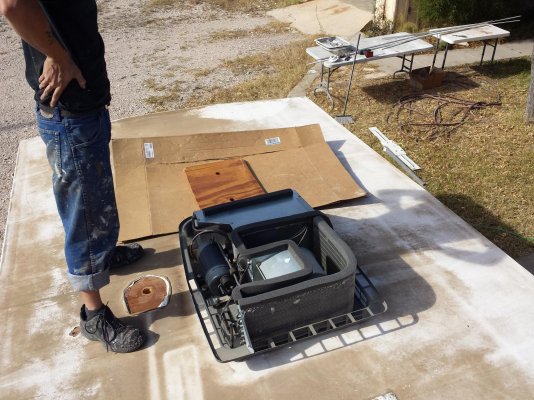
Mark, Jack's right, I just removed and replaced my A/C about 10 days ago. Nothing especially difficult about it. Except, as Jack says, it's HEAVY! Only 85# but at the angle of lift and the sealing effect of the seal, it is heavy. Can't slide it, but when placed on thick cardboard, you can move it to the edge and with help, lower it to the ground. Reverse putting it back up. When down, it's the prefect time to thoroughly clean out the inside, paint the outside, lube what you can, ETC. A new seal IS required. 14" X 14". Follow instructions when compressing the seal. Mine said to compress to 1/2". Did that, no leaks. Once nearly in place, I used the inside mounting bolts (about 8" long), screwed them in place about 1" or so and used those JUST to center the unit from the inside with the top raised. Just me, but when I remove anything from the roof, I fill the holes with caulk and put the new vent in. May or may not hit the original holes.
Tree
__________________
Treeclimber
2703 Tow Lite
2002 Escalade
Bonita Springs, Fl. &
Andrews, NC
Treeclimber is offline   Reply With Quote
Old 11-02-2017, 10:34 PM   #14
Member
 
Join Date: Mar 2017
Location: Sanderson in Far West Texas
Posts: 57
Default

OK the rubber roof kit is scheduled to be here in a week. My question is this....what is the material under the rubber roof material ? Metal...plywood...etc? Input needed..thanks !!
Mark2cars is offline   Reply With Quote
Old 11-02-2017, 11:39 PM   #15
Senior Member
 
Join Date: Nov 2015
Location: AZ
Posts: 122
Default

I'm curious as well. When I examine the roof it appears that only a small thin sheet of rubber is sandwiched in there. That's all this required to qualify as a "rubber roof"? odd.
thatguy is offline   Reply With Quote
Old 11-03-2017, 04:39 PM   #16
Site Team
 
Treeclimber's Avatar
 
Join Date: Feb 2015
Location: SWFL Bonita Springs/Andrews, NC
Posts: 1,264
Default

r67northern has done this. search "rubber roof" and check out his well documented post dealing with this. Also, youtube has a couple very good videos showing how to do this. Thin plywood is under the rubber.
Tree
__________________
Treeclimber
2703 Tow Lite
2002 Escalade
Bonita Springs, Fl. &
Andrews, NC
Treeclimber is offline   Reply With Quote
Old 11-04-2017, 06:34 PM   #17
Member
 
Join Date: Mar 2017
Location: Sanderson in Far West Texas
Posts: 57
Default

Have seen several videos and read a few posts on this. It looks fairly straight forward. We already have a lot of experience working with vinyl from our upholstery shop. I am sure it will be one of those jobs that we will go slowly with. I will take pictures !!!
Mark2cars is offline   Reply With Quote
Old 11-23-2017, 08:46 AM   #18
Member
 
Join Date: Mar 2017
Location: Sanderson in Far West Texas
Posts: 57
Default Our Roof Replacement

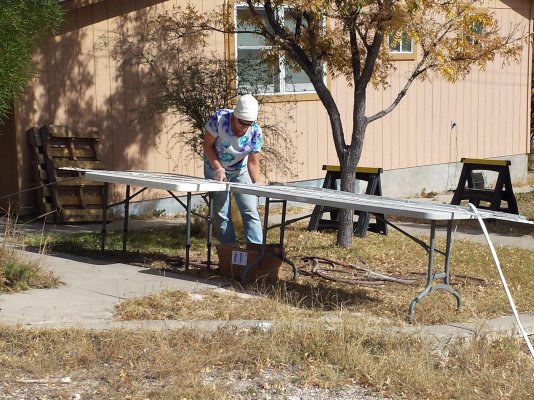
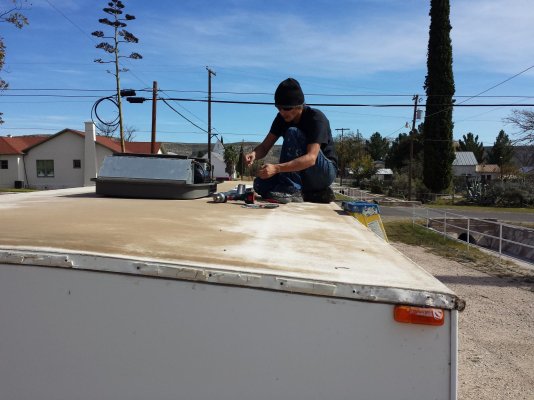
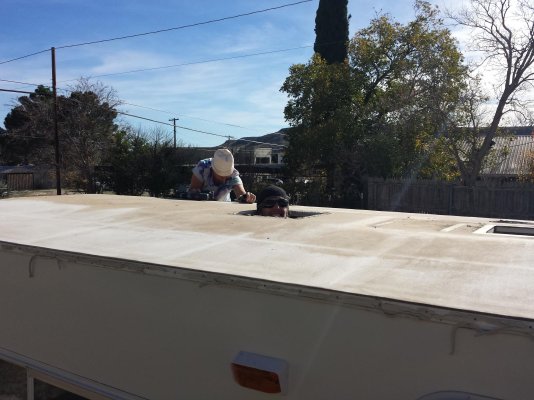
OK...roof kit arrived from RV Parts Nation. Quality material ! It took over three weeks to get it here however it was worth the wait. Includes everything you need...new roofing material/adhesive/caulk/butyl tape. Complete kit for a 20' trailer was under $330 shipped. I will post pictures here as we move along. Yesterday was spent Removing the awning, AC, vent covers and stinky pipe cover. The old TV antenna will be ditched ! While off Alex will replace the last 18" to 24" of the awning material that always dry rots. Separate pictures on that later. The trim pieces were removed and cleaned up w/o any problems. The AC unit was also not a large deal. Our friend Sam dropped by to help and was much appreciated. We are in luck as the next few days here in West Texas are warm w/o any rain, however Saturday will bring high winds ....22mph and up ! So it looks like Friday is the day !
Attached Images
File Type: jpg 20171122_125627.jpg (402.6 KB, 12 views)
File Type: jpg 20171122_132255.jpg (216.5 KB, 14 views)
File Type: jpg 20171122_141542.jpg (354.8 KB, 11 views)
File Type: jpg 20171122_144607.jpg (245.5 KB, 13 views)
__________________

Mark2cars is offline   Reply With Quote
Reply


Posting Rules
You may not post new threads
You may not post replies
You may not post attachments
You may not edit your posts

BB code is On
Smilies are On
[IMG] code is On
HTML code is Off
Trackbacks are Off
Pingbacks are Off
Refbacks are Off


» Featured Campgrounds

Reviews provided by

Powered by vBadvanced CMPS v3.2.3
Disclaimer:

This website is not affiliated with or endorsed by Hi-Lo Trailers Worldwide or any of its affiliates. This is an independent, unofficial site.


All times are GMT -5. The time now is 08:35 AM.


Powered by vBulletin® Version 3.8.8 Beta 4
Copyright ©2000 - 2024, vBulletin Solutions, Inc.
HiLoTrailerForum.com Copyright 2010
×