Atwood Furnace - Removal, Clean and Replace Ductwork

NTL1991

Advanced Member
Joined
Mar 14, 2024
Messages
39
Location
Rhode Island, USA
Day three of cleanup on my new 2001 22TL TowLite.

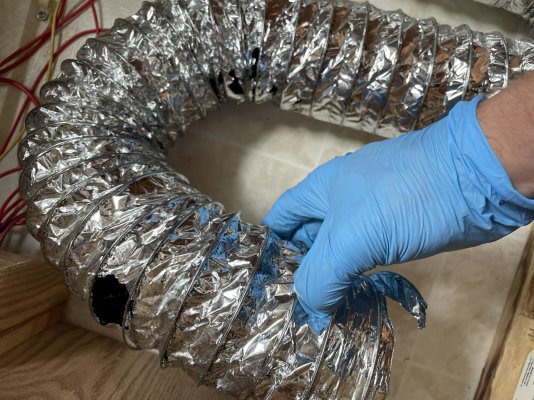
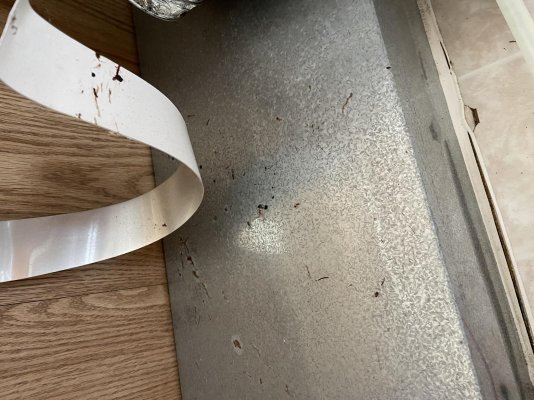
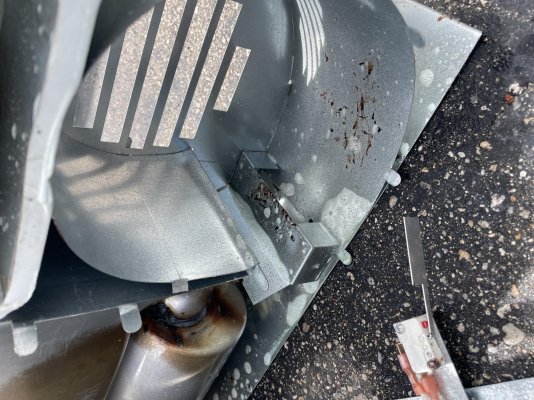
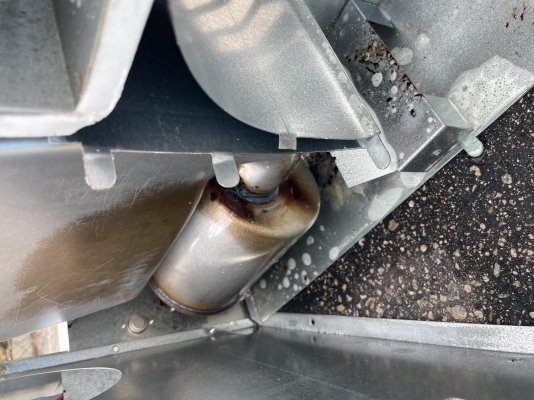
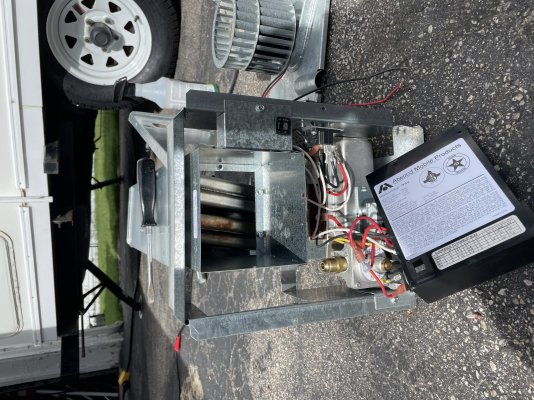
Today is furnace day. Cleaned up both dinette cubbies of mice droppings and found the ductwork to the front register was chewed through in two spots. Which means both went right in the trash and both outlets got a thorough cleaning. I removed the furnace itself (removed one screw at the front into the floor & loosened propane flare nut; the unit slides forward from the exhaust fitting, thermostat and power wiring is disconnected).

Opened up the unit and cleaned up the droppings. Luckily the squirrel cage didn’t have nesting material in it. I’ve been thankful I haven’t seen a single dead mouse in this whole unit. Just lots and lots of droppings, ugh!

Replaced both ductwork with fresh clean 4” foil duct and secured with clamps on the outlet end and screws on the furnace collar end.

I also replaced the terrible clunky Atwood/Robert Shaw thermostat with a Hunter digital unit with backlight that I had laying around. Much more accurate.

I tested for leaks, let the unit fire, and allowed it to run for an hour to burn any residual junk off the heat exchanger. Works great!

Also, when the interior reached 65, I was able to test the roof air and the compressor kicked on and blew cold air. Nice!

Tomorrow is plumbing day! I need to fill the fresh water, test the fixtures for leaks, sanitize the tank and check the holding tanks for leaks. Should be fun!

-Nick
 

Attachments

  • IMG_1005.jpg
    IMG_1005.jpg
    302 KB · Views: 10
  • IMG_1006.jpg
    IMG_1006.jpg
    280.1 KB · Views: 8
  • IMG_1009.jpg
    IMG_1009.jpg
    246.4 KB · Views: 13
  • IMG_1010.jpg
    IMG_1010.jpg
    336.5 KB · Views: 8
  • IMG_1011.jpg
    IMG_1011.jpg
    271.7 KB · Views: 7
  • IMG_1012.jpg
    IMG_1012.jpg
    359.6 KB · Views: 13
New to you HiLo.

Just wanted to say you are doing the right thing. It is good to go through all the systems. Many of us have changed out the thermostat. The old one felt like you were going the break it when engaging the slide lever. A digital one from Walmart was our replacement. Perhaps you can crawl underneath and plug up any mouse holes. A special foam product is made that animals hate to taste. When you get all done then you can pull all the windows and relign with butyl tape and Lexell caulk on the outside. You Tube has a video on how to do this. I wish someone had told us to do this. Would have save us a rebuild.
 
Thanks Sam! I did pick up a can of Great Stuff Pestblock foam and a couple packs of steel wool when I got the new foil duct. Judging by the amount of mouse droppings I’m pretty sure they found their way in from under the bathroom sink cabinet, and made their way into the kitchen cabinets and into the refrigerator access area. All of those areas have been vacuumed and scrubbed. Interestingly enough, the only area on the floor they weren’t in was under the couch at the front… inside the cabinet was a pouch of Fresh Cab Rodent Repellant, so I guess it worked!

I will definitely be resealing the windows and I already have a few tubes of Dicor self-lapping for the roof. I want to replace both vents and the skylight and get a new AC seal on at the same time, and lap everything with Dicor.

-Nick
 
Atwood Furnace

NTL1991,

The furnace in my 1989 Classic starts up but won't Light Up; it has never worked since we've owned it (used). After doing a little research on the web I believe it may have a bad sail switch. I'm not exactly sure where the switch is located, I'd imagine it's somewhere inside near the motor/fan cage, but for the life of me I can't seem to figure out how to get to it. Do I need to take the furnace out? If so any idea which screws I have to remove to get this furnace out? Do you have any more photos of the furnace removal procedure?

Thanks.
 
My 7900 series unit was only secured with one screw through the floor at the front of the unit behind the decorative cover.

You’ll need to turn off the gas and disconnect the propane line at the furnace. The unit will slide forward out of the exhaust pipe mounted on the sidewall exterior. Flip the unit on its left side, and remove the screw on the top and bottom edge of the fan housing plate.

There are a handful of small hex screws that need to come off the blower motor cover. The cover will slide out of the black combustion air hose. Set it aside. I can’t remember if there are a couple more screws or not, but if so, remove them and the blower will pull straight up out of the furnace and that will get you access to the switch. Be careful not to press down on the small combustion air fan as it’s only pressed on the shaft. If you adjust its position it may rub on the screw heads under the fan blades and will either make noise or keep the whole motor from turning.

You will see two wires together, mine were white, going through a hole at the right bottom of the furnace housing. Near this wiring hole is a small hex screw that holds the sail switch bracket. Remove the screw and carefully pull the sail switch out of its slot, taking caring not to bend the thin metal sail attached.

If you have a multimeter, you can test the switch for continuity when you press the sail.

You can rule out a bad circuit board by temporarily jumping both of the switch wires together, bypassing the switch. Make sure the small black circuit breaker switch on the face of the unit is closed and make a call for heat at the thermostat. The blower motor should start and after a moment or two, you should hear the ignition attempt then time out. If you do, you have a bad sail switch and it will need to be replaced.

Hope this helps!

-Nick
 
Last edited:

Try RV LIFE Pro Free for 7 Days

  • New Ad-Free experience on this RV LIFE Community.
  • Plan the best RV Safe travel with RV LIFE Trip Wizard.
  • Navigate with our RV Safe GPS mobile app.
  • and much more...
Try RV LIFE Pro Today
Back
Top