Bath Fan Mod

NDgent

Senior Member
Joined
Jul 7, 2010
Messages
157
Location
Salida, CA
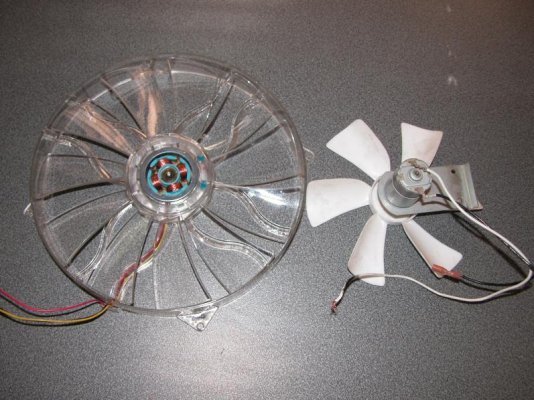
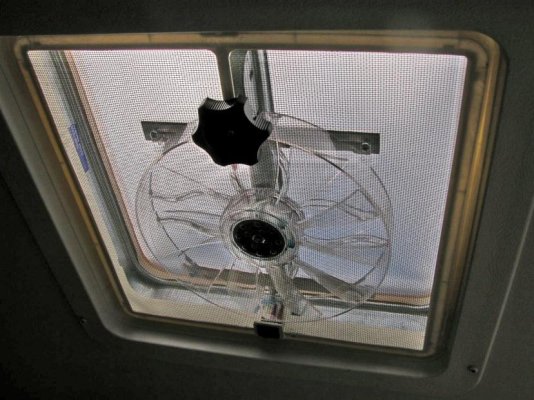
I replaced the bath vent fan with a 250 mm high capacity (105 CFM) 12 volt computer case fan I purchased from CoolerGuys. It was a little pricey at $21.95 plus shipping, but still cheaper than a Max or Fantastic fan.

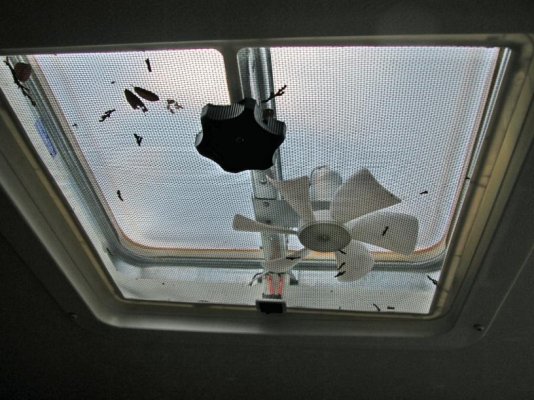
Photo 1 is of course the original fan

Photo 2 is a comparison with it's replacement (I really liked the fact that it is transparent and will not block the sunlight during the day)

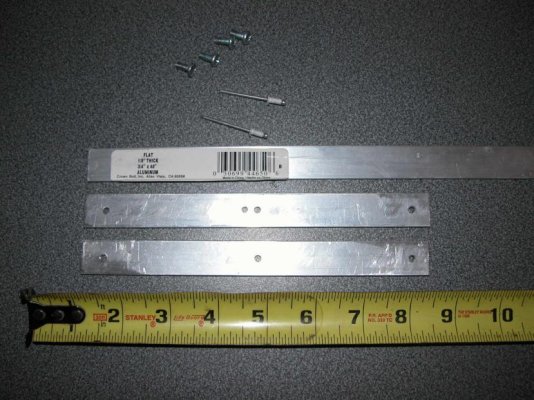
Photo 3 are the brackets I fabricated from aluminum stock I bought at Home Depot and pop riveted to the center bar

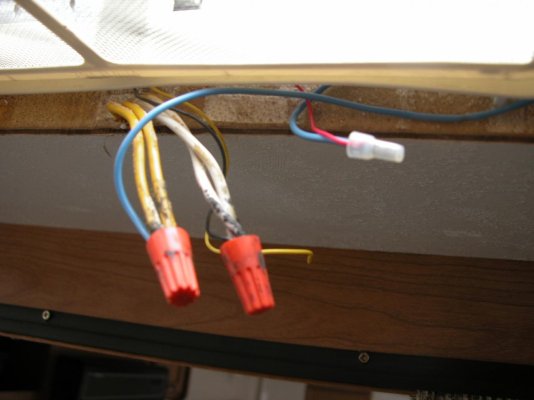
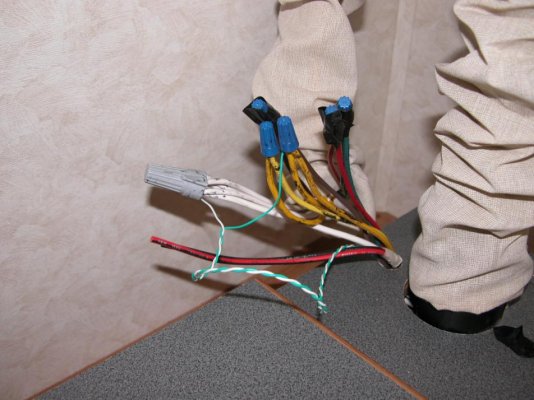
Photo 4 shows the connections to the existing wiring (thank you Hi-Lo), with the black fan lead being the ground and connects to the white line, the red lead is the 12v and goes to the switch via the blue wires and back to the yellow line, and the yellow fan conductor is a sync signal from the fan and not used in this situation.

Photo 5 is the final result ... the fan is absolutely silent and it has 5 blue LED's that provide a nice night light when the fan is on.

That's it ... pretty simple with the existing wiring from Hi-Lo in place. :D
 

Attachments

  • DSCN0832_edited-1.jpg
    DSCN0832_edited-1.jpg
    96.8 KB · Views: 111
  • DSCN0837.jpg
    DSCN0837.jpg
    97.2 KB · Views: 113
  • DSCN0848.jpg
    DSCN0848.jpg
    97 KB · Views: 112
  • DSCN0923.jpg
    DSCN0923.jpg
    81 KB · Views: 111
  • DSCN0926_edited-1.jpg
    DSCN0926_edited-1.jpg
    97 KB · Views: 130
Last edited:
I replaced the bath vent fan with a 250 mm high capacity (105 CFM) 12 volt computer case fan I purchased from CoolerGuys. It was a little pricey at $21.95 plus shipping, but still cheaper than a Max or Fantastic fan.

Photo 1 is of course the original fan

Photo 2 is a comparison with it's replacement (I really liked the fact that it is transparent and will not block the sunlight during the day)

Photo 3 are the brackets I fabricated from aluminum stock I bought at Home Depot and pop riveted to the center bar

Photo 4 shows the connections to the existing wiring (thank you Hi-Lo), with the black fan lead being the ground and connects to the white line, the red lead is the 12v and goes to the switch via the blue wires and back to the yellow line, and the yellow fan conductor is a sync signal from the fan and not used in this situation.

Photo 5 is the final result ... the fan is absolutely silent and it has 5 blue LED's that provide a nice night light when the fan is on.

That's it ... pretty simple with the existing wiring from Hi-Lo in place. :D

Nice set-up, I like it cause of the fan being transparent. Great choice
 
John,

Nice work. The whole thing looks like a great replacement/upgrade to the factory installed fan.

Was this part of the repair needed after the Yosemite ice-fall damage to the vent?

Just curious, would the fan wiring possibly allow the five LED bulbs to be setup to be turned on separately... would make a great night light!

Jim
 
Last edited:
Jim

The fan upgrade was planned prior to the falling Yosemite ice, but provided the motivation to install it now. The LED's and fan are supplied by the same single 12v lead so it would take some serious surgery on the fan's circuit board to implement a night light ... believe me, I thought about it for a minute. :confused:

Regards
 
Lil Stanker Fan

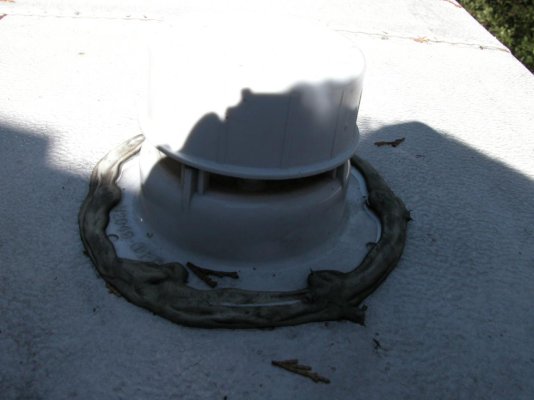
While I was on the roof I discovered the end cap caulking was no longer adhering to the roof at the left and right sides ... the center section was still fine. I haven't noticed any water intrusion on the inside of the Hi-Lo (doesn't mean that there is not any, though), but it was clear from the dirt under the old caulking that it could be happening.

So it was time to do some maintenance and while I was up there to implement another upgrade I found on the ModMyRV WEB site I mentioned in an earlier post. The instructions on ModMyRv are better than I can articulate so check it out.

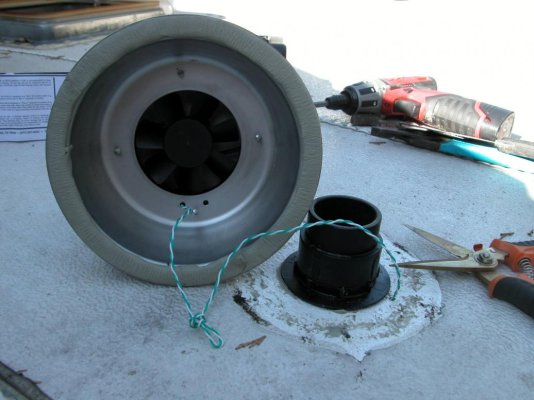
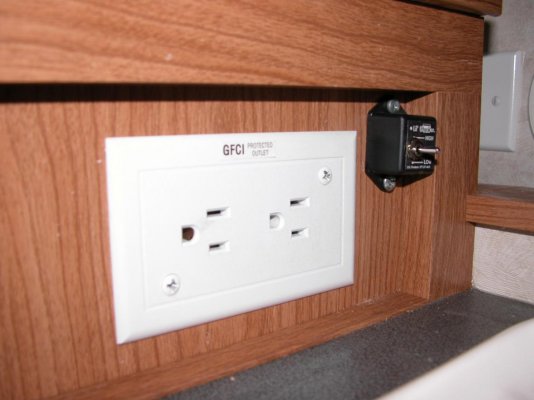
As you can see from the photos I drilled a hole adjacent to the vent pipe on the roof and ran the power line along the vent pipe and under the cloth sleeve, into the closet, over to the wall adjacent to the GFCI outlet where I located the switch, and then back to the upper unit power bundle which hangs along side the waste vent.

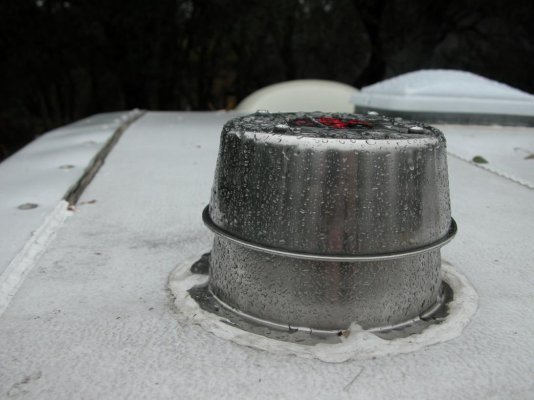
Conveniently this is where Hi-Lo ties the wires together (thank you Hi-Lo) so it was real easy to tap into the same circuit as the bath fan. You can see in the third photo where I have re-caulked the end cap seam, the Lil Stanker properly installed with caulking and the re-cylced replacement bath room vent sky light. (Once again my wife understands why I salvage all that old crap under the back deck!) The Lil Stanker has two speeds and is almost as silent as the new vent fan when run at the low setting :cool:

Why go through all the trouble of installing the Lil Stanker which creates a negative pressure in the holding tanks which creates an in-draft when flushing; and increase the volume of the bath vent? It's simple, I love making CHILI when we camp ... enough said! :eek:
 

Attachments

  • DSCN0849.jpg
    DSCN0849.jpg
    84.6 KB · Views: 66
  • DSCN0855.jpg
    DSCN0855.jpg
    90.7 KB · Views: 63
  • DSCN0932.jpg
    DSCN0932.jpg
    88.6 KB · Views: 63
  • DSCN0929.jpg
    DSCN0929.jpg
    94.6 KB · Views: 65
  • DSCN0933.jpg
    DSCN0933.jpg
    83.6 KB · Views: 70
Last edited:
Hi John,

We were checking out of the Ventura Ranch KOA, at Santa Paula, CA, this past July, when a Hi-Lo was arriving to check in. The rig looked real nice...was that by chance you?

Jim
 
Last edited:
Jim

Sorry ... it was not us we haven't tried that one yet, we just purchased the 2207T from a private party in Reno this last July. So far we have only take four trips, including USFS Pi-Pi and Silver Lake, and Yosemite ... in December we are going to a full-hookup campground in Monterey.

Do you have any favorites in the Pacific Northwest? I have relatives in Seattle, Leavenworth and Spokane. ;)
 
Hi John,

I'm most familiar with Idaho camping... some of the best of which is in the Idaho panhandle, not far from Spokane. What type of camping do you prefer... full hook-ups, dry, kid friendly, scenic, near lakes or rivers or hiking?

Let me know and I can make some suggestions, and I'll probably reply in the camping area. Afraid I've diverted this thread well away from the original topic.

Jim
 
NDgent Thanks for the fan Idea. The stock one sounds like a helicopter taking off. I will definately do this. Thanks for the ModmyRV link too.:D
 
My version of this mod...3 speed ball bearing fan. I even hooked up a dpdt switch to reverse the fan...but little did I know these computer fans don't reverse! After final installation, I would not bother with a 3 speed, it is so quiet that one max speed is just fine. Also, for about $25 I replaced the screen, trim, and weather seal. All 3 were cracked and yellowed.

 
Why go through all the trouble of installing the Lil Stanker which creates a negative pressure in the holding tanks which creates an in-draft when flushing; and increase the volume of the bath vent? It's simple, I love making CHILI when we camp ... enough said! :eek:

Not to mention the fact that good venting is good for the holding tank. It promotes anaerobic bacteria growth (the good kind of bacteria) to keep the tank fresher. Good idea. Thanks for posting. Let us know how it works.
 

Try RV LIFE Pro Free for 7 Days

  • New Ad-Free experience on this RV LIFE Community.
  • Plan the best RV Safe travel with RV LIFE Trip Wizard.
  • Navigate with our RV Safe GPS mobile app.
  • and much more...
Try RV LIFE Pro Today
Back
Top