Astroham
Member
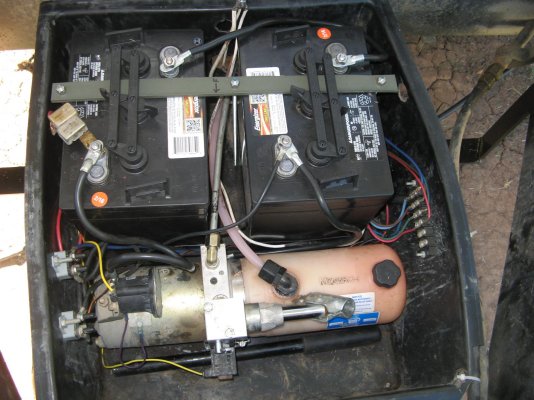
As the relatively recent new owners of a 2007 24T Towlight, we couldn't help but notice that the single battery would not come close to what we need when boondocking. So I lowered my battery box this week so that It will now comfortably hold two 6-volt golf cart batteries.
I had never welded 1/4" thick metal before (that's what the battery box straps are made of), but I found my mig welder was easily able to do so. To do the work, I first raised the top section, measured the distance between the top section and the side supports, cut 2x4s to fit this distance and shimmed them in place. Then I opened the manual lowering valve to release the pressure in the hydraulic line so that I could remove the pump. I covered the end of the hydraulic lines with aluminum foil squeezed on tightly and held there with rubber bands. It worked well and there were no leaks. I disconnected the propane connections and treated them the same way. I took pictures of this, but they have since disappeared!
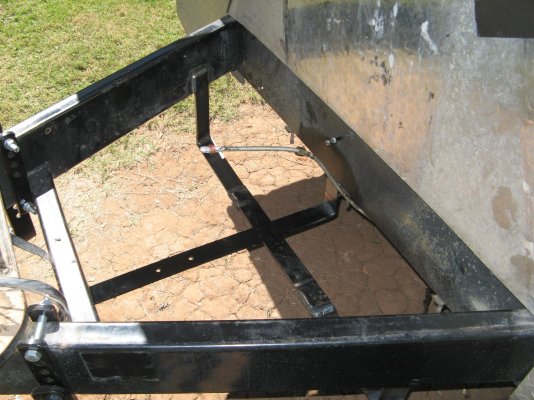
Next I removed the battery and took pictures of the wiring mess. Then I created a drawing of where each wire was connected. I made two drawings, one before I started and one as I removed the wires. In the process I even discovered an unconnected red wire going into the wire bundle on the left side of the trailer(?). I'll trace that out later. I was somewhat surprised to see that there was only one strap supporting the battery box when I got it out. After searching the forum a bit, I decided to add side supports connected to the frame just like someone else on the forum had done. I measured the angle to the new side strap additions (65 degrees) and the required length and cut the metal for these new side supports.
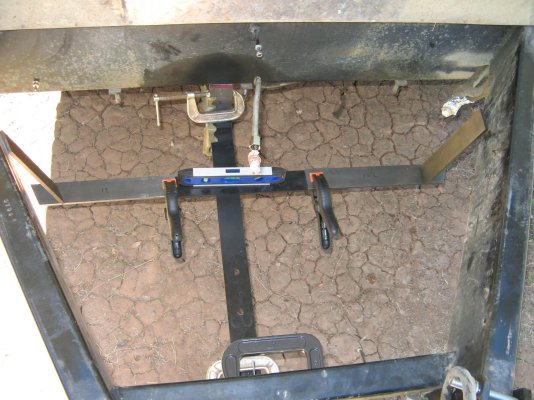
Next, I hack-sawed the present strap so that I could weld 3 inches of extension to the original strap overlapping each weld with a 1" lap joint (5 " total length). The front part of the strap was cut halfway down while the back part was cut flush with the bottom of the strap to leave room to weld it. After cutting all the metal the "before welding" picture shows what it looked like when clamped into position.
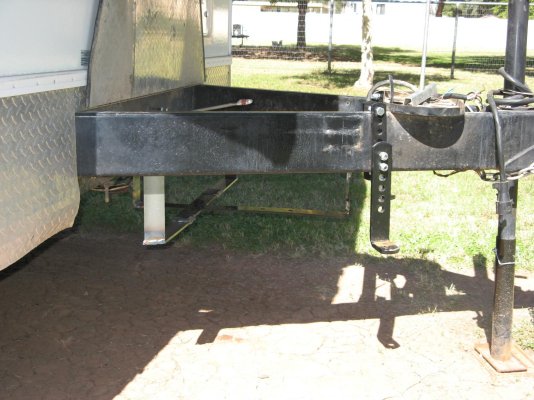
On the vertical additions I measured 1/2" from each end and drilled a 0.093 hole. Then on the front and rear part of the straps I did the same. Now I could put common finishing nails through the holes guaranteeing that the vertical position was correct and that no clamp slippage would affect it. After a bit of welding, the result is shown in the after welding pictures.
After it cooled, I primed and painted it, reinstalled the box and pump, and reconnected the wires. I used the manual pump arm to raise the top a bit to check that the fittings were connected correctly fitted (they were), made a battery hold down and checked out the electrical and hydraulic systems. I didn't replace any of the circuit breakers, but I think that I will in the near future. They have considerable weathering from the last 9 years.
All appears well and with the extra storage capacity I can now get on with the addition of a couple of solar panels.
Astroham
WB4IPB

