Access to Tank Drain Valves

camperD

Senior Member
Joined
Jul 16, 2011
Messages
102
Location
Marietta, OH
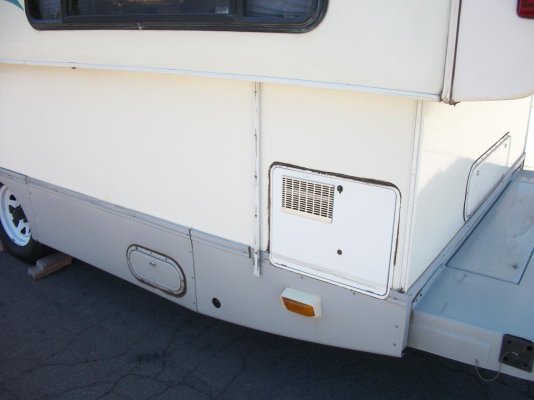
One of the things I don't like about my 2307C is that the bottom skirt interferes with my access to the tank drain valves. I find that I have to get down on my hands and knees to attach the sewer hose. Has anyone come up with a solution to this? I am thinking of making an access panel in that part of the skirt. But I'd like the advice of this forum first.
camperD
 
My camper has no access panel either, same as camperD's. I would be interested in seeing options as I also don't like having to get on my hands and knees to hook up my sewer drain line.

Jeff
 
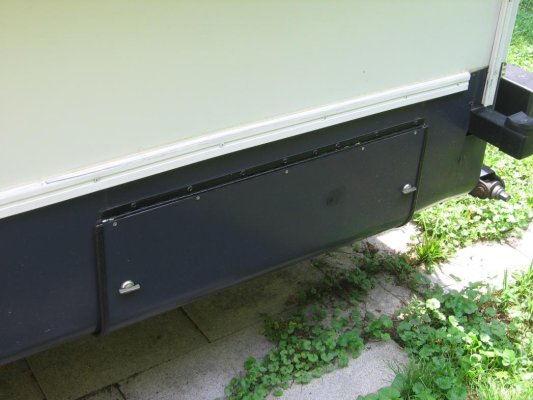
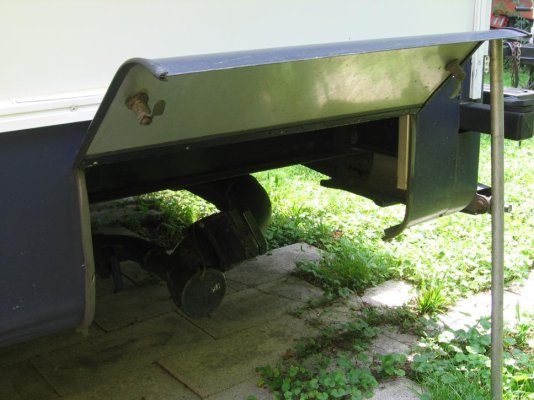
Here is a couple pics of the dump access door in the skirting of the 2209 T the 95 has no skirting. I am almost 75 years old and would not have bought the trailer if it had no access door to the dump valves, down on my knees it not something that I do well. Hope the pics are viewable, sun is on the wrong side, First one is door closed, second is with it open.
 

Attachments

  • Trailer Acess door 001.jpg
    Trailer Acess door 001.jpg
    91.2 KB · Views: 76
  • Trailer Acess door 002.jpg
    Trailer Acess door 002.jpg
    92.6 KB · Views: 76
They must have listened to customer complaints starting in 2009. Our 2310H has a door and it sure is an improvement over our 1705T sewer line access.
 
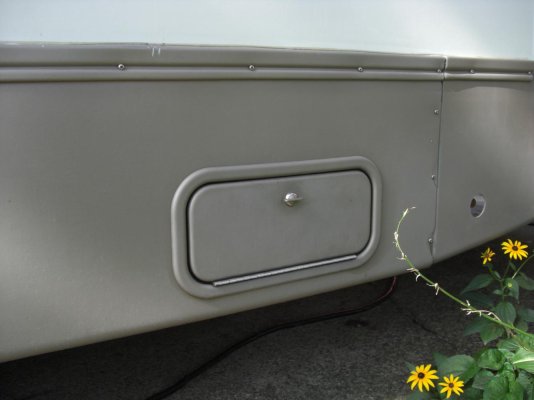
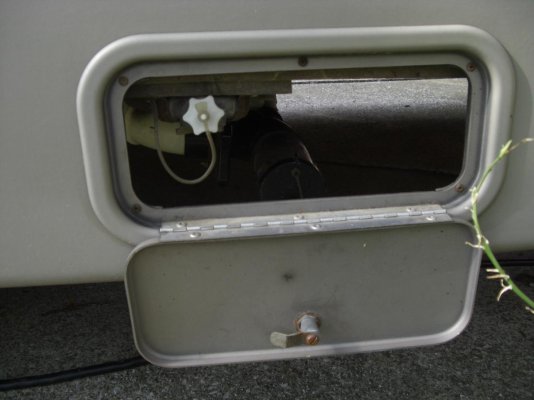
My 2001 came with a dump valve access door. It is a different style than PopRichie's.

Bob
 

Attachments

  • 2134.jpg
    2134.jpg
    83.7 KB · Views: 40
  • 2135.jpg
    2135.jpg
    85.8 KB · Views: 56
My 2001 came with a dump valve access door. It is a different style than PopRichie's.

Bob

I don't like that one. The "slinky stinky" has to be hooked up from under the skirt, even if there is a door. At least it looks like the sewer hose would have to almost go up to get out of that door.

Mine is like Pop Richie's. The door is the skirt and it lifts up allowing for easy access to the drain lines.
 
Atlee,

Yes, the sewer hose hooks up under the skirting, not thru the door. It gives me plenty of access and I can see what I am doing. Never had any problems with it all these years.

Bob
 
Mine are the same as Retiredcampers also. Basically I think the door is just there so you can open it for easy access of hookup of the hose and access for the drain valves. Other than that the door is pretty useless, as I could have just as easily put my hands under the skirting to reach the same points.
 

Attachments

  • Water heater 3.jpg
    Water heater 3.jpg
    88 KB · Views: 38
Last edited:
PopRichie, thanks for the pictures. Gives me a good idea of what I should. I see the aluminum channels on the skirt edges, but what kind of material is used to stiffen the edges of the door?
camperD
 
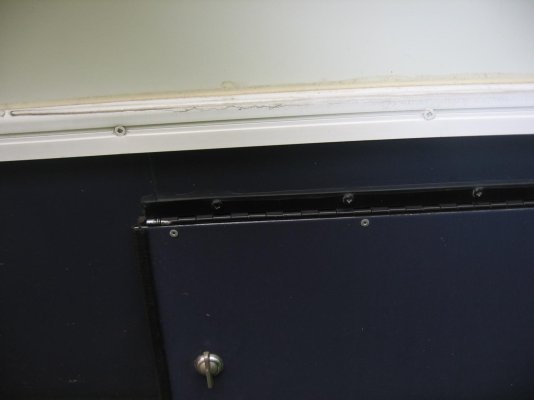
The door is bigger than the opening, the edges are backed up with aluminum square tubing with a plate welded on the top and screwed fast as I remember, tomorrow I will take a couple of pics for you. If you want to do this cut out the door piece, trim the edges enough to put a strip of molding on each, if you fit it close there will only be a small crack, this is just a suggestion, you may have a better idea. Get a piano hinge for the top and pop rivet it fast.
You can see the molding in the pic. there is weather stripping on the trailer and the latch on each end of the door clamps it tight.
 
Last edited:
camperD
The door opening is 25 1/2 wide by about 11 inches high, but the skirting on the Classic is a different height and you can make the door any size you want. Here are a couple more pics of the door. the first one shows the piano hinge at the top, the black push on molding and one of the latches.
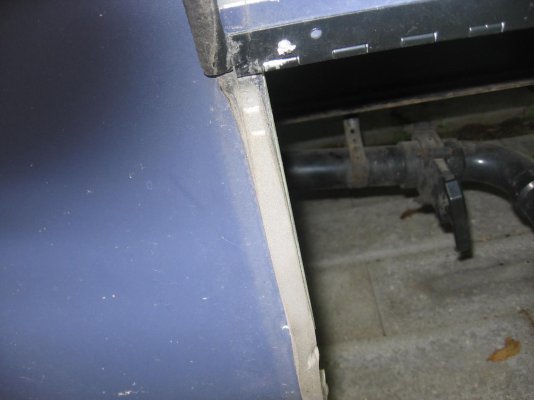
The second pic shows the weather strip on the edge, there are screws under it that fastens the skirt to the square tubing inside the edge.
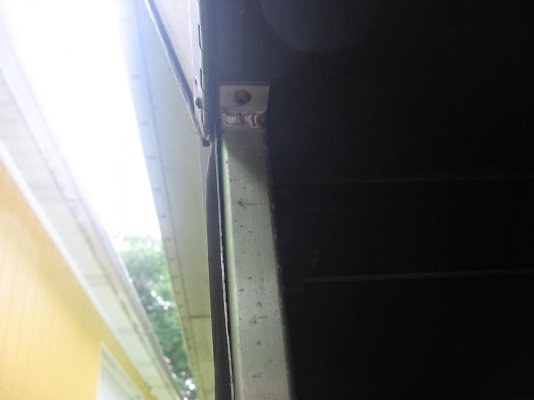
The third pic is of the 1" square tubing bracket inside the skirt edge, it is screwed to the plywood floor. Any other questions just ask, I will help anyway that I can. You can make the square tube brackets without welding, use steel tubing and cut down all 4 corners on one end about 1 1/2 inches bend 2 of the sides opposite each other 90 degrees and cut the other 2 off, drill holes and you now have a bracket.
 

Attachments

  • Trailer Acess door 003.jpg
    Trailer Acess door 003.jpg
    89.2 KB · Views: 44
  • Trailer Acess door 004.jpg
    Trailer Acess door 004.jpg
    88.1 KB · Views: 44
  • Trailer Acess door 006.jpg
    Trailer Acess door 006.jpg
    80.4 KB · Views: 45
Last edited:
Thanks for the additional pictures and information. This really looks like a mod that I can do. All the stuff I'll need seems like it is available. I'll send pics of the project when I get done. This one is on my "before the next trailer trip" list, so I'm sure it'll be done in the next few months.
 
I forgot to mention that if you mount the brackets so that half is under the shirt and half is under the door lip, each bracket will then support the skirt and the door. Just a suggestion. Good luck with the project, it should make dumping much easier when done..
 
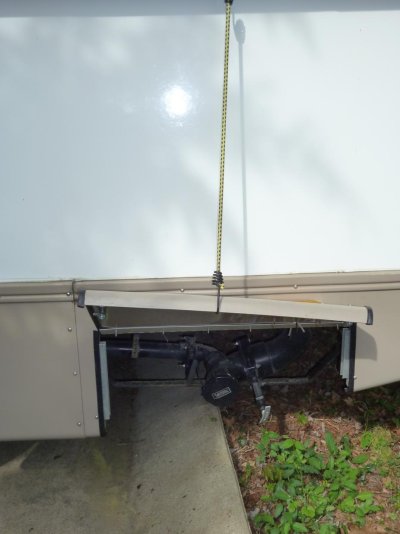
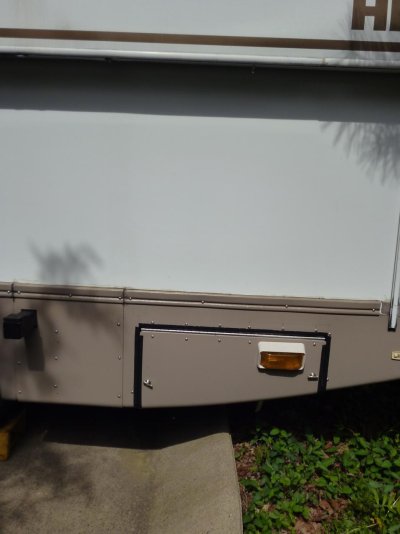
Well, life has a way of turning your best laid plans upside down. I finally did finish the mod and here are the pics. Some comments:
I ended up using aluminum channel because it was available, gave me enough flat surfaces to work with, and was easier for me to figure out how to connect to the existing aluminum framing around the inside of the skirt.
I decided to include the light in the access panel because it was easier than trying to move it. I just extended the wiring to give me enough play when the door was open.
I don't have a pop-riveter, so I used sheet metal screws.
I put in an eye-bolt above the door (in the bottom of the top half of the HiLo) so I could use a bungee cord to hold the access door open when I want to hook up the drain hose.
One point of caution: be sure to check the position of the lip of the door on the lower half of the piano hinge against binding when you open the access door all the way. I ended up trimming more off and eliminating the edge trim on that lip to get clearance (second pass adjustments).
 

Attachments

  • 011.jpg
    011.jpg
    86.1 KB · Views: 28
  • 010.jpg
    010.jpg
    82.6 KB · Views: 27

New posts

Try RV LIFE Pro Free for 7 Days

  • New Ad-Free experience on this RV LIFE Community.
  • Plan the best RV Safe travel with RV LIFE Trip Wizard.
  • Navigate with our RV Safe GPS mobile app.
  • and much more...
Try RV LIFE Pro Today
Back
Top