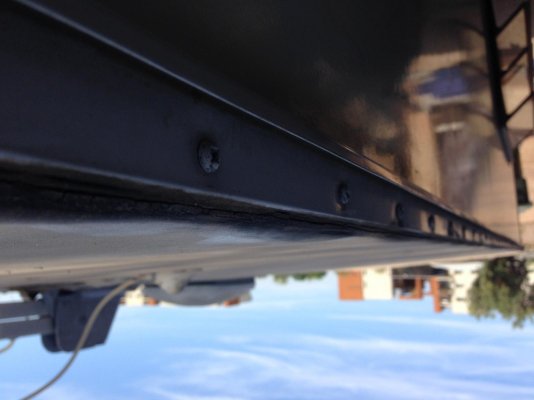
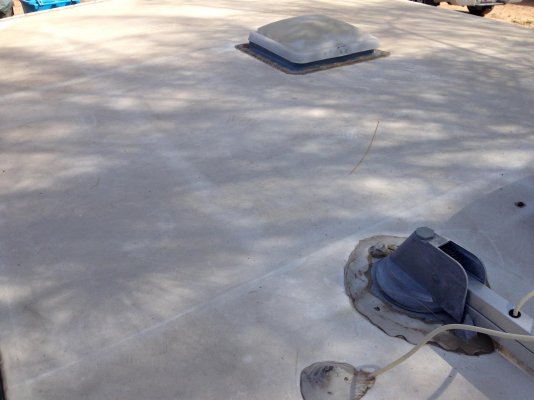
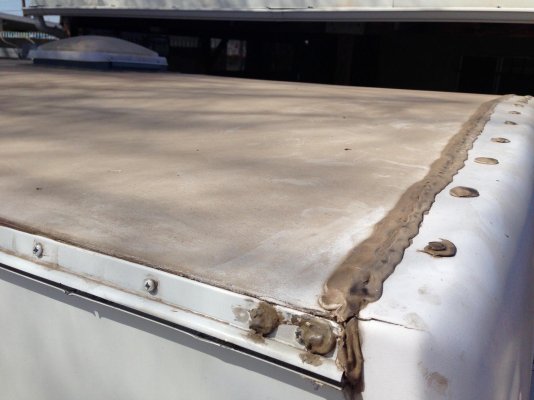
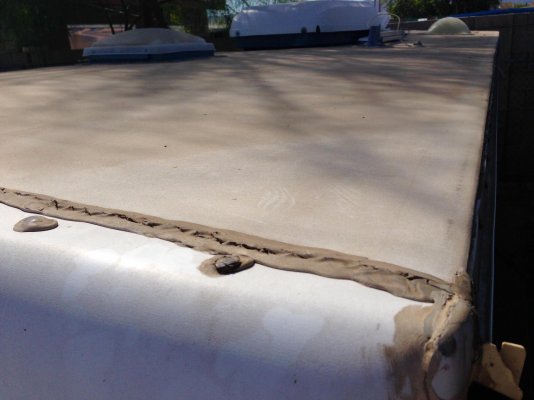
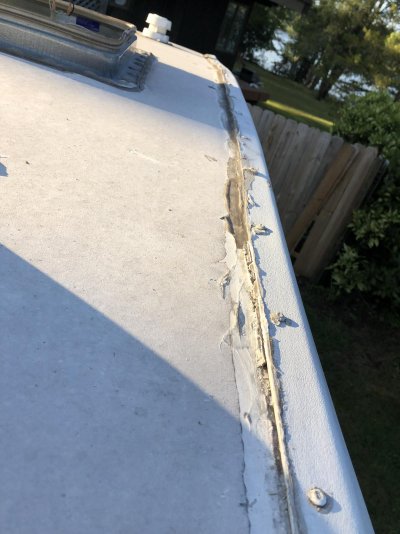
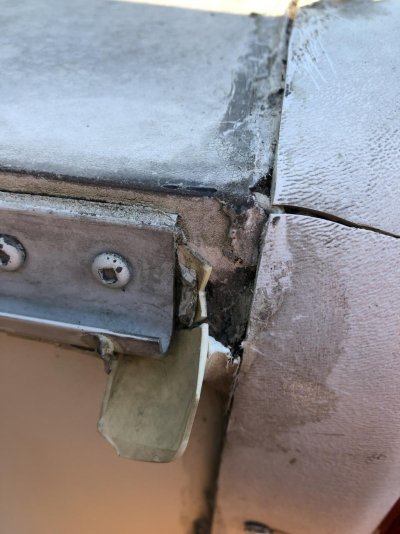
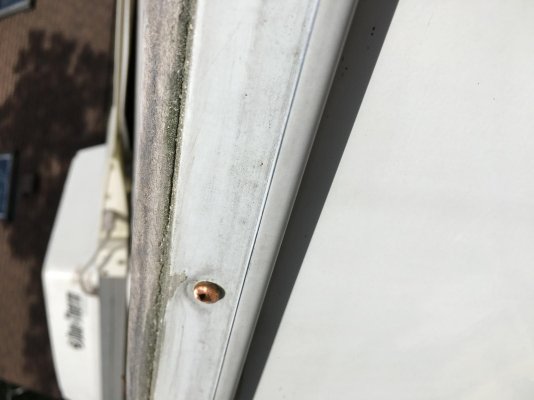
How does my roof look to you?

thatguy-HILO

Senior Member
Joined
Nov 11, 2015
Messages
122
Location
AZ
Hi all!

This is my first camper and I'm a bit concerned regarding this summer and how my rubber roof will hold up.

I do have cleaner and conditioner on order and will clean per directions as soon as it comes in.

I did see an ad for a company that will redo roofs for campers and rv's. I called them and my quote was $3,800! A couple of thousand more and that's how much I paid for the entire camper!

Anyway check out the pics and let me know your thoughts and/or recommendations. Truly appreciated!
 

Attachments

  • roof2.jpg
    roof2.jpg
    105.9 KB · Views: 39
  • roof3.jpg
    roof3.jpg
    156.7 KB · Views: 39
  • roof5.jpg
    roof5.jpg
    162.8 KB · Views: 39
  • roof.jpg
    roof.jpg
    153.7 KB · Views: 41
Guy, the roof itself looks pretty good to me.

DO "stop drill" that crack in the end cap and any others. Then fill the crack(s) with something like Lexel.

I suggest you try to remove and replace the caulk along the edges of the end caps. Again, I'd recommend Lexel.

I don't have a rubber roof, so I can't advise you on a product to coat it, but someone will surely have ideas. It certainly looks "cleanable"

- Jack
 
thatguy, Without a doubt, and before cleaning and sealing that roof, it most certainly needs to be re-caulked in many areas. End caps and antenna for sure. Look it over with care, if your not sure if it needs caulk - re-caulk if, then you'll be sure it doesn't need it.
Tree
 
Well, upon closer inspection I noticed that there is a soft spot about the size of a soft ball on the roof. Is this an indication of previous damage some sort?
 
that guy, just came across roof pictures you posted in 2016. Do you still have that Hi Lo, and did you deal with the roof?
I just bought a 2003 2203T and roof has similar bubbles. No sign of leaks on the inside ceilings, but the rubber roof condition has me concerned.
Thanks, Tom
 
I did clean and recaulk around most of the seams. I still need to do a recoat of some kind soon tho as now it is starting to peel these little white confetti looking particles. When it rains I just throw a tarp over for now. The roof does leak in two spots when it rains hard for hours. I think some places will redo the roof as an insurance claim.
 
Roof advice

Our 1990 25ft. HiLo Classic had a rubber roof. When we noticed the beginnings of a leak we bought a roll of rubber patch from our RV dealer. We kept the RV eighjteen years with the original roof. Our RV dealer sold us the appropriate Kool Seal roof coating. Go to a hardware store and purchase a product like powder Dirtex. This is what you wash the roof with before applying cool seal. It is a cleaner that doesn't leave a film. Lexel caulk can be purchased at ACE Hardware or on line. It is a premium caulk that costs about $10.00 a tube. Take care of your roof and it will take care of you. DH used blue painters tape where the side of the roof meets the RV. This gives you a crisp roof coating job. Remove right away when you are done. Our new to us 96 HiLo has a metal roof. Dh has already recoated it. Purchase a cover for the HiLO Sunbrella fabric.
 
Leaking roof on 2003 hi Lo 2203T update. While inspecting the roof, I found old silicone previously used to seal end caps to roof and sides. I’ve been removing and cleaning the are in prep to reseal with lexel. The folks at lexel say the rubber doesn’t look like EPDM, and it should be fine to use their product on. Just clean with de-natured alcohol first.
The dark sealer at the far edge is old silicone still to be removed, and you will notice the whiter roof abuts the end cap has what might be a secondary sealer (Kool Seal or the like)
Does anyone have a roof that looks similar?
I’m also ordering new drip spouts, is it best to remove the square drive screw and remove old spout, then seal the new one in place and reset the screw?
Thanks
 

Attachments

  • F72FF84C-5E13-4FF9-BA14-63CDDD798772.jpg
    F72FF84C-5E13-4FF9-BA14-63CDDD798772.jpg
    210 KB · Views: 7
  • 23F27AE3-0A95-4683-950D-595EA2154564.jpg
    23F27AE3-0A95-4683-950D-595EA2154564.jpg
    201.2 KB · Views: 7
Tr, That's how I'd replace the gutter. Remove screws (replacing rusty ones with REAL stainless screws). Mine has butyl tape to seal, then screws. Just an idea, but many people put a shot of caulk in the screw hole 1st, helps with adhesion. No toothpicks please. Followed by a thin bead of white Lexel if needed on the top edge. This should be a smooth transition from roof to gutter.
Tree
 
I've ordered those spouts from J&R and will install upon arrival.
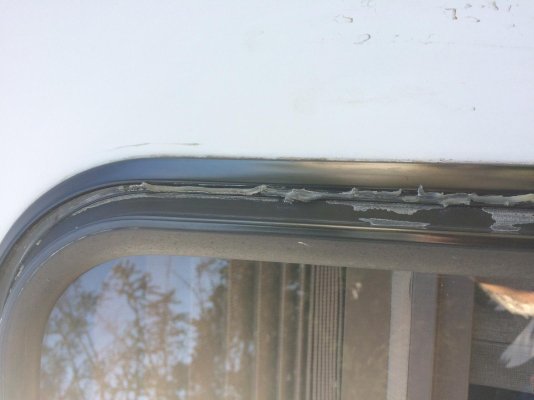
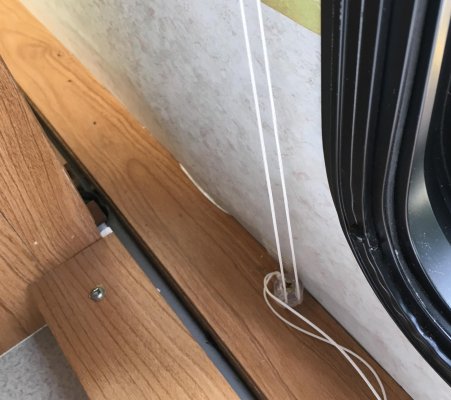
That area needs a good caulking. Not far from that spout location, I've recently noticed water damage on the inside wall to the left of the window, wall paper bulging and 1/4" plywood is swelled. Two causes could be broken seal where roof meets side wall and the window frame seals (attached pictures). Previous owner applied silicone at points on the window, has anyone had leaks in that window housing?
 

Attachments

  • IMG_2321.jpg
    IMG_2321.jpg
    114.9 KB · Views: 9
  • window caulked.jpg
    window caulked.jpg
    122 KB · Views: 7
  • IMG_2320.jpg
    IMG_2320.jpg
    194.2 KB · Views: 8
Window leaks

Previous 1990 25ft. Classic. Didn't realize that when the RV is 5yrs. It is time to take out all windows and reseal with butyl tape and Lexel caulk. While you have the window out you will get a look at the wall layers. We had to do extensive wall rebuilding.
 
That will be a good winter project. Hopefully my caulk along the questionable section at the roof line above the problem area will keep water out for now. Not sure why someone would apply silicone to the window where they did, maybe they saw water coming in the black frame at those points.
I have seen some forum posts with rebuild pictures, time to search those out again!
 

Try RV LIFE Pro Free for 7 Days

  • New Ad-Free experience on this RV LIFE Community.
  • Plan the best RV Safe travel with RV LIFE Trip Wizard.
  • Navigate with our RV Safe GPS mobile app.
  • and much more...
Try RV LIFE Pro Today
Back
Top