Introducing Dolly Roger

nmalozzi

Advanced Member
Joined
Apr 15, 2017
Messages
41
Location
Denver, CO
Hey everyone, thought I'd do a little intro...

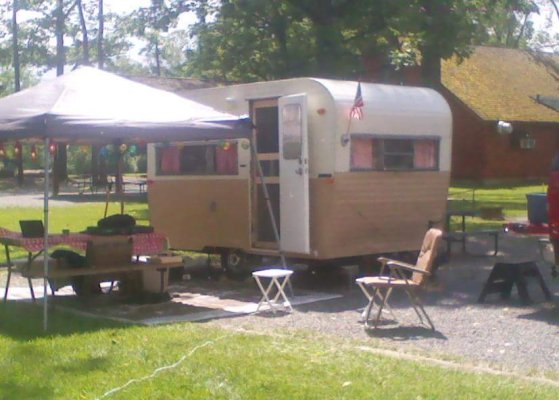
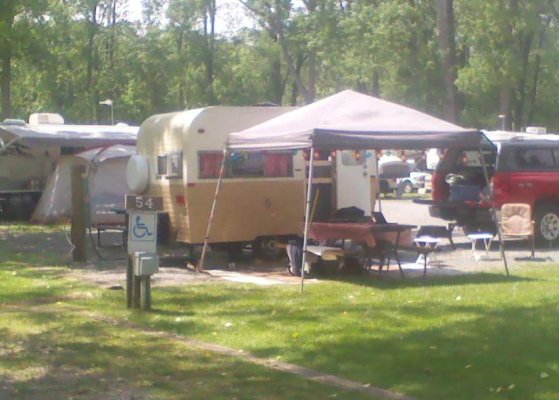
My name is Nick, and my Wife and I bought a 1972 HiLo Traveler (Model 17572) last summer. We bought her off an older couple who was taking delivery on a much larger rig so they could camp with their grand children. We fell in love with the camper almost immediately. Absolutely loved the quirky up and down action of it. We're both in our early 30s and like many our age, we were/are bit with the "Vintage Camper" bug. It's hip. It's trendy. It's whatever. Shastas, Casitas, Canned Hams, Airstreams, they're all cool. We get it, but we've never been one to completely dive into a trend like suckers. We walk to a slightly different beat, and the HiLo seems to as well. Let the hipsters have their overpriced vanity camper. We'll be the ones passing them on the highway, and actually boondocking in comfort and quirky style.

But I digress... I've always been one to name my vehicles. Always have since I was 16. Don't know why, nobody else in my family does. I do though. So we decided to name our HiLo 'Dolly Roger'. For two reasons:

1) 'Dolly' comes from Dolly Parton. Like the legendary singer and amusement park owner, our HiLo camper is "bigger on top".

2) 'Roger' comes from the fact that we consider ourselves landlocked pirates (we live in Colorado), and our camper is our land yacht of sorts. So we pulled that from the "Jolly Roger" or skull and cross bones pirates fly. Yes, we fly a pirate banner at camp, and have other items in the camper adorned with the Jolly Roger.

As stated above, Dolly is a 1972 Traveler. She's mostly original best we can tell, but she's been well taken care of and has had quite a few upgrades. I just opened her up for the season because I wanted to build a better sleeping area. However, I opened her up to find the ceiling full of water, and lots of rust on the metal frame. So at the moment I've gutted the entire ceiling. I have a new rubber roof, vent+fan, and LED lighting on order. I'm going today to buy new square tubing, and plan to cut out and replace anything that is rusted beyond saving. After the roof and ceiling are back in order, next up will be new paint, a new laminate floor, and that bed I mentioned. I'm hoping to have it all done by our first scheduled trip in June. It's going to be tight, but I think I can make it happen.

So greetings everyone, I'll likely be posting progress pics and asking questions. For now I leave you with an album of photos of the Dolly Roger:

HiLo
 
Last edited:
Nick, she's a beauty! If the rust is not "structural", I recommend you clean off the loose rust and then paint the metal with a rust neutralizing primer, such as this: Paint Over Rust with Extend Rust Neutralizer from Loctite Adhesives

I think there are other brands too, but these coatings will stop rust from progressing, if used properly.

Hoping your repairs go smoothly!

- Jack

Indeed. That's the plan for any of the cross members that aren't structurally compromised. I'll be cutting out the really bad one's and replacing them with new ones. I'm no welder, nor do I have the time or money to pay someone to weld them for me. So I've devised a plan to bolt them in that involves braced L brackets. It won't be as good as welding, but that's simply not an option for me, and it'll be stronger than what is there now. I'll share photos once I get them installed. The goal here isn't perfection, the goal is camping.
 
Very cool! Really enjoyed the naming story, I wish I was as creative. Good luck on the repair I'm sure it will turn out great. Can't wait to see more pics. I redid a 1956 Vacationette canned ham and it can sure be a labor of love.
Tom.
 
repairs

You have a good game plan for repairs. DH says sistering metal and using bolts makes a strong repair. Wal-Mart has the best prices on heavy duty liquid nails and Gorilla glue. It is recommended that you take out all your windows and re-seal with butyl tape and Lexel caulk. We are here to encourage you and to answer any questions.
 
These are the only photos I have left of my '56 Vacationette. Did frame work, floor from end to end. Rebuilt two walls and the whole roof structure. Insulation, wiring, plumbing, interior. The wife did the curtains. All was left was exterior paint. It's all possible to keep your head up and don't get discouraged. You have a neet diamond in the rough.
 

Attachments

  • FB_IMG_1492652800331.jpg
    FB_IMG_1492652800331.jpg
    51.5 KB · Views: 8
  • FB_IMG_1492652840798.jpg
    FB_IMG_1492652840798.jpg
    52.2 KB · Views: 6
You have a good game plan for repairs. DH says sistering metal and using bolts makes a strong repair. Wal-Mart has the best prices on heavy duty liquid nails and Gorilla glue. It is recommended that you take out all your windows and re-seal with butyl tape and Lexel caulk. We are here to encourage you and to answer any questions.

OK, this brings me to my First Question:

I've been reading MANY threads on this site and keep seeing mention of "DH", that is DH?

Second Question:


I've ordered or purchased just about everything I need to repair/replace the roof. However, I need all the aluminum trim. I removed three different types when removing the old roof.

- L shaped ones the ran along the sides and back of the roof.
- L shaped ones that ran along the front curved portion of camper.
- Flat one that bridged the seam between the rubber roof and the front siding.

I have no idea what any of that is called, so I've been struggling to google my way to an answer. Any help would be appreciated!
 
Last edited:
I had to figure those initials out myself, but I'll save you the time.
DH--Dear Husband
Thus DW--Dear Wife
Also, DD, DS daughter, son
I also added DSO, Dear Significant Other, my girlfriend.
The many others are self understanding according to the subject.
If you have a metal working shop in your area, they may be able to guide you to an alternate type of trim. May not look the same, but will do the job.
Good luck.
Tree
 
Oh wow, and here I was thinking DH had more mystical meaning than that. I've been a member of countless other message boards and forums over the years. I'm amazed that I haven't come across that until now.
 
Made a ton of progress today. Totally removed the old rotten roof, cut out the rusted cross members, wire wheeled/ground the rest of the rusted metal, bolted in a new metal frame, and glued/screwed new plywood. Next weekend the new rubber roof goes on. Then I turn my attention to the interior.

Album of progress photos: https://instagram.com/p/BTQSgpRh1wV/
 
I think you're going to have a trailer that is structurally more sound than the original design. Excellent work! Thanks for posting the link to the photos.

- Jack
 
I think you're going to have a trailer that is structurally more sound than the original design. Excellent work! Thanks for posting the link to the photos.

- Jack


Thanks! That wasn't the original goal, but as we were working yesterday I kept having the same thought. I also think it's going to be lighter. The newer rubber roofs claim to be 20-30% lighter than the older ones. So there should be significant weight savings there. In addition. I found a lightweight plastic material I'm planning to use for the ceiling. So I suspect some savings there as well. I think I'm more than making up for the added weight of the brackets + nuts + bolts, etc.

I actually felt confident enough it's strength to stand my 185lb frame on the roof last night to zip the last few screws into the plywood. I made sure I was placing my weight over 2 different beams, but that was mainly because 1/4" plywood isn't all to confidence inspiring, haha.
 
Wow! 1/4" ply is much thinner than my roof. I'm pretty sure mine is 3/8" ply - and it's very strong. I think you were wise to walk on the beams.

Still, I bet you're going to end up with a superior constructed trailer when you get done!

- Jack
 
Yea, I was thinking the same thing about the 1/4" ply. It's what we pulled off, and I just sorta followed that lead. I think I may add another layer of 1/4". The stuff is pretty light, and then I can stagger the seams and get the roof a bit stronger.
 
The weather has really been slowing me down, but I got at it this weekend...

I went ahead and put down another layer of 1/4" ply and staggered the seams. Nice helping of liquid nails in between layers, and plenty of screws. You can now walk on the roof safely. There's still a bit of flex with my 185lbs on it, but WAY better than what was on there when we bought it. I'd have never stood on it before. Also got the hole cut for the new Fantastic Fan, and laid/glued the new rubber roof. Storms rolled in soon after gluing down the roof. So back on went the multiple layers of tarps + RV cover. I did get to confirm that the top still goes up and down after all the work. If anything, it seemed to go up easier. That new rubber roof is significantly lighter. I've got all the materials I need to insulate the roof, as well as all the exterior trim pieces. I have the ceiling material as well. So I'm really just waiting on a good weather window to button most of that up.

I added a few more photos to this album: HiLo

As for sanding the plywood edges... I felt uneasy about the edges in general. Not only did they need a lot of sanding, but the top of the exterior siding is pretty mangled/sharp from a previous owner's failed attempts to re-attach it. I made a few attempts to clean the edges up, but was unsuccessful. So I got creative. I actually bought Drywall Corner Bead, and ran that around the sides and rear. It worked WONDERFULLY. Not only did it cover up and reattach the siding properly, but it helped pull the edges of the plywood down onto the frame more evenly. At the two back corners, I spent extra time with a hammer softening the corners made by the bead. I used as few screws as possible when attaching it, and marked them with pencil on the side of the camper. That way when I attach the outer trim I can be sure to avoid hitting them with a screw. I'm guessing the internet will tell me this was all a bad idea, but it really made for a nice clean/soft edge for the rubber roof to wrap around. I think it worked great!
 
Last edited:
Rick, I'm not familiar with drywall corner bead, but from your description, it seems to do exactly what you need it to do. I think that's great and would like to see a picture of it. And, if you wrap the rubber roof over the edge down to the sides, it should seal everything perfectly..

Great progress, sir!

- Jack

Drywall corner bead is just a super thin galvanized metal corner piece. It's pretty pliable and easy to cut:

Gibraltar Building Products 10 ft. Galvanized Metal Corner Bead-10524 - The Home Depot

The rubber roof wraps over the edge and then some. The kit I bought is larger than I needed, but the closest size I could purchase. SO I've left the rubber roof hanging off an all sides. I'm going to install the trim pieces + butyl tape, and then just run a knife along the bottom edge of the trim to cut the roof to size. SO effectively the roof will wrap over all edges by about an inch and be secured under the trim pieces.
 

Try RV LIFE Pro Free for 7 Days

  • New Ad-Free experience on this RV LIFE Community.
  • Plan the best RV Safe travel with RV LIFE Trip Wizard.
  • Navigate with our RV Safe GPS mobile app.
  • and much more...
Try RV LIFE Pro Today
Back
Top