Tank capacities and replacements

techjak2005

Advanced Member
Joined
Jun 11, 2019
Messages
51
Location
CT
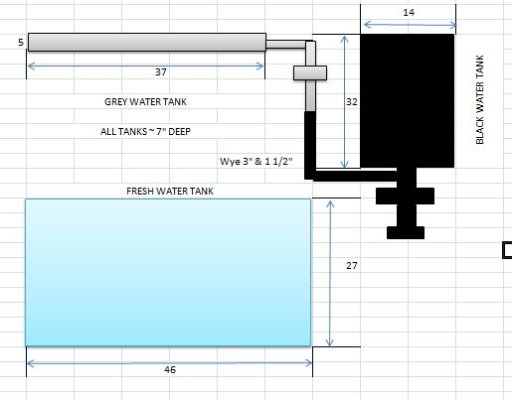
Even though the manual for my 1983 Funlite only shows a single waste tank (which I need to replace) my unit actually has a very odd-sized grey tank as well. It appears to be only about 6 gallons though. Dimensions (roughly) are 37" x 5.5" x 7". The gate valve is still there with an extension for opening it from the rear of the camper. It appears that this size was chosen because of the space between the framing at the rear of the camper and the sink can drain directly into the grey tank.

The black tank appears to be about 14 gallons (but it's trapezoidal, so I'm not sure, it could be 9 gallons) dimensions are 32" x 14" x 7" with level connections and outlet toward the front. The gate valve and outlet end of the tank was blown out during a tire blowout, so all that (and the toilet & Vent piping will also need to be replaced.

Finally, on the FW tank, the drain valve is missing and the system hasn't been used in an unspecified length of time. After consideration (and discussion with "the boss") I've decided to replace this tank as well. It is held in with a couple of straps and sheet metal ... it also appears that there's some foam insulation covering the whole tank, so until I tear into it, I won't know the exact dimensions. The manual says it's 30 gallons, and the outside of the tanks dimensions are 46" x 27" x 7". I've got plenty of information and a few RV service/dealerships in the area, so I should be able to source the tanks I need. I'm also pretty handy with plumbing so I don't foresee too many issues there. I was wondering though if anyone could post a picture of their waste drain piping (especially if they have a similar setup to mine.

I have attached a sketch of the tanks and the way I think the two (grey/black) tie together. I'm sure once I find the tank, I will be able to figure out the fittings I need, just would be easier if I could see some pictures!
 

Attachments

  • TANKS.JPG
    TANKS.JPG
    36.6 KB · Views: 24
Jack - the black water tank in my 17 ft HiLo is 17 gals. The gray water tank is 30 gals. A 6 gal gray tank would be woefully inadequate. A 14 gal black tank would be a bit small, but would probably work for you if you used the toilet sparingly, as we do (at nights to pee).

I've found a picture online that shows essentially how the drain lines from my two tanks are connected. It's about halfway down this page: https://rvtipoftheday.com/general-tips/drain-master-electric-waste-valve-rv-plumbing-makeover/ The picture shows a flexible hose connected to the 3" outlet of the drain, you would add that.

The small, 1-1/2" pipe on the left comes in to a Y-fitting in the 3" outlet. There is a Valterra type slide valve in that smaller pipe just upstream of the Y. This is the gray water drain line.

The larger, 3" drain line on the right comes from the black tank and it also has a 3" Valterra type valve in it that is upstream of the Y.

The article is about adding an electric valve to the system which is not important. The pipes, valves, elbows, a Y-fitting or a 90 deg fitting are all available through etrailer online. The outlet end of the 3" pipe has "hooks" that allow the flexible hose to be attached, and a cap to close it off when not in use.

This is the best I can do right now. If you need an actual picture of my piping, let me know.

- Jack
 
Thanks again Jack! That's how I thought it was plumbed up. I think there's room for me to add a second grey tank in the frame bay in front of the existing one. I could remove the existing gate valve and extension rod that goes to the rear and tee the outlet of that to the outlet of the new tank. Just have to figure out how to route the vent pipe. Or, it might be easier to remove that old grey tank and replace with a larger one in the next bay, then I just need to re-plumb the drains from the sink and shower.
 
Jack, I can't help you with a vent pipe for the gray tank. Thinking about it, I'm sure there must be one, but I've never seen mine. I suppose it may be "teed" into the "stink pipe" vent from the black tank.

The biggest problem I see for you is the limited accessibility from underneath the trailer. I imagine, when the tanks are originally installed, that would be done before the floor or walls were put in.

- Jack
 
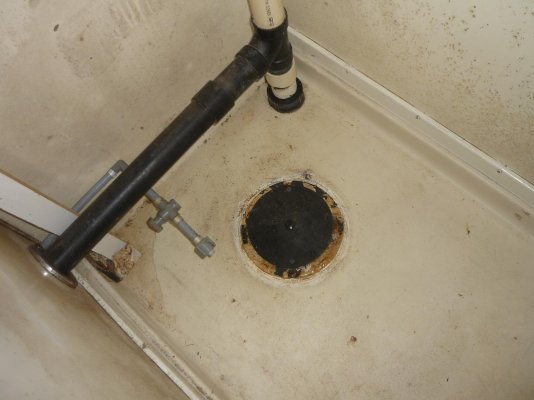
The grey tank does tee into the stink pipe. You can see it in the attached pic of the wet bath. It's the black abs pipe coming in from the lower left. The pipe goes through the kitchen cabinets and into the bath. My concern is if I add a second tank, I THINK I need to tie a vent from that tank into the other and the routing is going to be complicated with everything else going on underneath in that area. If I don't tie that tanks vent into it, then I believe that once the level rises above the connection between the two tanks, I'll end up with slow drains. I know there will be a solution, I'm just spit-balling ideas. :D:confused:
 

Attachments

  • P1030498.jpg
    P1030498.jpg
    161.9 KB · Views: 11
I wonder if you replaced the current tank with a new, larger one, could you route the existing vent pipe to it? I'm spit-balling too. My only experience with tank stuff is replacing the sensors, fixing a black tank leak and replacing the plastic freshwater drain with a brass one.

- Jack
 
I've thought of that as well, and it could be possible. I'd have to move the tank forward into the next frame bay (even with the door) as the current tank is wedged into the small section (only 5" wide) at the rear. the sink drain would have to be plumbed forward. The tank inlet would have to go in the side of the tank near the top.
 
If you can extend the plumbing, that's the way I'd do it. Having the gray water tank more forward should not hurt anything, since you would normally dump both waste tanks before traveling. And, if there's no dump station handy, you could probably water some trees with the gray water, or, make sure your campfire is DEAD out (it's what I do).

I think the location you are thinking of using is about where my grey water tank is. The black water tank is at the rear of the trailer, and the toilet empties directly into it with no J-traps or anything like that. The valve in the toilet and disinfectant in the tank keep odors out of the trailer.

- Jack
 
Vent solution

I've thought of that as well, and it could be possible. I'd have to move the tank forward into the next frame bay (even with the door) as the current tank is wedged into the small section (only 5" wide) at the rear. the sink drain would have to be plumbed forward. The tank inlet would have to go in the side of the tank near the top.

If you haven't already taken care of this, you really don't need to vent your grey water tank. If you have access to one of your cabinets, you can install a vacuum break. The valve itself needs to be installed as close to the underside of the counter top as possible.
 
Thanks for the tip. I haven't gotten around to that yet (more important things to take care of first). I've been trying to get the BW tank out first so I can find a replacement. Looks like I'll have to cut the old toilet flange out to drop the tank. It appears also that the black tank was modified so the P trap from the shower could drain to the grey tank ... looks like a DIY job as well. I'll take some pics when I get a chance.
 
Black Tank

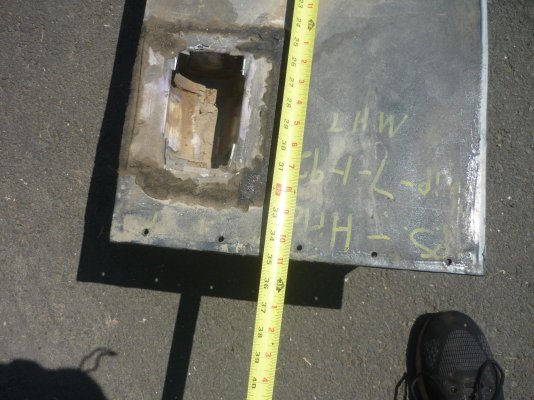
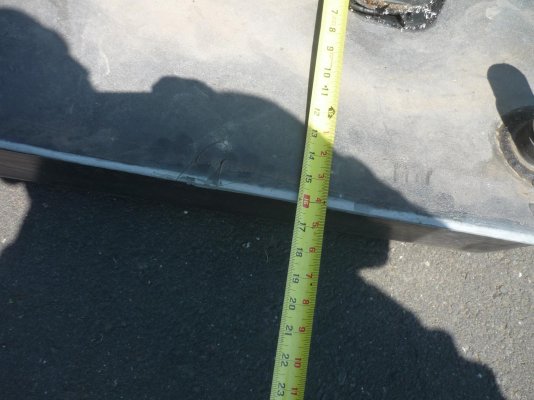
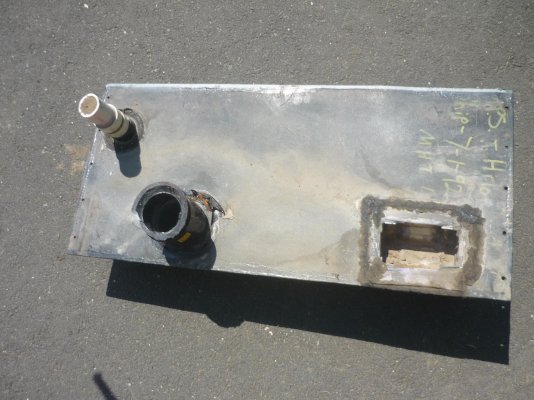
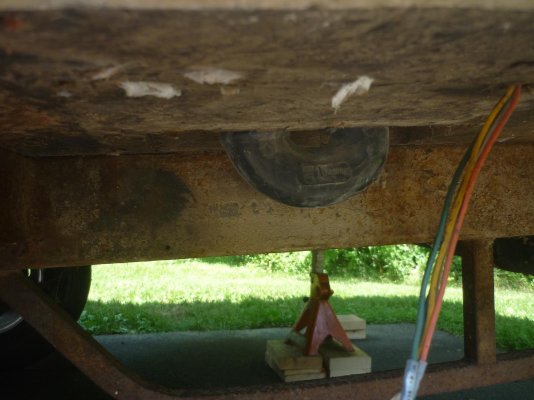
Well, I finally got the black tank off. Turns out this isn't the original tank, it appears that it was replaced in 1992.
I was wondering how they plumbed the shower and that 'mystery' is solved, they cut a hole in the black tank and patched with what looks like some ABS and a soup can (or something similar!!)

So I toss the busted tank into my car and run to the local RV service place. After taking some measurements and poring through their catalog for a while, he says that they don't have anything close enough to work and good luck! So I now know where NOT to go in the future for assistance.

I sent JR an email a while ago, and will contact them to see about sourcing a new tank.
 

Attachments

  • P1030500.jpg
    P1030500.jpg
    293.6 KB · Views: 6
  • P1030501.jpg
    P1030501.jpg
    216 KB · Views: 8
  • P1030502.jpg
    P1030502.jpg
    249.7 KB · Views: 7
  • P1030507.jpg
    P1030507.jpg
    171.6 KB · Views: 8
Well, I found a tank, but it is smaller than the one that was there ... turns out that I will be able to turn that to my advantage. Since the replacement tank is not as deep, I would have run into the situation where the drain from the grey tank would be lower than the black tank drain. My solution? Frame out a box of 1 x 3 to drop the mount of the new black tank. This solves both problems. I no longer have to cut and patch where the shower P trap is and will put the drains on the correct level. I still need to pop the holes into the tank for the toilet and vent and re-route the tank sensing wires yet, but making progress!
 

Try RV LIFE Pro Free for 7 Days

  • New Ad-Free experience on this RV LIFE Community.
  • Plan the best RV Safe travel with RV LIFE Trip Wizard.
  • Navigate with our RV Safe GPS mobile app.
  • and much more...
Try RV LIFE Pro Today
Back
Top