Window shade damaged while raising top

Trblandy

Advanced Member
Joined
Jul 24, 2019
Messages
85
Location
NJ
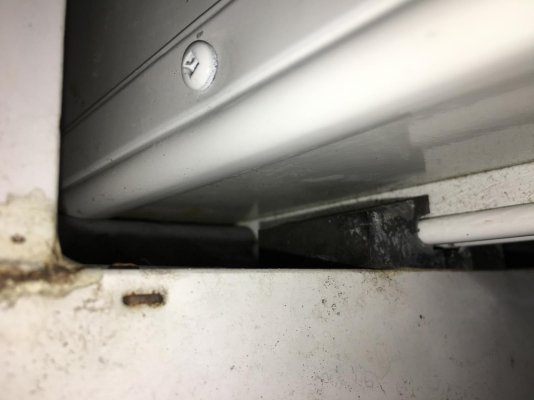
When raising the top on the 2003 hi Lo 22L, I heard a bad sound while the lift struggled. Let go of the switch to find the shade assembly jammed and screw torn out. See attached picture. Used a flat pry bar to get the shade passed the jam point.
The trailer was level and has been up/down several times without issue. Next step is to reattach the part.
Does anyone know what that screw went into? Metal, wood stud, etc.
Maybe I can relocate the shade brackets up a bit and remount the shade assembly.
Thanks
 

Attachments

  • E386B3DA-7C34-413E-BC4C-96A5E9280FF6.jpg
    E386B3DA-7C34-413E-BC4C-96A5E9280FF6.jpg
    192.4 KB · Views: 21
I think it goes into wood, but you can probably see now that it's out. I'd try filling the hole with epoxy and then re-drilling it. That would keep you from having to relocate things.

- Jack
 
TrBlandy, My curbside rear did this also. But during a complete change of fabrics throughout the Hi Lo, including the cornice, I trimmed off about 3/8" from the back of that one and re-located the holes up about 1". I drilled the holes and put in plastic screw inserts, then attached the cornice again, It's held now for a couple of years.
Tree
 
When raising the top on the 2003 hi Lo 22L, I heard a bad sound while the lift struggled. Let go of the switch to find the shade assembly jammed and screw torn out. See attached picture. Used a flat pry bar to get the shade passed the jam point.
The trailer was level and has been up/down several times without issue. Next step is to reattach the part.
Does anyone know what that screw went into? Metal, wood stud, etc.
Maybe I can relocate the shade brackets up a bit and remount the shade assembly.
Thanks
Just don't use longer screws as you will poke through the exterior cover, i.e fiberglass or whatever it might be.
 
I would have a concern as to why the shade got caught. Was is already pulled loose or is the top of the trailer not properly aligned. Check the guide blocks to see if they are on their tracks.
 
On my 22t them screws went thru Luan then into foam...I drilled bigger and put Molly bolts /screws the metal kind the open up when setting...Gota play with length to get it right cause they wana bump outside layer..
My never got caught or anything but several just would not tighten up...Above fixed problem
 
My street side rear caught a couple years ago and I described my fix, but I was wondering why it caught. All blocks are on the rails, level trailer, side to side and front to rear. What I found was two oddities. First, street side top IS closer to bottom wall than curbside, full length. Second, the cornice barely clears at every window except front, that one is fine. So during the full fabric change I narrowed all the cornices. Now all clear.
Tree
 
Thanks to all for the helpful comments. I removed the shade assembly for now. The trailer was level side to side and left to right, I believe the jammed valance was not loose, the others are all tight. I’m planning to follow Tree’s method and trim the depth of all the windows, being sure to use shorter screws.
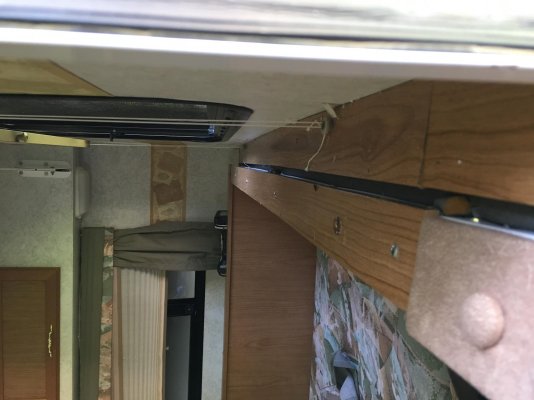
All the guide blocks are in place, if this (attached) picture is a guide block. Curbside front corner.

As to their operation, perhaps that should be a different thread?
It appears that both front and rear section seem to sag down. When looking at the upper and lower section wood trim, the top section can be 1-1/2 + lower then the bottom at certain areas. I’m thinking this can be solved by adjusting the cables?
Thanks. Tom
 

Attachments

  • 8DA5918E-34D8-4EFA-9B1A-AE869FDD1716.jpg
    8DA5918E-34D8-4EFA-9B1A-AE869FDD1716.jpg
    104.6 KB · Views: 19
  • 0F91ADB3-BAE1-41DB-89B4-1C6D79928723.jpg
    0F91ADB3-BAE1-41DB-89B4-1C6D79928723.jpg
    138.9 KB · Views: 12
Tom, I expanded you pic of the guide block and to me it looks cracked, center line. It may not be fully broken, but not normal.
Window shade housing: No need to trim too much off. And screws just long enough to spread the anchor "wings" a bit. If memory serves me, mine caught twice. My DSO said fix it!
I adjust cables a bit different than most. Two 9/16" box wrenches and a small pair of vise grips. Plugged into shore power, to keep charging the batt, and the top down. I loosen the lock nut about 3 turns. Attach vise grips on the back side of the frame, the one needing adjustment. Tighten the inner nut about 2 full turns (or whatever you feel safe with). Raise the top all the way up, and see what impact that made. If needed, tighten again until that corner is right. When your happy with the fit, tighten the lock nut and remove vise grips. BTW, vise grips prevent the cable from spinning, you'll have to hold then while tightening the offending nut.
You'll raise and lower a few times, but no need for any other equipment and not as much strength required to turn the nut. The batt, of course will recharge. I've used this method on many Hi Los, including my own
Best of luck.
FYI, I have the keys to the courthouse where the wi-fi is powerful and secure!
Tree
 
Thanks Tree. If I put a jack outside the sagging end while the top is up, can I gently raise it up to see the amount of slack in the cable?
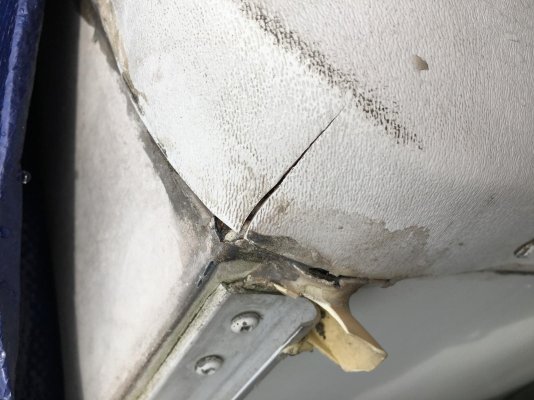
Also, there is a small crack in the upper end (not fiberglass), what is the best sealant to caulk it?
 

Attachments

  • 5F76A460-AB7F-4DD3-85B7-E90AA7DDB746.jpg
    5F76A460-AB7F-4DD3-85B7-E90AA7DDB746.jpg
    203.9 KB · Views: 9
Trblandy - I'm not Tree, but I'd recommend Lexel caulk, which you can buy online, in ACE hardware stores or at Lowes. It adheres better than silicone and is very flexible. I've used it to seal cracks like you show and have been very happy with the results.

- Jack
 
Tr, if you have a farm jack or something similar, I'm sure it would work. When adjusting the cables, you may not even need the jack if there is only an inch and a half sag. Try it, if it's too much grunting to tighten that way, then use a safe jacking method. NO bouncing around with a jack holding it. Ensure the trailer is level front to rear and side to side, it DOES make a difference.
As for that crack, Find the end of it and drill a 1/4" hole just thru the surface. This will stop the crack from continuing. Called stop drilling, really! I fill the crack with white Lexel caulk and wipe smooth with a wet sponge.
Tree
 
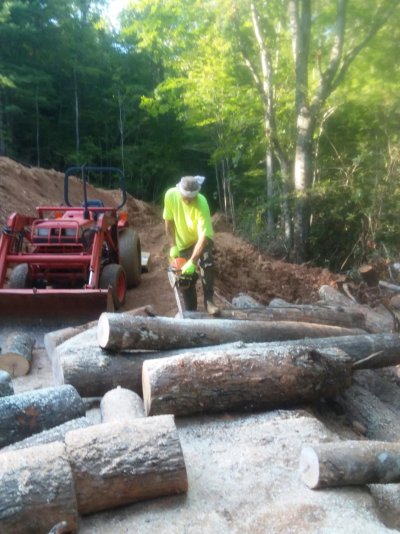
That lumberjack picture makes an impressive resume, I'm ok with a chainsaw, just not rolling and lifting 50-100 lb logs!
Just picked up a tube of Lexal this week and I'll follow the suggestion. Somewhere I heard Lexal was best on rubber, those end caps are PVC?
I also remember somewhere on the forum a picture with a screw set next to the crack to help hold it from further expansion.
perhaps the cured caulk will do.
Back to Tree's earlier comment about a possible cracked block, when zooming the pic it does appear a crack might be starting. will try to get a clearer picture and post it tonight.
Tom
 
Tr - I should have mentioned "stop drilling". You simply create a small round hole at the very end of the crack (where it's growing). That spreads the stress out and stops the crack from progressing further. You won't need to add any other screws or such to reinforce it further.

Tree, I use a chainsaw on lower tree limbs too, but I don't think I've cut anything that big. I DID successfully fell a pretty good sized (20 ft tall) pine tree in the back yard of a rental property we had a few years ago. It was a bit tricky avoiding surrounding structures. Great picture!
 
That tractor in the background makes work work of loading. Four days, scores of logs, some were beautiful spalled and curly maple. Think furniture and instruments. Burl wood for bowls and tabletops. and of course live edges for counters and floating shelves. Flatlanders love that stuff, me too.
Tree
 
Wood grain is beautiful, isn't it? I DO enjoy working with wood and love to use wood that can be left in a natural finish.

- Jack
 

Try RV LIFE Pro Free for 7 Days

  • New Ad-Free experience on this RV LIFE Community.
  • Plan the best RV Safe travel with RV LIFE Trip Wizard.
  • Navigate with our RV Safe GPS mobile app.
  • and much more...
Try RV LIFE Pro Today
Back
Top