Lower Rail on Upper Half Cable Attach Question

raysnuffer

Advanced Member
Joined
Jul 1, 2010
Messages
61
I have a 2008 1908T HiLo

I looked at lower rail on upper half today where the cable attaches next to door
and noticed that the cable has sunk into the wood where it attaches to lower half.

I took the pressboard cover off rail so I could see the rail. I was surprised to see that cables rest on a block of wood (about 8 ") long and the rest of the rail is a hollow aluminum box about 1.5 " square extending about 13 ' to the cable attachment in the rear of trailer which is also a block of wood about 8" long.

The wood part is soft causing the cable at the attach bolt to sink.

I have made sure to caulk where the water may have gotten to the wood.

It looks as if I just need to replace the wood blocks at the attachment points
rather than the whole rail.

Has anybody dealt with this problem and what did you do to correct it.

Thanks
Ray
 
Mine had a similar problem when I tried to raise one corner too much.

I filled the indentation with epoxy and then cut a piece of aluminum L-bracing that I placed over the damaged area to reinforce it. It's held up well.

I think I made a post about this somewhere in the forum with a picture - I'll try to find it.

- Jack
 
Good suggestions

Thanks JackandJanet and JoeJones for the reply.

I thought of the Epoxy and aluminum "L" bracket to place under the attach point.

I'm glad to see someone got it to work.....:)

I just wish HILO had done it that way using aluminum and not just wood.

But they did it right by having the rest of the lower rail "aluminum box" instead of wood.

I will probably call JR also just to see what he says........:)

Ray
 
I have one place it has done the same thing. I would call J and R and ask them what to do! Joe

Joe, I have the same problem on my HiLo. We live close enough that we should work together on fixing this. I also need to replace the seal on mine. I have also thought about forming a Mid Atlantic HiLo club and would like to know if you would have any interest. My Ph# is 434-361-1771. JIM
 
Repair of Cable Attachment point

I had a similar idea to the l-bracket and epoxy idea while I was in bed last night.
With a flat piece of 1/4" aluminum that is 3" wide and 6" long, I would do the following:The pressure could be taken off the cable attachment point then take it loose. Then the flat piece of Aluminum predrilled with holes that match the cable attachment bracket holes plus two-four additional screw holes would be backfilled with epoxy. Then mount the 1/4" piece of Aluminum centered on the cable mount with additional screws. Then reattach the the old cable mounting bracket in the same place over the newly installed flat aluminum. This technique will not affect the insulation as an l-bracket might yet repair the crushed area and only affect the cable height by 1/4" which it seems would not require any cable adjustment. Of course the L-Bracket might have the advantage of holding the epoxy where you want it and not letting it squirt out before it sets up.


Joe

Joe
 
Last edited:
Joe, the L-brace fits along the bottom and inside of the rail. The vertical portion of the "L" reinforces the repair and keeps the horizontal portion from bending under the load produced by the cable during lifting.

The L-brace I used can be bought at Home Depot in their "strip metal" section. They have both aluminum and steel strips there. The one I used has legs that are about 1-1/2 inches wide. Aluminum is easy to cut with a hacksaw and is simpler to use than steel.

And yes, I screwed this onto the rail then mounted the old bracket on top of it. I actually had to readjust the cable length though, because you need to loosen the cable to get enough slack to unscrew it and then reattach it again.

I haven't found the post I thought I'd made, but I think I have a picture on my desktop PC at home which I can post later. I'm working on a laptop away from home right now and for the next couple days.

- Jack
 
Joe and Jack,

You guys are mechanical genuises.......:)

I went by Lowes today and saw the aluminum "1.5 L Bracket" Jack is talking about.

Jack, does the Bolt at the attach point screw into wood or is it screwed onto some strong aluminum.

My wood block that has the bolt in it is actually tilted outward at the top about 5 degrees and is being held in that position by the the inside wall structure.

Also, were you able to do this process while the top was down or did you have to support it in the up position with 2 X 4's

Warm regards,
Hilo Ray
 
Hi Ray - Doubt that I qualify as a "genius", but I AM an engineer, so maybe that gives me a tiny advantage.

I'm 90% certain the bolt at the attachment point screwed into wood. I remember it being a lag screw, maybe 1/4" diameter, but it's been several years since I made that repair and my rapidly fading brain cells may have recorded a faulty picture.

I had no tilt on any part of the structure, just a rather severe "dimple" in the frame where the cable pulled too hard and the smallish bracket that HiLo installed was bent in the middle too. I straightened it with a hammer as I recall.

I think I filled the screw hole as well as the dimple with strong epoxy and let it cure for at least 24 hrs. I seem to recall taping the aluminum angle to the area with duct tape (what else?) with a layer of wax paper between it and the epoxy so that the repair cured to the original shape of the frame.

I'm also fairly certain I did this all with the top supported on 2x4's, a couple inches below max height, for ease of access. These were the same 2x4's I then used to adjust the cables properly when I was finished.

Hope what I said makes sense.

- Jack
 
Upper Half Cable Attach Question

Ray and Jack-Is there any reason you could not use two large C clamps to hold L bracket in place as Epoxy cures?? Joe
 
Hello Joe and Jack,

The C-Clamps would work real well Joe.

Hate to hear the bolt went into wood. But that makes since because a block of wood is what I see from the top looking down.

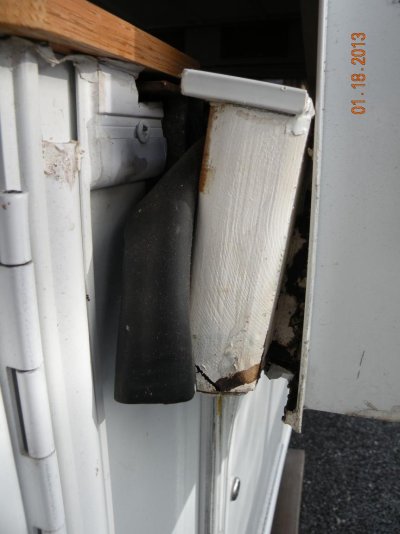
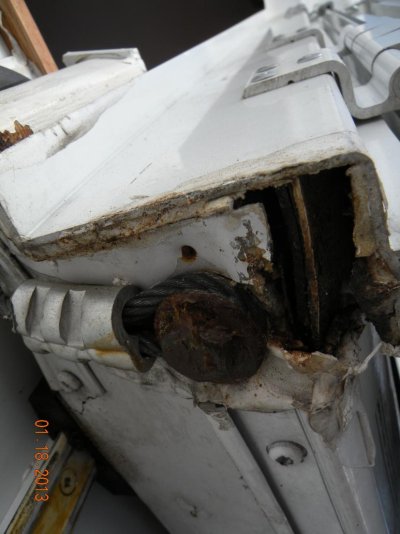
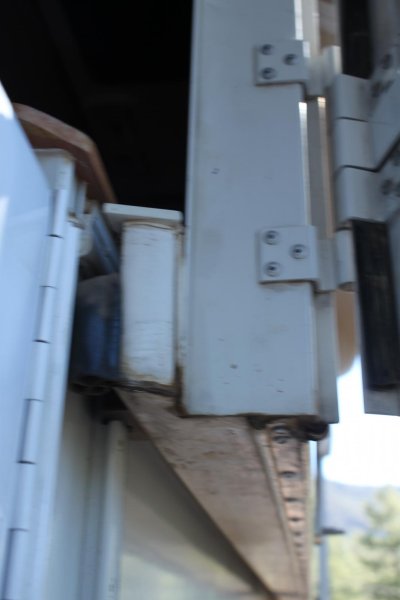
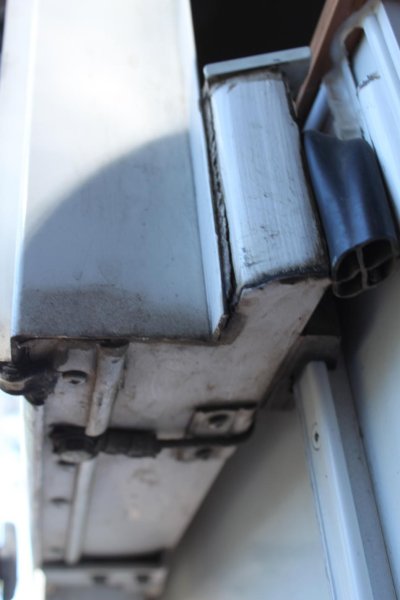
I included some pics with this reply.

Thanks
Ray
 

Attachments

  • DSCN0830.jpg
    DSCN0830.jpg
    87.1 KB · Views: 77
  • DSCN0831.jpg
    DSCN0831.jpg
    87.2 KB · Views: 73
  • DSCN0829.jpg
    DSCN0829.jpg
    84.7 KB · Views: 73
Yes, C-clamps would have worked, but, YOW! Ray, your damage looks pretty severe to me.

You've got metal damage and it looks like there may be wood rot. I fear you need to get to the inside of all that area to see what is still sound. It looks like there was damage caused by water.

In my case, everything was dry - I'd just shortened the cable too much and the strain when the top hit the bottom ledge upon raising was so much that something had to give. I was lucky that the cable didn't break or that I didn't break a pulley or pull one out of its mount.

I wish you luck!

- Jack
 
Yep....... after careful look at pictures, it seems the block of wood has pulled away from wall at the bottom. That block will have to be replaced and reattached.

I will have to get an estimate at an RV place. I don't want to do that myself.

It looks as if the block was glued to the wall and not screwed to it.

If this was the case, I am surprised it could stand the strain of the cables at all !

The only good thing is it is just the block that needs to be replaced, not the whole rail.

Incidently, I sent these same pictures to JR in Jan of this year (see date on Pics) and never received a reply.

Regards
Ray
 
Couldn't you use a long drill bit and go all the way through the wood block and use aluminum angle on the top and bottom with bolts going all the way through? Seems like that would be a lot stronger.

Bear :D
 
Thanks for the thought Bearshrum,

But the wood block pulled away from the wall at the bottom. I can put bolts thru the wood block, but what would they attach to on the wall ? It looks like HiLo glued the block to the wall instead of bolting it. I will analyze it again in the next few days. The bolt idea may work. There must have been a tremendous force applied to the block to rip it from the wall to begin with.

I need to make sure there is nothing wedged between the upper and lower halves to have caused it to pull away from the wall like that.

Thanks again for the thought.
Ray
 
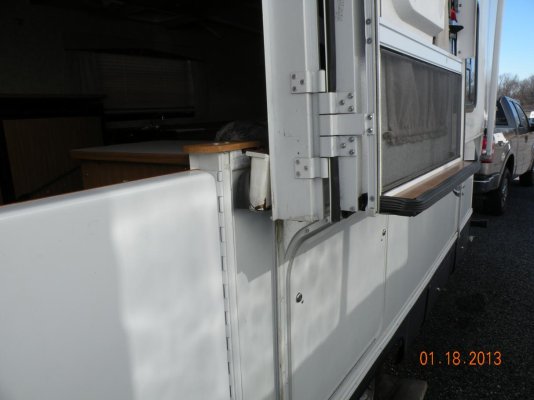
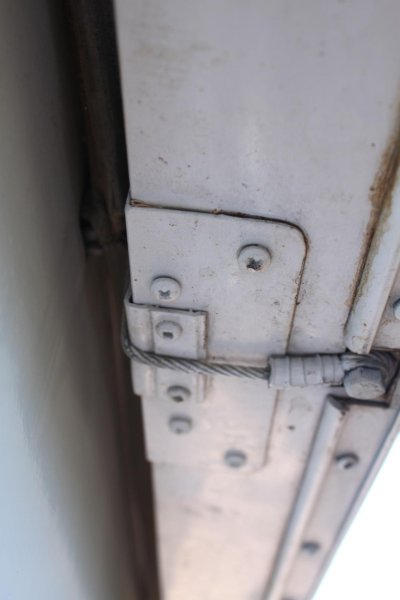
Ray, I finally got home and took some pictures of the repair I made on my cable attachment point. My trailer, like yours, has a wooden block (strip) on the inside of the wall, but I'm certain it's only there to provide support and attachment for the inner trim ledge. The cable wraps around it, but it is attached to the outer wall by the big lag screw.

Your pictures seem to indicate there is severe rotting and wood loss where that screw goes in. That would be the area that needs probably a new section of good wood.

On my trailer, the lift point near the door is behind the door (the last picture). The area I had to repair was on the right front, and in the first picture you can see I used a fairly large aluminum L-plate for this. The damaged area is under it, and is about half the length of the new plate. As you can see, I put the old, smaller bracket over the new plate.

The middle picture (poorly focused) simply shows how my trailer resembles yours on the hinge side of the door, but without the lift point.

Hope this helps you a bit.

- Jack
 

Attachments

  • IMG_3738.jpg
    IMG_3738.jpg
    77.1 KB · Views: 65
  • IMG_3739.jpg
    IMG_3739.jpg
    73.1 KB · Views: 63
  • IMG_3740.jpg
    IMG_3740.jpg
    77.5 KB · Views: 62
Thanks for the pics Jack. Comparing mine to yours, the cable pressure on the bolt has split the wood and caused it to pull away from the wall.

So it looks like the wood block needs to be replaced and the cable bolted it. A new block
of wood would be wedged in that space and hold ok it seems.

Again thanks for the follow up. I will update when I decide who will do it.

Ray
 
By the way Jack, good job on that repair. If I didn't realize you worked on it, I never would have known. It looks original........:)
 
Thanks, Ray. In my case, the repair was pretty simple. The part the lag screw went into was not damaged. The "denting" was on the inside wooden strip - but it didn't seem to be pulled away.

- Jack
 
Thanks, Ray. In my case, the repair was pretty simple. The part the lag screw went into was not damaged. The "denting" was on the inside wooden strip - but it didn't seem to be pulled away.

- Jack

Thanks Jack - Mine has a similar indent on the inside edge where the cable pulls it. I had thought that something like yours would correct it. I hoped this thread would lead to your solution. Yours looks much nicer then what I had planned so now I have something to shoot for. Once the weather improves. First snow of the year in the SL driveway.
Ralph
 

Try RV LIFE Pro Free for 7 Days

  • New Ad-Free experience on this RV LIFE Community.
  • Plan the best RV Safe travel with RV LIFE Trip Wizard.
  • Navigate with our RV Safe GPS mobile app.
  • and much more...
Try RV LIFE Pro Today
Back
Top