Better Figure 4 - Adjusting Cables

mkempf-HILO

Member
Joined
Sep 29, 2012
Messages
23
Location
Bellevue, WA
2208T here in Seattle. Attempting to adjust the cables (the front is about 1.5 inches lower than the rear when raised). I read the adjustment procedure multiple times to make sure I got it right.

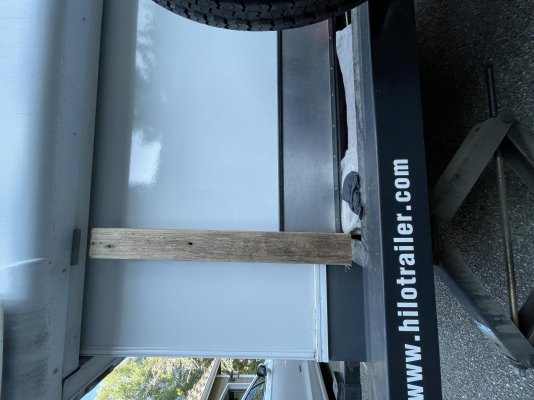
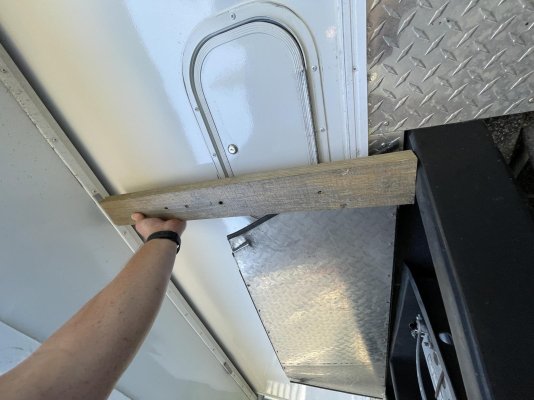
Used 4 2x4s and lowered the trailer on the 2x4s (there are little grey rubber things where (i think) I'm supposed to align the 2x4s with the frame on the top, and the bottom rested on the frame itself. As i was lowing, I heard a horrible sound like breaking wood. I thought one of my 2x4s was breaking.

With the full weight of the top on the 2x4s, i went to the front and the front of the underside of the top (front) was bowing under the pressure of the top on the 2x4s. looked unnatural. The rear was fine and flat. I quickly raised the top and the front "appears" to not have been damaged too bad.

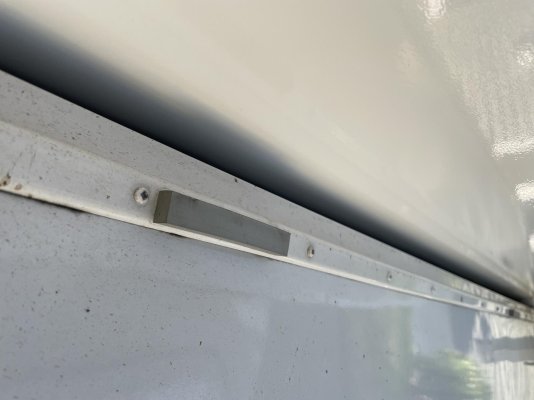
So, my question is this. Exactly where is the top supposed to rest on the 2x4s? Are the 2x4s supposed to be on the things that stick out from the trailer (where the top rests in the normal down position) or on the grey things that appear in Figure 4 of the manual?

Thanks in advance.
 

Attachments

  • IMG_4687.jpg
    IMG_4687.jpg
    210.6 KB · Views: 47
  • IMG_4688.jpg
    IMG_4688.jpg
    194.6 KB · Views: 38
  • IMG_4689.jpg
    IMG_4689.jpg
    104.4 KB · Views: 34
Matt, I think you were putting the front 2x4s on the battery compartment? You don't want to do that.

You mentioned "those things that stick out of the bottom that the top rests on when down" (I'm paraphrasing, but hope you understand). Those are what we on the forum refer to as "outriggers", and yes, those are what you should put the 2x4s on to because they can support the weight and they are aligned with the frame. I use duct tape around the 2x4s and against the sides of the lower half to hold the 2x4s vertically. Then, I gently lower the top half onto the 2x4s. I think I had the 2x4s set up so the narrow side was against the lower half when I did mine. This way, the top half strong part of its frame will rest on the 2x4.

Now with the cables as slack as you can get them, you can tighten the ones that you need to to raise the section that is too low. Don't try to make the inside trim pieces align. You just want the bulb seal on the top half to meet the lip on the edge of the lower half when the top is up.

You said the front was 1.5" low. That sounds like a LOT. I'd try raising it in 1/2" increments and see what that does to the bulb seal with the top up. You can see how the bulb seal meets if you take the trim strip off the inside top of the lower half - it's just held on by a few screws. The adjustment is pretty much 1:1. If you move an adjusting bolt out 1/2", it raises the top at the cable attachment by 1/2". If you raise ti too much, the cables will cut into the lower edge of the top half and you'll have to fix that.

- Jack
 
Thanks!!!!

Thanks Jack! It did take a whole inch.

I think it has to do with the heavy usage of the dropdown bed. We'd use the back of the couch perpendicular to the couchseat to "secure" the kids when they were small, Spouse in the dropdown and I'm in the dinette. It's needed an adjustment for quite a while and I'd been hesitant (scared) to do it.

Thanks for your help! I'll pass it on to the cousins that have a 19' Hilo.
-Matt
 

Attachments

  • Adjusted.jpg
    Adjusted.jpg
    357.6 KB · Views: 22
Great! Looks a lot like mine did when I adjusted the cables properly. Some people say the cables may stretch - I suspect yours have done all the "stretching" they will do. I doubt you'll need to do any more adjustments. Cable stretch is a property of NEW cables.

- Jack
 
Jack, the photos showed the 2x4's placed on the rubber along the frame and not on the outriggers. I guess whatever he did worked this time. The adjustment screws appear maxed out so cable replacement is probably in his future. Better to plan now and order parts than wait, like I did, until one or more break.

I wish that I had known to grease the cables from the top ten years earlier. That is someone else's issue now.

Richard
 
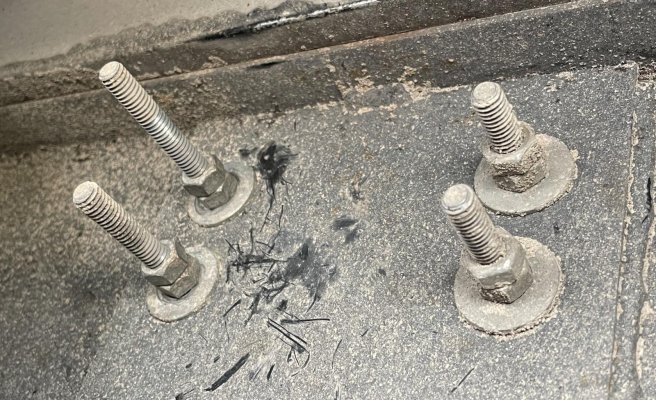
If you have adjusted the cable adjustment bolt to it's limit, trying to lift the top and the cable seems too long, you can effectively "shorten" the cable by putting something between it and the lower edge of the top, right next the where the cable attaches to the top.

I found this out when I repaired the edge where the cable had cut in and damaged the wooden frame there. I filled the damaged area with epoxy and then added a short length of aluminum angle under the original metal reinforcement which I straightened and put back on too. That extra thickness effectively shortened the cable maybe 1/2" or more? I could see adding even more, if needed to shorten the cable to whatever is desired.

- Jack
 
Hilo part

Would you like a bathroom window cover? We have one that we pulled off and it just in our garage.

It's free, but you would have to come over to the Leavenworth area to pick it up.

(We saw you were in Bellevue and we don't want to take it to the landfill)

-Dan

boatordie@gmail.com
 

New posts

Try RV LIFE Pro Free for 7 Days

  • New Ad-Free experience on this RV LIFE Community.
  • Plan the best RV Safe travel with RV LIFE Trip Wizard.
  • Navigate with our RV Safe GPS mobile app.
  • and much more...
Try RV LIFE Pro Today
Back
Top