Bulb Seal Replacement

If if fills the opening, as I think it will, they won't get in that way. There ARE other ways they can get in. See my thread (from about 3-4 years ago, I think) on "Mouseproofing" the trailer. You might able to find it just by searching on that one word.

It has been a total success! There is NO evidence of mice (or other critters) inside my HiLo and it has been sitting outside under its carport shelter the entire time. There are numerous mice about - I've caught at least 50 during that time in my garage, which is right next to where the HiLo is parked.

I DID find a mouse nest inside the storage area in front of the rear bumper of the HiLo when I raised the top today to look at that trim strip. I knew there were access points into it, but there's nothing in there they can damage. I removed the nest and may decide to secure it as well, with hardware cloth.

- Jack
 
Jack,

Yup, as owners of hilos, we have to be very creative/resourceful sometimes!
I like your idea!! That will certainly look and function better, and like you said this mod "will last forever". Thanks for sticking this thread topic; it will save hilo owners some money by doing this modification when that bulb seal fails.
ps I take no credit for this idea, I got it from another Hilo forum member, thanks.
 
Hilltool,

If you only do a small section using the garage door sweep, I don't think it will keep mice out because the ends of the sweep would be exposed/open, therefore leaving an area where the varmints can get in. You would have to do the entire length of the hilo so that it seals properly eliminating any possibility of an opening. Picture it. Hope this helps.
 
I’m noticing a good deal of mouse sign right next to ac cord storage hole. How is that tube accessed underneath?
 
Rick, are you sure they came in through the place where there is missing bulb seal? They'd still have to climb up the lower half below it, and my trailer is very smooth on the sides there. I don't know they'd have anything to hang onto. The places in the floor, however, where water/waste line go through and possibly where electrical or gas lines come in might have big enough openings for them.

- Jack
 
Jack, I’m not sure. Just made sense to me. I’ve seen mice climb straight up and down house walls. So, I figured slippery gel coat wouldn’t stop them. Once I can get the trailer back to a spot where I can do a thorough inspection I will have to do that. Meantime covering up the side gaps seems prudent.

Rick
 
Makes sense. How did did you fit around the tracks on each end ?

Hilltool,
I'm not sure of this question that you're asking:
??"How did did you fit around the tracks on each end ?"

Which tracks on each end?? Are you referring to the guide rails?
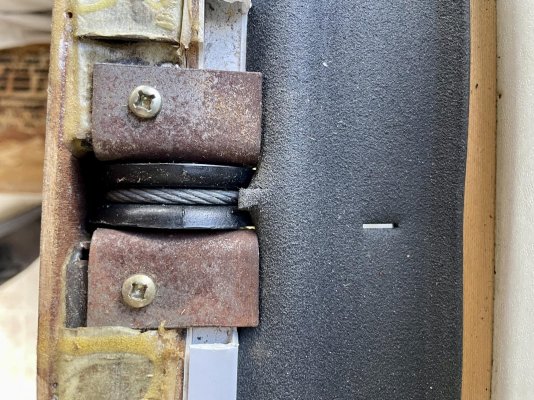
If so...I trimmed the rubber garage door sweep around them as close as I could. Also trimmed around the 4 corners as close and as best as I could.
Hope this helps.
 
I did this trick last year. Worked out great...it's not pretty but quite effective. No evidence of mice or stink bugs after several months in storage. I'm less physically able and with the help of my tolerant wife, took only a couple days to complete. Rubber seal, staples and new screws for top board cost about $100 at Lowe's w/military discount ����
 
JayandRobin2,
I'm glad you tried this method to seal the bottom and upper halves using a garage door sweep like I did. I did not want to separate the two halves to replace the original seal that's installed in-between the top and bottom halves. You may hear a little bit of noise/flap as the garage sweep travels up and down against the side walls of the hilo, but that's not a big issue for me. At the very least, you won't have to use pool noodles on the inside (like I was) to try and seal the 2 halves, and most importantly you saved yourself a $1,000 or more if you were to have the original seal replaced at a hilo repair shop!! I did this modification on my hilo about 2 years ago; no problem whatsoever. Best Mod!! Enjoy your camping season.
 
Observations from replacing the seal between the layers.

On our first HiLo the seal was shot. The foam crumbled..orange pieces. We seperated the trailer halves as best we could. I wouldn't have wanted to staple over the old grey casing. We did the best we could. Impossible to seperate around the refrigerator. Felt like we were going to tip the HiLo over. Still let in a fair amt. of dirt after traveling. 2nd. HiLo we had enough $ and J&R replaced the seal for us. Lets in a small amt. of dirt..much less than the 1st. HiLo.
 
I purchased the 100-ft roll and I’m getting the wood trim removed - mine is stapled.

Is this the correct orientation you’ve used?

-Nick
 

Attachments

  • IMG_2219.jpeg
    IMG_2219.jpeg
    66.2 KB · Views: 3
Yes, that is the correct orientation like I installed mine.

If I remember correctly I had to trim a little bit of the garage sweep because it was a little too wide. I trimmed the smaller edge off of the sweep as shown on your posted picture; that was not difficult at all, that way it "lays" in there just right. Almost guaranteed to keep most critters out if you install it all the way around, and when traveling it will also keep the road grime to a bare minimum. Good look with your project.
 
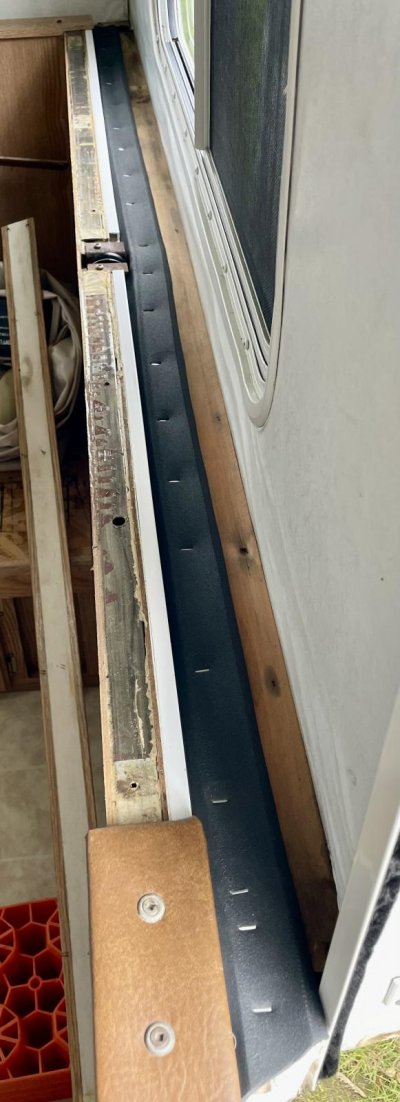
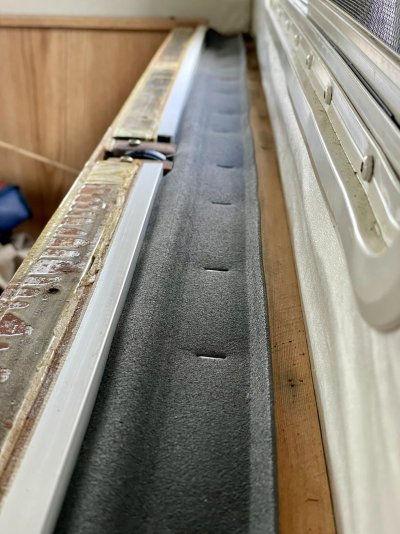
Thanks! I didn’t see this in time and tried both ways. With the seal the way I illustrated (first picture attached), I couldn’t get the seal to sit flat enough to put the thin “wood” trim back on neatly, there was too much of a hump from the seal. It was wavy and bowed and didn’t look right.

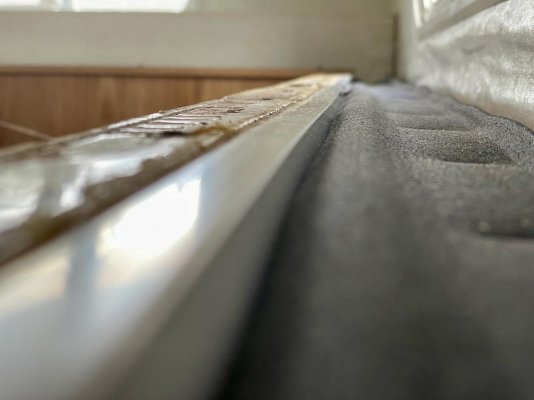
So I took it up and installed it “upside down” to see (last 3 pictures attached). It actually seems to work better this way for my camper. I did the front half of the camper but ran out of finish washers - I’m using them with screws to secure the stapled strip back down.

It actually rolls into a nice curved “bulb” against the seal trim with the top all the way up. We’ll see how it goes I guess. I can already tell it’s going to be a MUCH better seal either way.

Now that I’ve seen what both those wood trim strips are made out of, I really want to replace them with some hardwood trim. I’d just need to find a way to rabbet out the inside trim piece.

Thanks for the post and the help

-Nick
 

Attachments

  • IMG_2218.jpg
    IMG_2218.jpg
    113.3 KB · Views: 7
  • IMG_2226.jpg
    IMG_2226.jpg
    251.2 KB · Views: 7
  • IMG_2227.jpg
    IMG_2227.jpg
    111.2 KB · Views: 6
  • IMG_2229.jpg
    IMG_2229.jpg
    431.1 KB · Views: 8
Last edited:
NTL1991, nice job!! This modification will for sure save you a lot of $$$ compared to taking it to an rv repair shop!! And it will definitely help keep critters and road dirt out!!

I got this idea from another hilo forum member, where he installed it on the outside of the hilo. I wanted to improve on the idea, studied it a little and decided to go for it and install it on the inside instead. So far it has been working really well!! Plus,...my wife now thinks I am so much smarter than yesterday!! Haha.
 

Try RV LIFE Pro Free for 7 Days

  • New Ad-Free experience on this RV LIFE Community.
  • Plan the best RV Safe travel with RV LIFE Trip Wizard.
  • Navigate with our RV Safe GPS mobile app.
  • and much more...
Try RV LIFE Pro Today
Back
Top