NE
Neal and Bev
Guest
Using the bunk bed for storage isn't a new idea. It's my understanding that there have been a few different methods of how to do it, ranging from using it as is, to actually modifying the bunk.
The idea that I'm sharing here is one that I got from Sam Shields. Sam had referred to it in a response to another member.
Now that I have all of my disclaimers in place , here's what I did...
Our Hi-Lo has a double Goucho couch for a bed. I told DW that I wanted to modify the bunk into usable storage to store the bedding for it. She was fine with the idea as long as it didn't keep the bunk from being converted back into a bunk when needed.
With the mattress removed from the bunk, the space between the bottom of the bunk and the roof is enough for the bedding that I wanted to store. The problem is when the bunk is up, the gap between the bunk and the roof is too narrow to get stuff into it.
Lowering the bunk isn't that hard, but it's awkward and then after you add storage items, the bit of added weight makes it all the more awkward to fold / lift back to the ceiling.
The idea that I got from Sam was to add a second bolt / screw to the rear hinges. This prevents them from folding down and only allows them to pivot.
The next step is to add some sort of an extension to the front of the bunk, to support it when you let it down, to access the storage items in it. There's always more then one way to do something, but here's mine.
STEP 1:
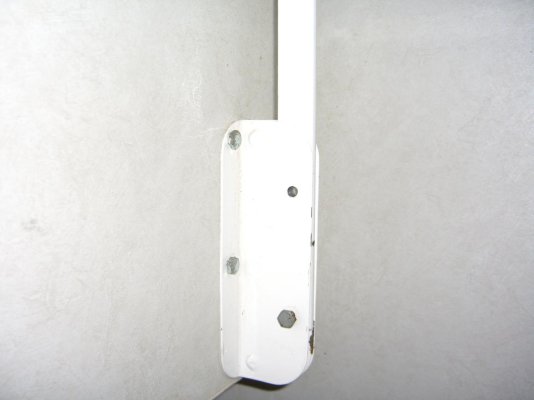
Drill a hole in both of the rear hinges. I used a drop cloth underneath to catch all of the metal shavings, also I wore safety glasses for this step.
See picture "Hinge drill.JPG"
STEP 2:
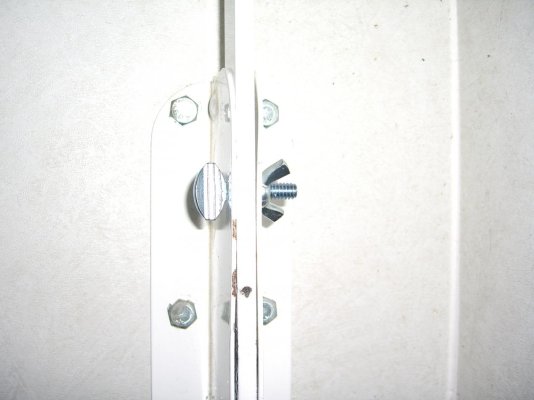
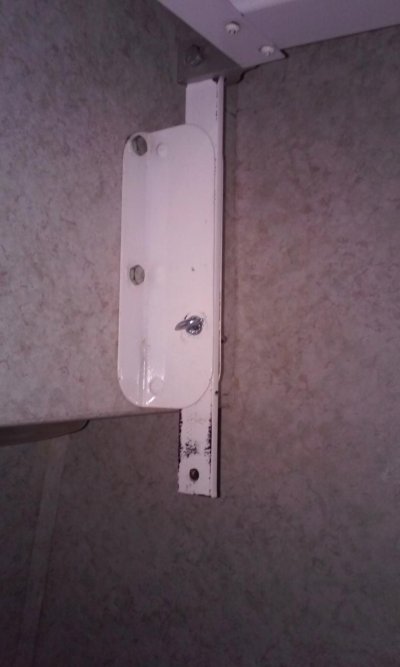
Because DW required that this be easily 'undone' if we wanted to use the bunk as a bed, I used thumb screws and wing nuts to secure the hinges. This way the bolts could easily be removed.
See picture "Hinge with new bolt.JPG"
STEP 3:
To create a simple extension for the front, I bought 4 feet of 1/16" cable and four cable crimps. I cut the cable into 2 two foot pieces. Using the cable crimps, I formed a small loop onto the end of each cable.
STEP 4:
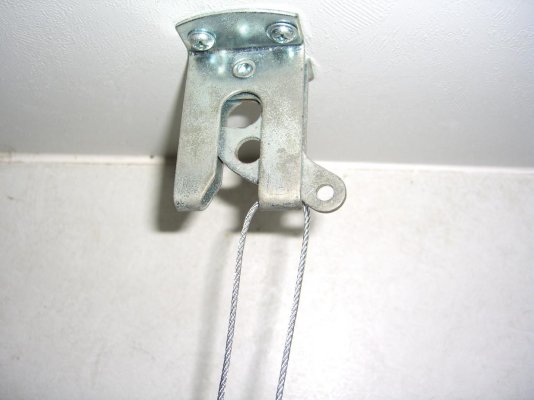
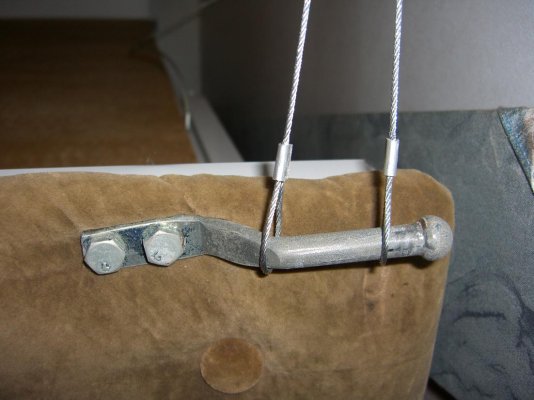
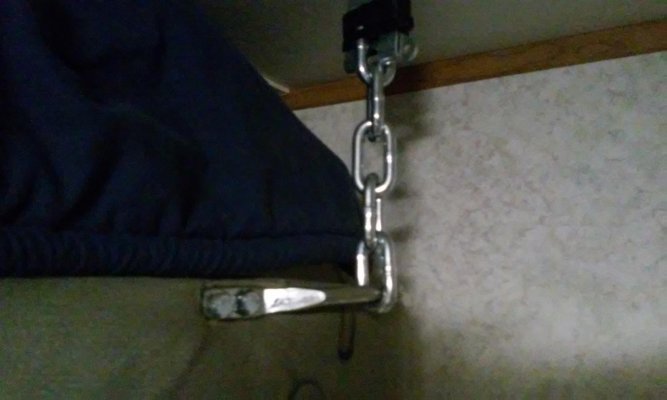
Thread one of the cables though one of the bunk latches on the ceiling. Using the loops in the cable, hook both ends of the cable to the hook on the bunk bed. Use the second cable to repeat this process on the other side of the bunk.
See pictures, "Cable thru latch.JPG" and "Cable on hook.JPG"
That’s it. It took about an hour to do and the materials cost about $10
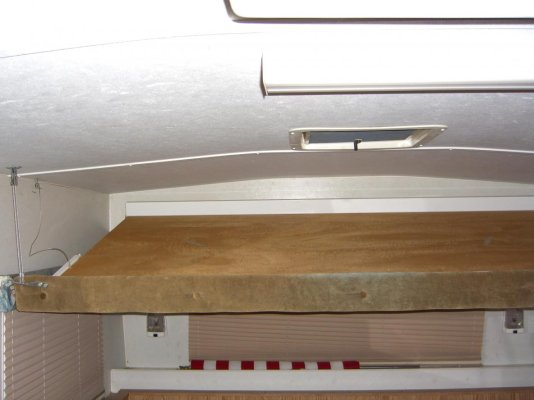
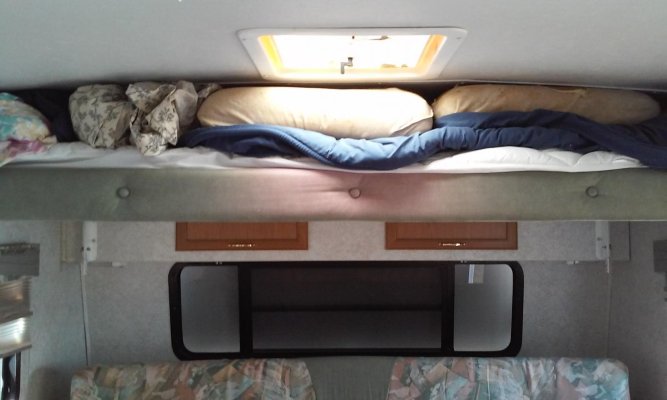
The end result is that the front of the bunk can be easily lowered to put things into it. Of course this assumes that you have removed the mattress (and stored it in your house for future use). The length of the cables lets the front of the bunk come down about a foot from the ceiling. Then after you put your blankets and sheets, or in our case a 'Travasak', and pillows into it, raise the front up until it clicks back into the latches.
It works very well, at least for us. Thanks again to Sam Shields for sharing the idea with us!
Neal
The idea that I'm sharing here is one that I got from Sam Shields. Sam had referred to it in a response to another member.
Now that I have all of my disclaimers in place
Our Hi-Lo has a double Goucho couch for a bed. I told DW that I wanted to modify the bunk into usable storage to store the bedding for it. She was fine with the idea as long as it didn't keep the bunk from being converted back into a bunk when needed.
With the mattress removed from the bunk, the space between the bottom of the bunk and the roof is enough for the bedding that I wanted to store. The problem is when the bunk is up, the gap between the bunk and the roof is too narrow to get stuff into it.
Lowering the bunk isn't that hard, but it's awkward and then after you add storage items, the bit of added weight makes it all the more awkward to fold / lift back to the ceiling.
The idea that I got from Sam was to add a second bolt / screw to the rear hinges. This prevents them from folding down and only allows them to pivot.
The next step is to add some sort of an extension to the front of the bunk, to support it when you let it down, to access the storage items in it. There's always more then one way to do something, but here's mine.
STEP 1:
Drill a hole in both of the rear hinges. I used a drop cloth underneath to catch all of the metal shavings, also I wore safety glasses for this step.
See picture "Hinge drill.JPG"
STEP 2:
Because DW required that this be easily 'undone' if we wanted to use the bunk as a bed, I used thumb screws and wing nuts to secure the hinges. This way the bolts could easily be removed.
See picture "Hinge with new bolt.JPG"
STEP 3:
To create a simple extension for the front, I bought 4 feet of 1/16" cable and four cable crimps. I cut the cable into 2 two foot pieces. Using the cable crimps, I formed a small loop onto the end of each cable.
STEP 4:
Thread one of the cables though one of the bunk latches on the ceiling. Using the loops in the cable, hook both ends of the cable to the hook on the bunk bed. Use the second cable to repeat this process on the other side of the bunk.
See pictures, "Cable thru latch.JPG" and "Cable on hook.JPG"
That’s it. It took about an hour to do and the materials cost about $10
The end result is that the front of the bunk can be easily lowered to put things into it. Of course this assumes that you have removed the mattress (and stored it in your house for future use). The length of the cables lets the front of the bunk come down about a foot from the ceiling. Then after you put your blankets and sheets, or in our case a 'Travasak', and pillows into it, raise the front up until it clicks back into the latches.
It works very well, at least for us. Thanks again to Sam Shields for sharing the idea with us!
Neal
Attachments
Last edited:

