Easy Stabilizer

NE

Neal and Bev

Guest
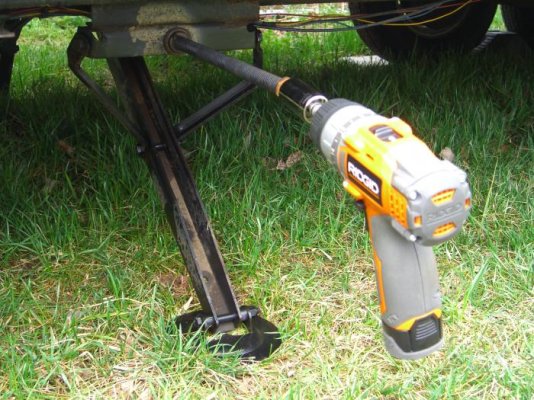
An easy and quick way to set your stabilizer jacks is to use a socket and a cordless drill.

Park your camper, get out the drill and in a jiffy you can have all four stabilizers set.

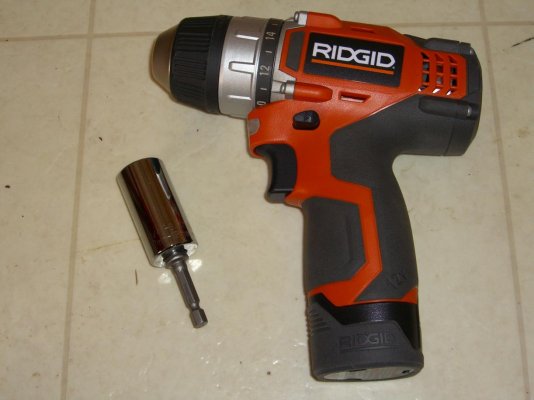
I don't know if all Hi-Lo's have the same type of stabilizers, but it'll work just the same. Ours has a 3/4" (19mm) hex head on the stabilizer screws, so all we needed was a standard socket with an adaptor for our drill. They also make a special socket for stabilizers that have the oval head with two flat sides.

I've seen this tip on several RV sites and I'm sure that some of the folks in our community know this trick already. I really like this method myself.

BTW, hang on to your stabilizer jack hand tool, the drill is great but you still need a backup.

Neal
 

Attachments

  • Drill and socket.jpg
    Drill and socket.jpg
    88.5 KB · Views: 114
  • Stabalizer operation.jpg
    Stabalizer operation.jpg
    100.1 KB · Views: 158
Socket for stabilizers that have the oval head with two flat sides.

I am in search of the socket for the model #23025 BAL light trailer stabilizer jacks that have the oval head with two flat sides. My 1509T came with no tool at all. Can anyone paste a link to where I can buy one here? Thanks for reading this.
 
An easy and quick way to set your stabilizer jacks is to use a socket and a cordless drill.

Park your camper, get out the drill and in a jiffy you can have all four stabilizers set.

I don't know if all Hi-Lo's have the same type of stabilizers, but it'll work just the same. Ours has a 3/4" (19mm) hex head on the stabilizer screws, so all we needed was a standard socket with an adaptor for our drill. They also make a special socket for stabilizers that have the oval head with two flat sides.

I've seen this tip on several RV sites and I'm sure that some of the folks in our community know this trick already. I really like this method myself.

BTW, hang on to your stabilizer jack hand tool, the drill is great but you still need a backup.

Neal
I use the drill for the stabilizer jacks and I have converted the front jack to use the same 3/4 socket. I removed the crank shaft and replaced it with a 1/2 inch bolt with the threads cut off. This has a 3/4 inch nut on it. I cut the old crank off and weld a 3/4 inch socket to it. This gives me a power front jack as well as a hand crank. Any needing help or more information let me know.
 
I use the drill for the stabilizer jacks and I have converted the front jack to use the same 3/4 socket. I removed the crank shaft and replaced it with a 1/2 inch bolt with the threads cut off. This has a 3/4 inch nut on it. I cut the old crank off and weld a 3/4 inch socket to it. This gives me a power front jack as well as a hand crank. Any needing help or more information let me know.

Good post! I suspect you have a much older model trailer? The newer ones come with a factory installed power jack that has a manual backup in case of battery failure.

I had to crank mine up by hand once - it was very easy.

- Jack
 
I did something similar, but decided to not remove the manual crank for now. I have to be a bit careful to avoid the handle when rotating the crank with the drill, but when manual cranking is needed, the crank is always attached.

Maybe the Classic models came with a power jack as standard, but on the T models it was an option. The hand cranking does get to be a pain, especially with the up-and-down to help install load-leveler bars.

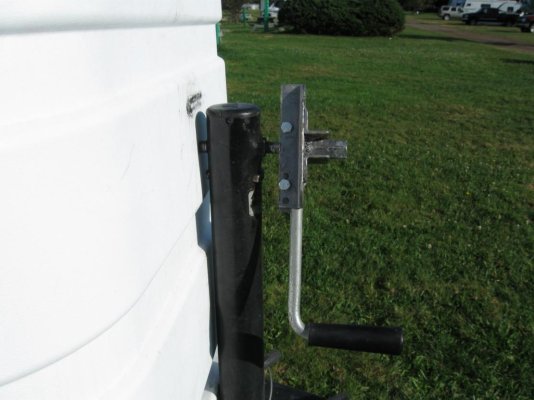
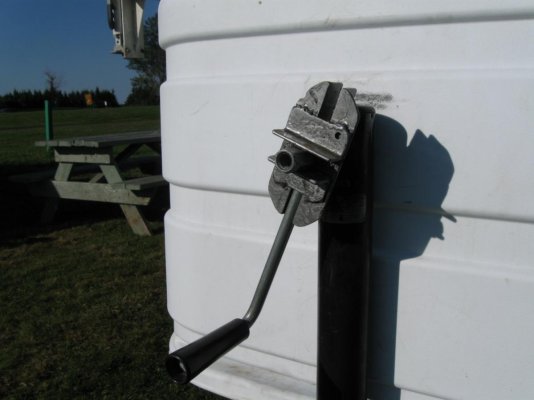
I've attached a couple of pictures of the adapter I made, that just clamps on to the original manual-crank handle with 2 bolts. It too has a 3/4 inch nut welded on, so the same drill socket works for the stabilizers too.

I was thinking about doing the same change you did, and may still take that extra step. Nice to see that it will work too!

Gord.


I use the drill for the stabilizer jacks and I have converted the front jack to use the same 3/4 socket. I removed the crank shaft and replaced it with a 1/2 inch bolt with the threads cut off. This has a 3/4 inch nut on it. I cut the old crank off and weld a 3/4 inch socket to it. This gives me a power front jack as well as a hand crank. Any needing help or more information let me know.
 

Attachments

  • IMG_0510.jpg
    IMG_0510.jpg
    88.9 KB · Views: 147
  • IMG_0511.jpg
    IMG_0511.jpg
    72.5 KB · Views: 147

Try RV LIFE Pro Free for 7 Days

  • New Ad-Free experience on this RV LIFE Community.
  • Plan the best RV Safe travel with RV LIFE Trip Wizard.
  • Navigate with our RV Safe GPS mobile app.
  • and much more...
Try RV LIFE Pro Today
Back
Top