Solar Upgrade
FWIW, over the last couple years I have replaced all my interior lights with LED replacements. Get the right kind, you get same or better light with about 1/4 power usage. Most of mine came from Star Lights (
Porch LED Lighting | Automotive LED | Motion Lighting 12 Volt | Home | - Star Lights, Inc.).
Then I had to replace my batteries, one failed, so went with AGM sealed. Best price was at Sams Club and WalMart.
Decided to upgrade the solar part roughly $1000, and I did the work. You could double that if you had a dealer do it. Most of the stuff came from a place called Mr Solar (
Solar Panels • Residential Solar Power Kits) : 2 each BP485J 12v solar panels, 4 each Flush Mount Kits (mounting brackets (I used 8 mount points per panel)), 1 each 72" #10/2 Intermodule Cable (between panels) , 1 each XX' #10/2 Output Cable (Length will depend on where you mount them.), 1 each SSD-25Rm 25 Amp 12 v Morningstar SunSaver Duo with Remote Meter (this is the solar controller with remote metering. From Home Depot or Lowes, a outdoor junction box, hole on bottom, 2 holes on side and matching removable water tight lid, (mounts on top of roof where old solar cable came out). From Bulk Wire (
Bulk Wire: Online Shopping for Electrical Wire & Cable, Hookup Wire, Magnet Wire, Teflon Coated Wire, Red/Black Zip Cord) about 75 foot of #10 Red/Black Zip Cord. This is the important part. You need to replace the original solar wire with something heavier, and if I had to do it over again, I woudl use #8 in stead of #10. #10 is marginal for the lengths required. The Output Cable from Mr Solar is much too stiff to run from the roof to the bottom half of the HiLo. The wire bundle MUST be flexable, as it folds as the top is lowered. You have to take a lot of stuff apart, and it is a pain in the @$$ to get the #10 run. The zip cord runs from the junction box on the roof, down along the wire bundle (this depends on where yours is) thru the cabinet, behind the toilet, under the bathtub, into the refrigerator area. I had room (barely) to mount the remote part of the solar controller here. The zip cord goes from the roof junction box to the solar controller input. The output of the solar controller goes to the battery directly. Took me half a day to get this simple cable run. From the refer compartment, run along side the water and electric wires, under the tilt out, into the waterheater/pump compartment. Drilled a hole and used some vinyl tubing (1/2" ??) to protect the cable as it now goes under the chassis to the battery compartment. 30Amp fuse at the battery, just in case of shorts sometime (NAPA fuse holder, typical for car) Had to use a fishtape to get the wires thru the tilt out. Again, #8 would be better than #10 throughout, less voltage drop on that length of cable. The stuff that is in there is NOT heavy enough wire, too much loss, might burn it up with max charge. The remote meter for the solar controller is mounted next to the monitor panel by the refer. It comes with a 25' cable with RG 45 (??) telephone type connectors, they just plug in. Had to take the external shower panel apart, disconnect water temporarly, to get the cable run. That was another pain. Make sure you have new gaskets for the water connectors. You will also need some cable ties, a tube or two of RV calking (the kind that is UV resistant), about a week in good weather to do the work, ear plugs for the wife so she can't hear you swear. Probably some stuff I missed, but that is about it.
Here is some Pictures:
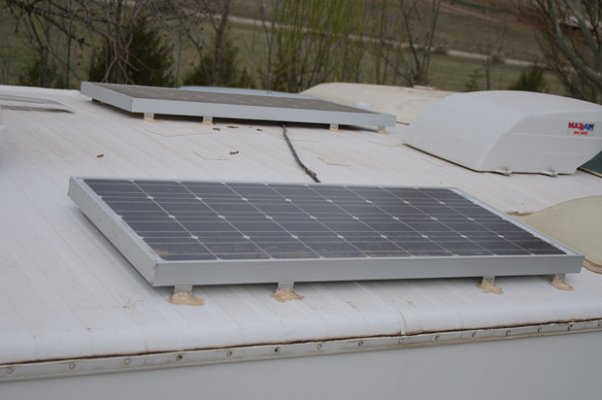
Roof 1 - Drivers side, solar panel. Black cable from panel to junction box. Note the 4 mounting feet. (8 total per panel) Panel must be at least an inch above roof for venting heat from bottom of panel. The feet mount to the panel with 1/4" Stainless steel bolts. For the 8 feet, I marked location, drilled a small (1/16" ?) hole to start Stainless Steel or Galvenized #10 x 1/2 hex head sheet metal screws, (CLEAN THE FOOT AREA) put lots of calk under each foot, some on the screw, (ya gotta have the cable attached first!) and screwed to roof. More calk on top of screw & foot, make sure it is a FULL seal around the foot. Look close on the picture of the roof, you can see some patches. These are where the screw holes for the old (I had 3) solar panels were. The patches are EternaBond 4" wide, by about 4" long for each old hole. Make sure you clean and rinse the areas for the new solar feet and any place the patches go. I used Simple Green (Phospher based) (Home Depot) and lots of paper towels. In fact, I cleaned rinsed this whole back half twice to make sure everything bonds with the roof, and just before I patched or mounted the panel, cleaned and rinsed again.
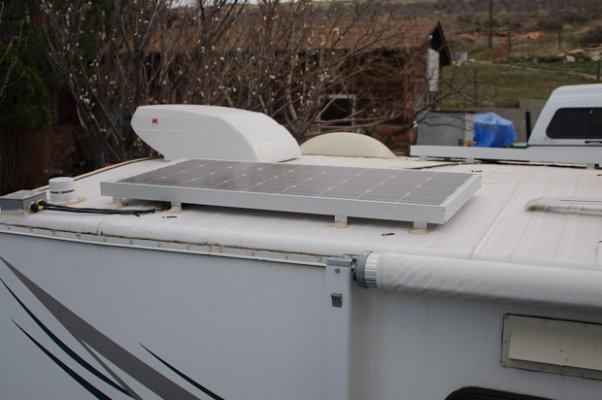
Roof 2 - Passenger side, solar panel and junction box. The individual solar cables run into this box. The box is located where the old solar cable came up through the roof.
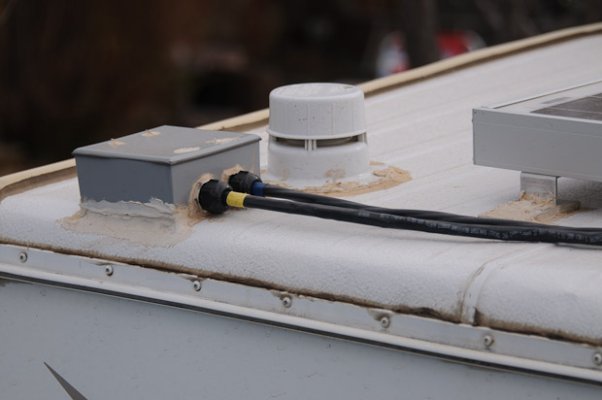
Roof 3 - Junction box. Lots of calk under it. Has 4 screws into roof inside box. The black knobs came with the cables from Mr Solar, water tight rubber and plastic seals, plus my white calk around them. The box lid has 4 screws which I also calked. There is a single hole on the back side (not shown) opposite the 2 cables that I also sealed with calk. The box has a hole in the bottom and a cable clamp inside for the #10 Red/Black Zip cord.
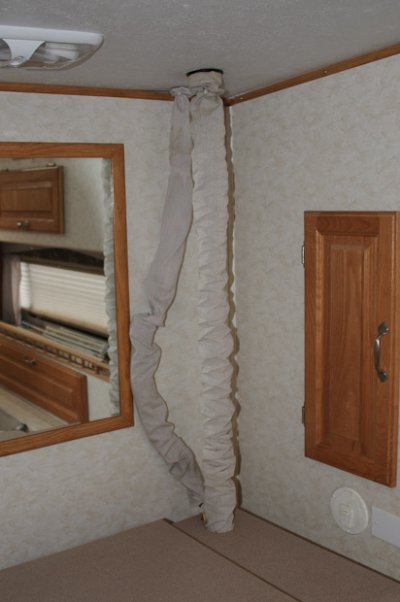
Cable Bundle - You can see the vent pipe and the cable bundle. Because this flexes at roof, at cabinet, and in the middle, it needs to have flexable cable. The Mr Solar cable is 7 strand bendable (not flexable) and cannot be used here. The zip cord has 105 strands in it. I left a couple extra feet of zip cord in the cabinet incase it ever breaks at a flex.
(No Picture ) - From that cabinet (which you have to take apart), behind the toilet, under the bathtub, to the refer compartment.
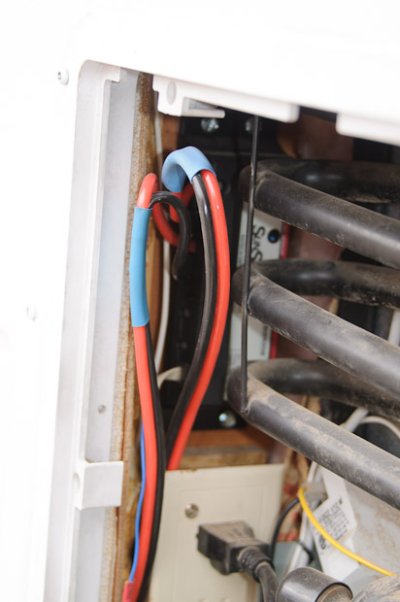
Controller Mounting - This is the refer compartment. You can see in input and output Red/Black Zip Cord. The blue stuff is shrink tubing just to keep the zip cord from splitting apart. To the immediate right of the zip cord peeking thru the refer pipes you can see thte controller (black, white with some letters, and red strip) mounted sideways with a strip under the ends to allow venting underneath it. Tough place to work.
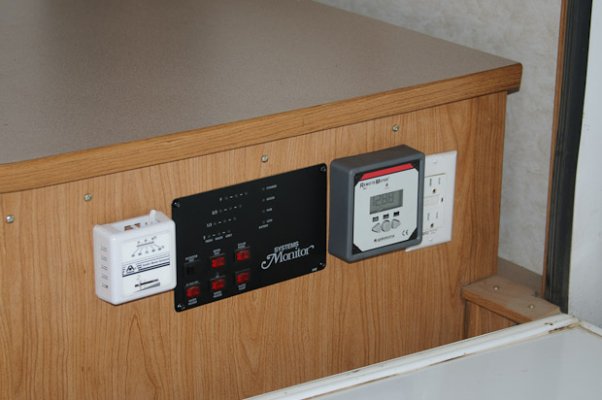
Remote Meter - Shows location I mounted it on the side of the cabinet by the refer. I did put a 1/4" wood backing plate inside for the screws that mount it. Another cabinet to take apart on the inside, both to run the remote cable, and the backing plate.
Cable Routing - Refer compartment is just behind the tires, then the tilt out, then the water compartment. Cable is on the interior of this part, then drops through the floor at the front (behind water heater). Watch out for the steel frame members when you drill here, plan ahead.
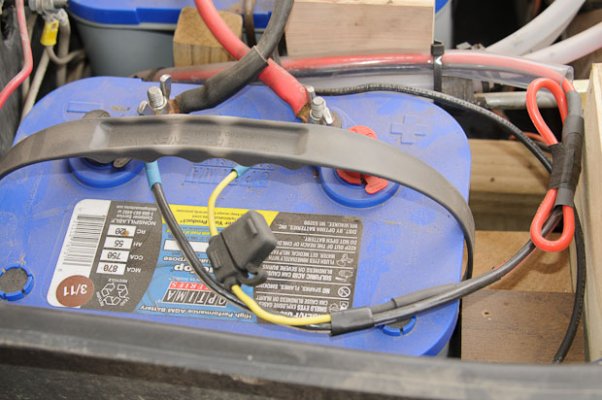
Battery Compartment - Here are the AGM batteries (2), the waterproof fuse with yellow wires and the red/black zip cord with an extra foot looped in a figure 8. Notice it goes through some 1/2" vinyl tubing and a black cable tie.
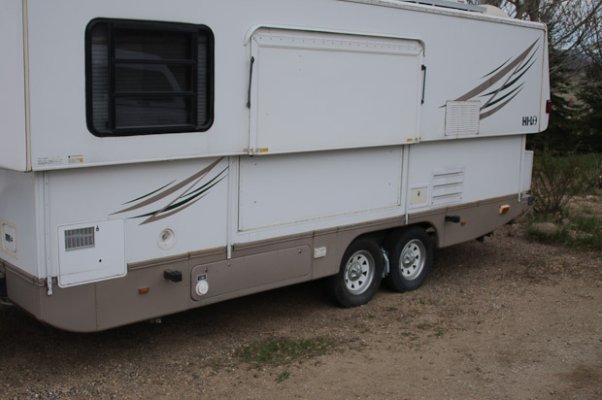
This is a 2507C if you want to look up the layout. The floor is about 20 foot long, Hilo measures from the hitch to the spare tire (25'). You can see why I used almost 75 foot of wire, I had about 10 ' left over. Get either 1 100' roll or 2 50' rolls if you mount the controller in the refer compartment like I did. What ever you do, you do not want to splice the cable!
(It appears that the HTF only lets me upload 5 files at a time. Will try to add the other 3 in another post.)

