HiLo Repair In Butler, Ohio Is Alive And Well

retiredcamper47

Senior Member
Joined
May 27, 2010
Messages
1,419
Location
Ohio North Coast
I talked with Jim & Rob and they are open for repairs. Here's the info:

J & R Repair
145 W. Elm St
Butler, Ohio 44822

Phone # 419-883-3001

Fax # 419-883-3002

Email - jrrepair@centurylink.net

Jim is Jim Seals and Rob is Rob Laher. The repair facility is at the original location. They had to get different phone numbers due to the change in ownership.
 
That is good news! Please don't forget about your local Hi-Lo dealer, he needs to have some Hi-Lo repair business also.
 
Great Dealer if someone needs one here in Western NY.

That is good news! Please don't forget about your local Hi-Lo dealer, he needs to have some Hi-Lo repair business also.

I agree! Your local dealer is a great source for us Hi Lo/ Tow Lite Owners. I just had to have my cables replaced on my 1998 Tow Lite. These were all the original ones from 98 so after 1 let go, decided to get them all replaced. I took my trailer to Mantelli Trailer Sales & Service in Lockport NY. I bought the trailer there in 1998 and this is the really the only thing that I have done to it. They did a very nice job on a job that I had no inclinations of doing. Seeing they have been a Hi Lo Dealer for many, many years, their service guys did an excellent job.They still have a few BN Hi Los in stock at hugh discounts if anyone is looking. The Owner told me that even though Hi Lo is out of the business, the majority of the parts you can buy all over.
 
national list

If someone had the info and/or the resources; a nationwide listing of
dealer or "rv" shops that have experience working on Hi-Lo's would be very
helpful. I'm sure throughout the U.S. that there are some shops that do
better work than others. I don't know that I would want to take mine to a
shop that doesn't have much experience with Hi-Lo's except for some the
common stuff (wheels, electrical).
 
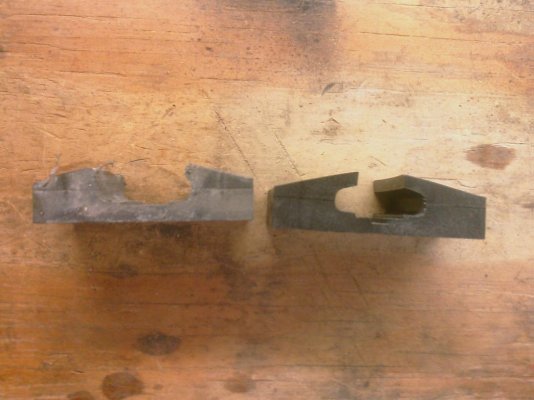
I ordered some glide blocks and suspension parts from J&R Trailer Repair. Rob was most helpful with getting me the parts, actually they arrived the very next day.
I was very pleased with their operation and look forward to doing business with them in the future.
I installed the three glide blocks today in about an hour and a half, I think that I'll attack the suspension tomorrow.

Thanks Rob!!
 
Last edited:
How did you replace the glide blocks?

Good information and thank you.

Please explain exactly how you replaced the glide blocks. Did you raise the entire the top half with jacks?
 
Good information and thank you.

Please explain exactly how you replaced the glide blocks. Did you raise the entire the top half with jacks?

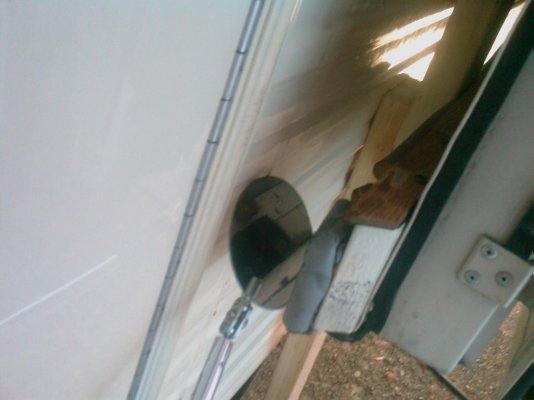
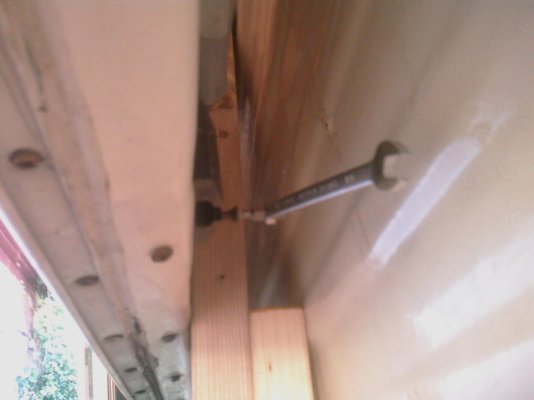
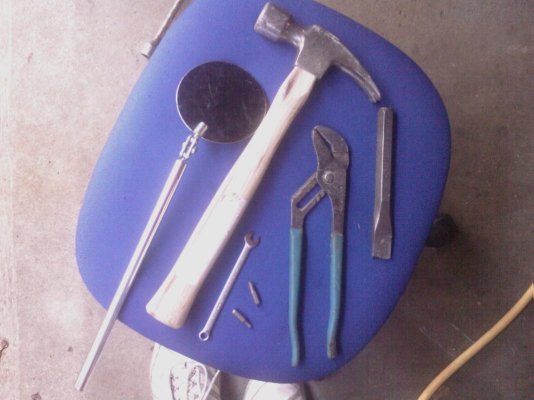
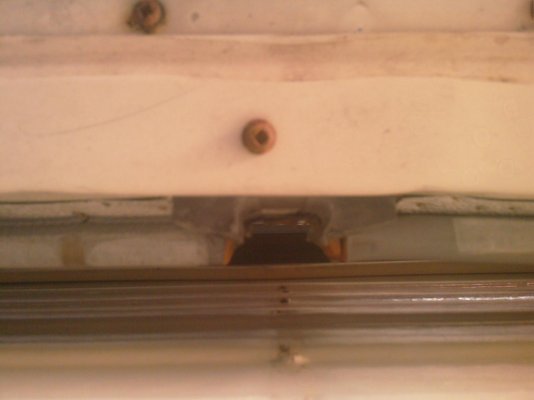
No, I took the guide rails off where the glide blocks need replaced and the ones across the camper from them. lowered the top about 16" pulled the top away from the bottom and pushed two 2x4"s in between. The bottom screws were tight to remove so I removed the top ones (with an R2 tip and a 1/4" wrench) and split the glide block off of the bottom with a cold chisel then backed them out with channel locks. I took me about 2.5 to 3 hours to do three blocks, that's from start (before learning curve) to finish. I used some almond silicone caulking in all of the holes behind and through the guide rails before reassembling.
 

Attachments

  • IMAG0253.jpg
    IMAG0253.jpg
    87.2 KB · Views: 49
  • IMAG0259.jpg
    IMAG0259.jpg
    93.6 KB · Views: 43
  • IMAG0256.jpg
    IMAG0256.jpg
    95 KB · Views: 43
  • IMAG0255.jpg
    IMAG0255.jpg
    91 KB · Views: 48
  • IMAG0258.jpg
    IMAG0258.jpg
    90.3 KB · Views: 44
Last edited:
Great post, vannooch! I can visualize what you did here and appreciate the "close quarters" work and having to work "blind". Must have been a whole lot of fun! :D

Do you think you got more clearance by lowering the top only 16" instead of all the way?

Thinking about it, I wonder if you might have gotten more with the top even higher? (I'm not trying to "second guess" here but the top could probably be raised and lowered with the rails out until you find an "optimum" position. And maybe that's exactly what you did!)

- Jack

I tried it higher, the cables are too short and put alot of tension on the bottom rail of the top. I only lowered it 16" because I didn't want to lay down to work on it. Sixteen inches gave me enough play in the bottom rail without getting so low I couldn't work on it from a stool. I'm sure lowering it more would give you more room to work but 3" was enough for me.
 
I tried it higher, the cables are too short and put alot of tension on the bottom rail of the top. I only lowered it 16" because I didn't want to lay down to work on it. Sixteen inches gave me enough play in the bottom rail without getting so low I couldn't work on it from a stool. I'm sure lowering it more would give you more room to work but 3" was enough for me.

Of course! *headslap* I hadn't thought of the fact that the suspending cables were shortened with the top up :eek:.

Thanks again for a good explanation of how you did this!

- Jack
 

New posts

Try RV LIFE Pro Free for 7 Days

  • New Ad-Free experience on this RV LIFE Community.
  • Plan the best RV Safe travel with RV LIFE Trip Wizard.
  • Navigate with our RV Safe GPS mobile app.
  • and much more...
Try RV LIFE Pro Today
Back
Top