Levels

NE

Neal and Bev

Guest
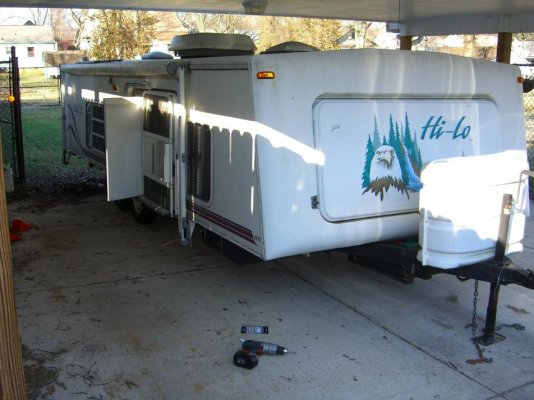
I decided to add a couple of levels on the outside of our Hi-Lo to aid us in setting up the camper. I've never done this before so I just came up with my own method for it and there may be a better way.

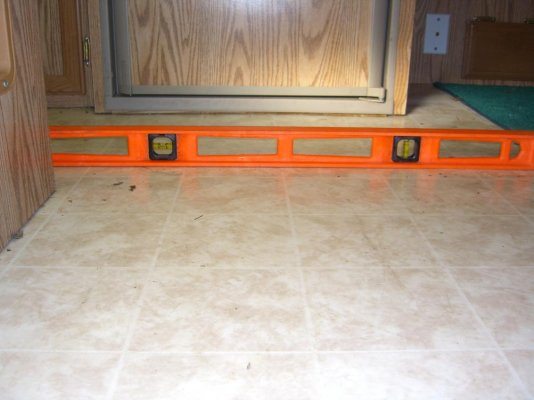
I figured I needed to start by getting the camper level so I pulled it onto the carport and unhooked it. I laid a 4-foot level on the floor of the camper and I used a jack under the frame, on the side of the Hi-Lo near the wheels, to raise it just a bit to make it level side to side. I used the tongue jack to level it front to back.

When the 4-foot level on the floor of the camper showed level in both directions, and after double-checking that the top of the Hi-Lo was all the way down, I installed the levels.

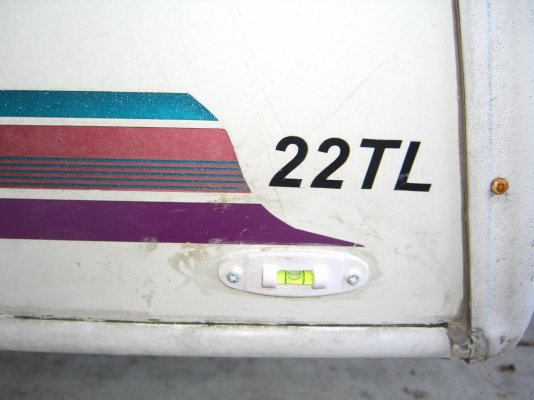
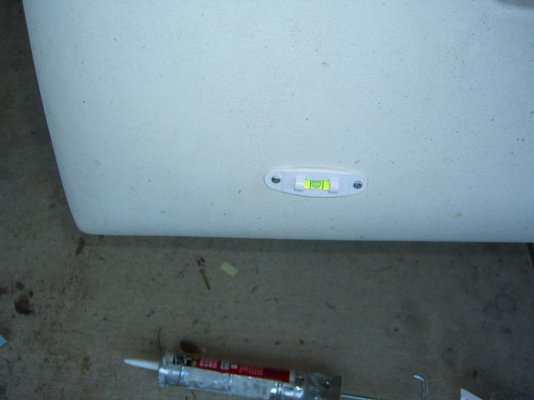
I put them on in the same place that I'd seen them on other campers. I put one on the lower curbside near the front. This one would be for front to rear leveling. I put the other one near the front on the curb side. This one would be for side-to-side leveling.

Since the camper was level I installed both gauges so that the bubble was center. The screw holes were a bit loose so I put some caulk on the back of the levels to help stabilize them and to prevent any water from finding its way into the screw holes. Stick on levels might have been a better choice.

I figure to use the side to side gauge (the one on the front) when parking the trailer on the camp site, if the gauge shows low on one side I'll pull up, lay a block on the ground and back up onto it, repeat process until the trailer is close to level side to side.

After unhooking the camper I'll use the tongue jack to level the trailer front to back using the level on the curb side of the camper.

After everything is setup and we are inside the camper if the stovetop is out of level I could always tweak the stabilizers or tongue jack a bit.

I'm sure many of the more seasoned campers out there can do this in their sleep but I like having the added visual assistance.

Neal
 

Attachments

  • Level 0.jpg
    Level 0.jpg
    93.6 KB · Views: 229
  • Level 1.jpg
    Level 1.jpg
    87.1 KB · Views: 212
  • Level 2.jpg
    Level 2.jpg
    91.7 KB · Views: 224
  • Level 3.jpg
    Level 3.jpg
    97.1 KB · Views: 212
Last edited:
Your set up is grate, YOU HAVE TO HAVE THE TRAILER LEVEL TO START. I use a 2 way level on the toung by the toung jack It has 2 bubbles one front to rear and one side to side in the same holder. This makes it much easer to level the trailer you can see the left to right with out unhooking, you can level and set your trailer level with boards or blocks then after you unhook and level front to rear with the toun jack you can see both with out moving.
Sam
 
For side to side leveling, I purchased a plastic two foot level. I place the level on the floor or on the rear bumper. I estimate how far the two foot level is out of level. I take that dimension and multiply that by three because the tires are about six feet apart. That gives me the amount of blocking that I need to add to the low side. I make final adjustments with the stabilizer jacks. It's quick and easy. There's no need to keep moving on and off the blocks.
 
Hoppy levels

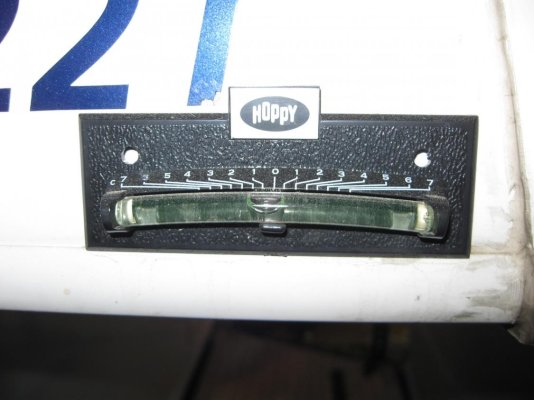
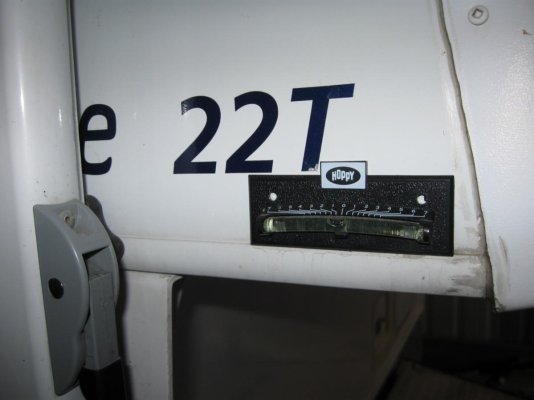
I'd like to put in a plug for some Hoppy brand stick-on levels I've used for years. They provide a direct read of how many inches off level the trailer is. They come in a set of 2, one for the front for side-to-side level, and one for the side for front-to-back level. The graduations are calibrated differently.

I've found them at WalMart stores in the US. Here in Canada, WalMart carries some unbranded "equivalent" levels that don't work nearly as good as the Hoppys do.
 

Attachments

  • IMG_0656.jpg
    IMG_0656.jpg
    87.5 KB · Views: 130
Hoppy level size

Looking at the picture I posted, I realize it's hard to tell how big the Hoppy levels are. They're not real big, about 3-4 inches long total.

Here's another picture, maybe easier to tell the size. Front and side ones are about the same size, just different graduation markings.

The last set I bought, a year or so ago, was about $6.
 

Attachments

  • IMG_0655.jpg
    IMG_0655.jpg
    67.4 KB · Views: 109
Last edited:
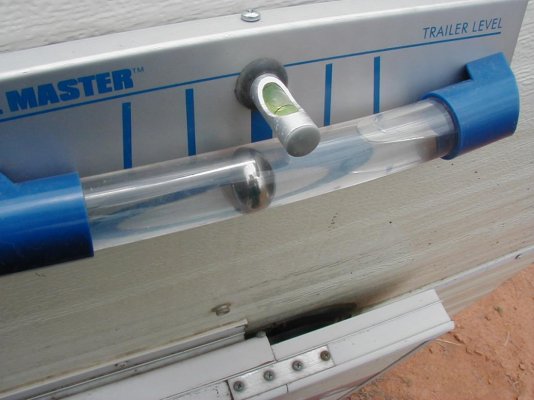
Most of the camping I do is dry camping on BLM land or unimproved campsites. For Leveling I use a Level master brand. I insalled it useing about the same method as you described. It is about 6 inches long and has a huge "Bubble" visible using my rearview mirror. I can dig small holes or add blocks and then pull forward until it's level port to starbord. Then I unhitch (after choking) the small level jutting out allows me to see how level it is as I crank the tongue jack. I think they are about $20 I have had the trailer parked and level by myself. The picture was taken out in some open desert.

ooops LEVEL Master.
http://www.campingworld.com/shopping/item/jumbo-level-with-mounting-bracket/30939
 

Attachments

  • pic 042.jpg
    pic 042.jpg
    88.2 KB · Views: 94
Last edited:
Has anybody added scissor jacks to their HiLo? I called the local junk yard and he said he'd sell them to me for $10 each, I can pick out the ones I want.
 
Has anybody added scissor jacks to their HiLo? I called the local junk yard and he said he'd sell them to me for $10 each, I can pick out the ones I want.


I would not use scissor jacks to level the trailer. The frame of a hi-lo is not designed to take that type of load. It may twist or bend. I would use blocks under the tires to level side to side and the touge jack for front to back. Only then do you lower the corner jacks to keep the trailer from rocking.
 
Leveling off

Lots of interesting info in this thread about supporting and leveling off the hilo.

Again talking about screw jacks. I'm thinking that they could be used as support jacks after you have leveled off.

Later Tim
 
Leveling

Hi-Lo manual says the scissor jacks or jack stands are only for stabilizing and not leveling the trailer. As previously mentioned, the frame isn't designed for that stress. Get it out of whack and you really have a whole set of new problems with the rigging.
 
The only thing I would add to this discussion is this: The goal is get the fridge as level as possible. I recently learned that the best place to check the level is in the freezer compartment of the fridge. Checking levels on the camper floor or on the cabinet above the fridge may not be accurate. Putting a level in the freezer will give you the best measure of levelness.
 
That's pretty smart Greg! You're really only leveling things for the refrigerator (and comfort), so why not use the important item? Wish I'd thought of that.

- Jack
 
I'd like to take credit for this, but I'm quoting from the Good Sam magazine: Before beginning a trip, with the refrigerator empty, place a circular bubble level either in the center of the shelf in the freezer compartment, if the refrigerator indeed has one, or in the center of the bottom of the freezer compartment if there is no shelf in the freezer. Next, level the coach so that the bubble is in the exact center of the level. Then, permanently mount a set of corresponding levels anywhere that is convenient for you. In many travel trailer applications, mounting the levels on the exterior corners on the front of the trailer, near the hitch, is most convenient.
There! Now what could be simpler than that?
 

Try RV LIFE Pro Free for 7 Days

  • New Ad-Free experience on this RV LIFE Community.
  • Plan the best RV Safe travel with RV LIFE Trip Wizard.
  • Navigate with our RV Safe GPS mobile app.
  • and much more...
Try RV LIFE Pro Today
Back
Top