2007 23C Rebuild

window cut out

When DH and I removed all the windows to realign with butyl tape we also found one window opening was cut a little big. DH shimmed it up. Many owners have come across this problem when they were rebuilding.
 
I think you're going to have a "museum piece" when you finish. Perhaps it should go to the Smithsonian, when you're finished using it.

- Jack
 
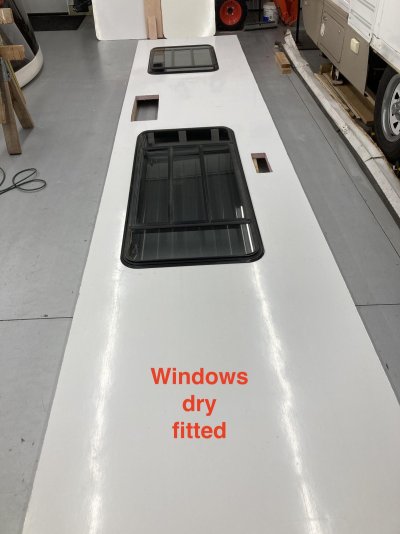
I then placed the actual windows on the tracings to verify (in my mind) that they were the right size. Which by the way, the larger window was originally cut a little bigger than needed so I remarked my plywood.

Great idea. Some of those window openings, like you noticed... are a bit 'overlarge.'
 
I figured I better put an update out there before I forgot where I left off.

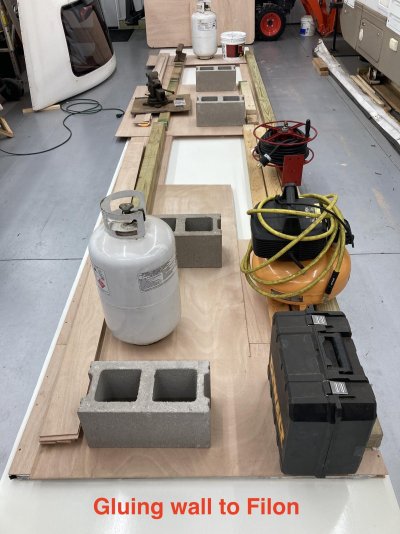
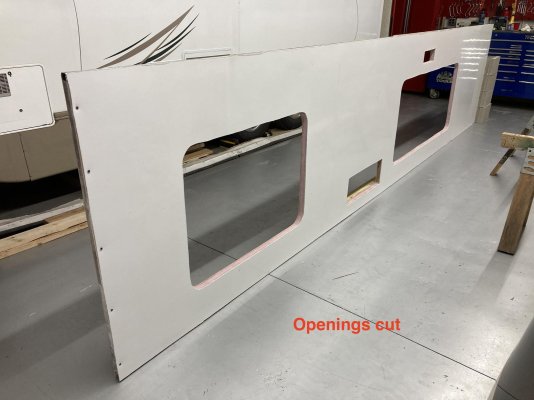
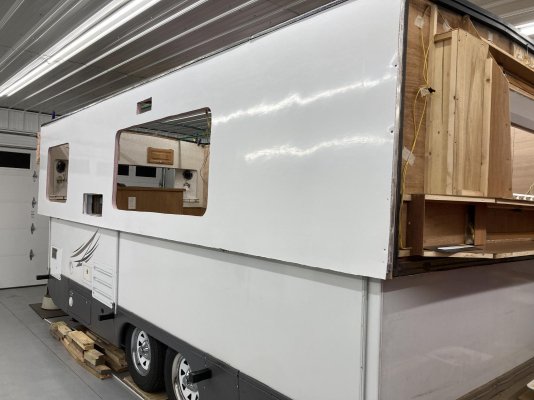
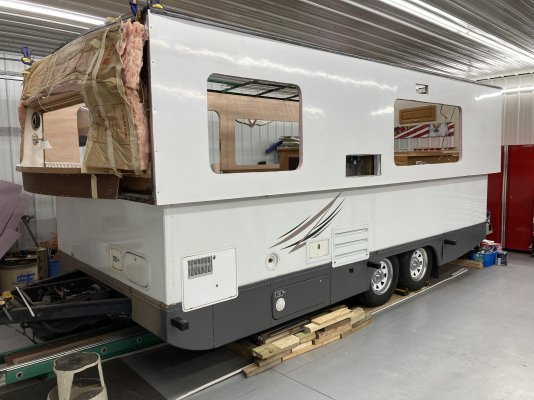
The left wall Filon is glued and complete with the openings cut out and windows fitted. The cable brackets are mounted to the 4x4. Once I get the third outrigger welded onto the frame for the wall to sit on when lowered, I will be ready to mount that wall.

Then onto the ceiling/roof, yay!
 

Attachments

  • 95BC3064-40C4-4C1A-A443-25118C490335_1_201_a.jpg
    95BC3064-40C4-4C1A-A443-25118C490335_1_201_a.jpg
    226.7 KB · Views: 4
  • 2B5F27F2-1D63-4BBF-9A6E-90D6750A248E_1_201_a.jpg
    2B5F27F2-1D63-4BBF-9A6E-90D6750A248E_1_201_a.jpg
    146.7 KB · Views: 4
  • D3E5D168-C688-4C64-A5EA-EEBF55C2A95D_1_201_a.jpg
    D3E5D168-C688-4C64-A5EA-EEBF55C2A95D_1_201_a.jpg
    137.3 KB · Views: 3
Last edited:
Sometimes, it really helps to have heavy stuff lying around, doesn't it? Pretty work, as always!

- Jack
 
Keep up the good work.

Cheering you on as you get to your ceiling/roof rebuild. Do you have to rebuild cabinets or anything else in the interior?
 
Cheering you on as you get to your ceiling/roof rebuild. Do you have to rebuild cabinets or anything else in the interior?

Thanks! Fortunately all the cabinets are in great shape, so that will speed up the process.
 
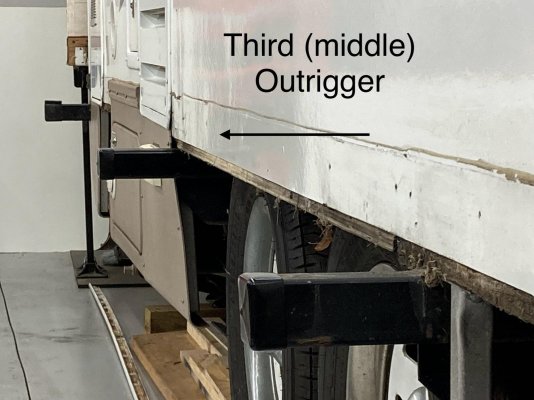
The third outrigger

I now have the third outrigger installed on the left side. It is placed right in front of the front axle, almost center of the camper. I wanted/needed a third one on the right side to help prevent doorway sag. So I figured it couldn’t hurt to place one on the left side as well. It may reduce any excess stress on the upper half going down the road.
 

Attachments

  • IMG_4478.jpg
    IMG_4478.jpg
    190 KB · Views: 4
Great modification, Rahn! I think two outriggers are too little for longer trailers. As far as I can tell, they work fine on the shorter ones like mine though. Galloping down the road, especially on a couple of the back roads I've taken, has got to put a lot of bending stress on the center section of the upper half. A middle outrigger will certainly counter that.

- Jack

That was my thought as well. And with the new outriggers almost in line with the A/C, it can only help prolong bad things from happening.
 
It seemed like a good day to work on some odds and ends.

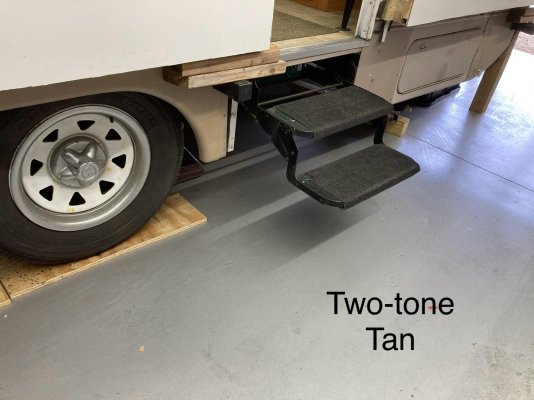
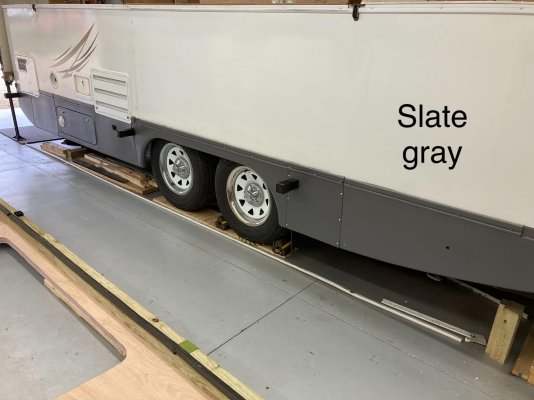
The original tan skirting looked, well, old! And it was different shades of tan. So today I tackled the left side. The DW vocally approved and I like the new look!
 

Attachments

  • IMG_4499.jpg
    IMG_4499.jpg
    190 KB · Views: 11
  • IMG_4498.jpg
    IMG_4498.jpg
    161.5 KB · Views: 8
Gray looks super on these, nice visual upgrade. I like that new outrigger too...

So question for the experts here: the 24'er that i have never had any at all. And has the roof sag to prove it, especially over the entry door where the wall is especially flexible. If I try and add something at this point, am I just asking for more problems as it now re-flexes back the other way?

I could see it either helping, or it could open up some gaps in new places and be more of a problem than a solution. Keep in mind I rebuilt the side without an outrigger added, so it has been rebuilt sag and all. One of those "wish I had thought of that problem at the right time" things.

Great question! And the only issue I can think of would be possibly the area around the windows that would flex just enough to allow water penetration? But I also wonder if the wall is dry would it even/ever flex? I can see why a damp wall would eventually flex/sag but I don’t know if a dry wall would unless the wall actually cracked.

As you can see, I don’t really know, so I’m not an expert on this, and have limited experience.
 
Northern, I'm hardly an "expert" on this, but remind me - Didn't you reinforce that section of the side better than the original framing? I seem to recall you doing that.

If so, I think you've probably taken care of the issue. And, if you were to install a third set of outriggers now, since you HAVE some sag built in, the roof would be supported on just that new set until things bent back the other way. This would put a lot of stress on joints in this area and, like you, I'd be worried about it opening new gaps.

I'd say, "If it ain't broke, don't fix it."

- Jack
 
Thanks all, good thoughts.

I did do a little bit of work in the area, but sometimes as I look at the sag I wish I would have done better. You're probably right about the 'ain't broke don't fix it.' And you've got a great point about bending it back the other way, even hammering it back the other way because of a bad bounce or two. That would probalby make it much worse.

Okay. Choosing to live with it and moving on ... and I'll stop looking enviously at the ones that have straight roofs :)
 
We have lift-off!

So far, so good! I just need to tweak the cables a little bit to get it perfect!
 

Attachments

  • 5DA24865-2E91-43B8-B118-55A3D5541A72.jpg
    5DA24865-2E91-43B8-B118-55A3D5541A72.jpg
    176.8 KB · Views: 8
  • 6EF20F0D-6FFD-450C-8DED-FCCBEECB974F.jpg
    6EF20F0D-6FFD-450C-8DED-FCCBEECB974F.jpg
    227.9 KB · Views: 5
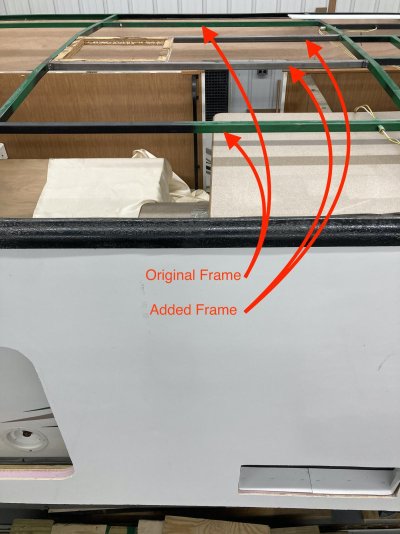
Roof Rail Frame Addition

Moving on to the roof section. I don't question the overall strength of the original frame, but it bothered me that the second bay from the front of the camper was only two 1" rails and that is also where the doorway is located. I also am aware that the majority of the strength of the camper comes from the sum of all the parts (i.e. plywood, foam, and frame.)

But, since I had an open canvas (frame) I decided to at least add a little more stability to that bay. (Both end bays of the roof frame are also 2-rail frames, but seeing how the end truss sits on the end frame, that doesn't bother me.)

So, I added two more rails to the second bay. I figured it was a good time to do it and it won't add more than a couple pounds to the total weight.

I also spaced them just wide enough to stick in the frame work for the front roof vent.

And yes, the reason for the multi-color frame is to use up almost empty cans of paint.
 

Attachments

  • F1B8D024-F6CB-4CF1-A25B-4DAD9D67C639.jpg
    F1B8D024-F6CB-4CF1-A25B-4DAD9D67C639.jpg
    190.8 KB · Views: 11
Last edited:

Try RV LIFE Pro Free for 7 Days

  • New Ad-Free experience on this RV LIFE Community.
  • Plan the best RV Safe travel with RV LIFE Trip Wizard.
  • Navigate with our RV Safe GPS mobile app.
  • and much more...
Try RV LIFE Pro Today
Back
Top