2007 23C Rebuild

Red Green

Senior Member
Joined
Dec 8, 2020
Messages
185
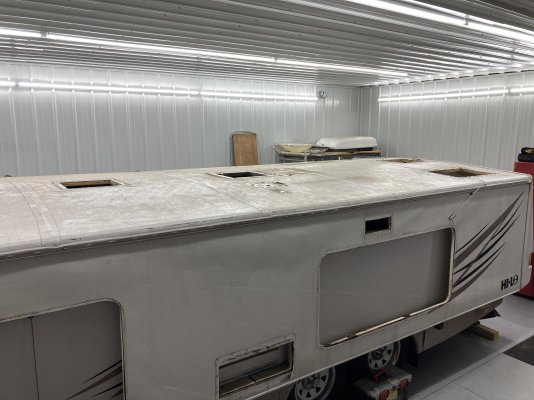
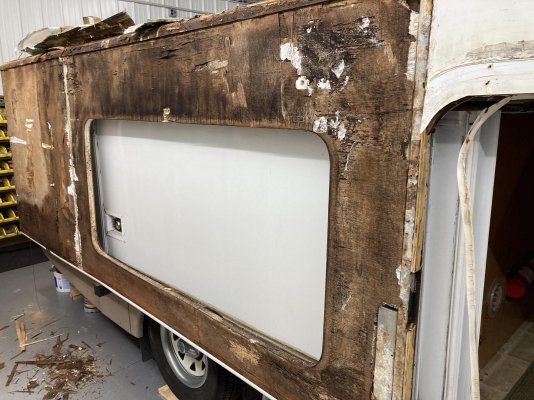
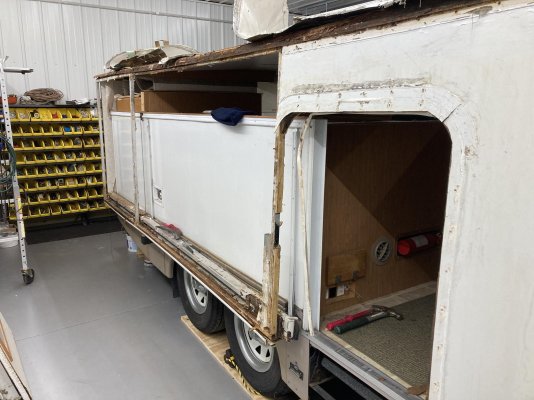
Well, I finally started tearing into my 23’ Classic a few months ago. I have also been working on other projects and so I haven’t really been devoting a lot of time on this yet. But, as I am getting deeper and deeper into this, my 23C has become a love/hate relationship. :)
I have found so many hidden issues that were not visible from the ‘looking at it’ view. I really want to save her, and even though some days, some minutes, I feel like torching her, but I come right back around and I can’t stop myself from doing whatever I need to do to keep her rolling!

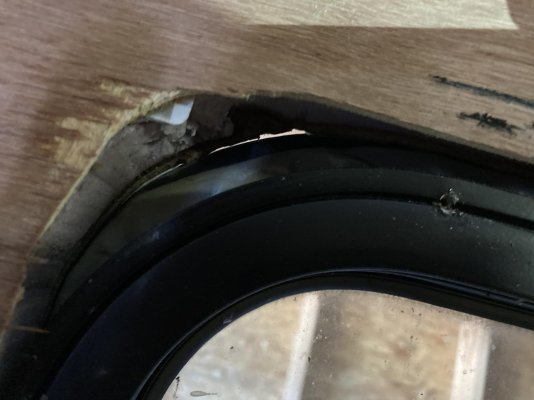
The previous owner (or was it the owner before him?) rebuilt the right front corner from the door forward. But it too was showing the affects of water damage. While taking out the front window, I find the factory cut the upper front corner way too wide. And even though the previous owner had added excessive amounts of silicone and calk to that window, I could actually see daylight out past the frame from the inside after removing the interior holding trim band.

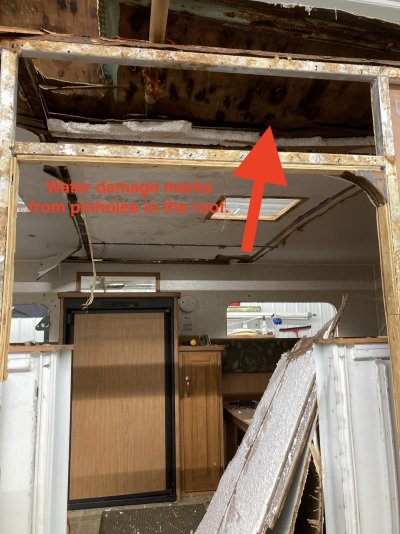
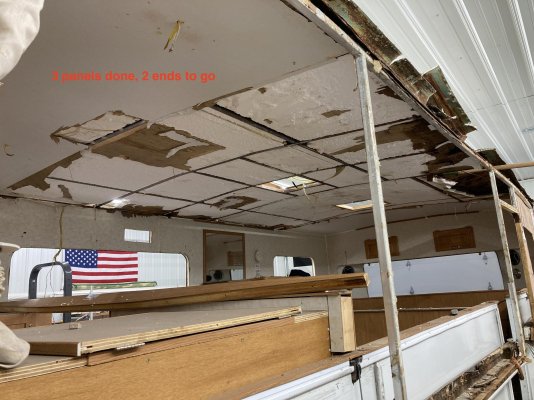
Also, the ceiling was wet above the door and above a few of the interior cabinets. I was thinking maybe it was just an ‘old’ leak since the PO used eternabond tape on everything! Roof seams, edges, anywhere and everywhere. Talk about a mess removing some of that to get at the screws, but I have most of that removed and debating whether to attempt to clean up some of the parts or just replace. (Stay-tuned!)

I did find the roof had numerous pinholes, and that was why everything stayed damp and wet. More on that later as well. (It has been in the shop for a little over a year, and the luan is still damp!)

So, I will do my best to keep you up to date. I am very thankful for r67northern’s rebuild thread from 2016. I have been reading it, re-reading it, and re-re-reading it for guidance and inspiration.
 

Attachments

  • 4B39A614-E8C4-403C-81E0-A4B245D0DEB9.jpg
    4B39A614-E8C4-403C-81E0-A4B245D0DEB9.jpg
    129.4 KB · Views: 23
  • 63CDA3FE-0224-468D-AFD7-CEF1F17DD510.jpg
    63CDA3FE-0224-468D-AFD7-CEF1F17DD510.jpg
    209.8 KB · Views: 20
  • 54A4A947-DAEA-4883-91EA-D2A8EFA9E534.jpg
    54A4A947-DAEA-4883-91EA-D2A8EFA9E534.jpg
    303.6 KB · Views: 28
  • A2F18DBA-955B-4EC0-BF44-AA08CF8E8A64.jpg
    A2F18DBA-955B-4EC0-BF44-AA08CF8E8A64.jpg
    227.2 KB · Views: 29
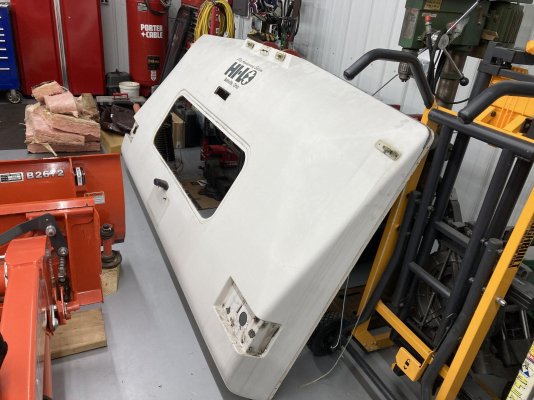
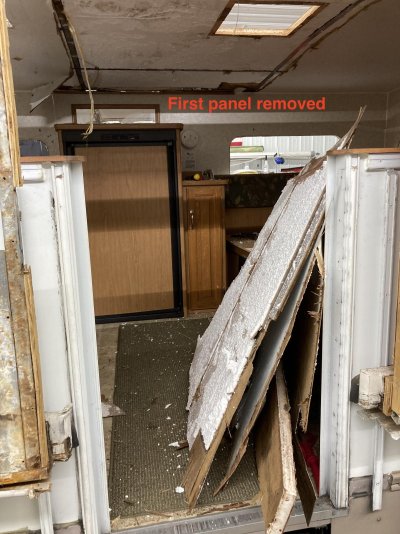
I did get the right front corner outer wall piece removed, it was stuck really good in a few places. I am going to need to freshen up on my fiberglass repair technics that I learned in repairing aircraft in the military, long, long, ago!

Also, figuring that I will replace the roof radius piece with new. I could probably use the old one, but it is rusted pretty bad on the lower edge on both sides of the camper.
 

Attachments

  • 7CC55396-F689-4A98-B44E-568C916995FC.jpg
    7CC55396-F689-4A98-B44E-568C916995FC.jpg
    211.3 KB · Views: 25
I wonder if expanding foam (such as Great Stuff) would work to fill those big gaps, as opposed to silicone caulk? Then, you could trim it as needed and apply a better choice of caulk such as Lexel.

It's quite a project you have going, though. Keep us updated. I find my trailer is a constant project!

- Jack

Thanks Jack, my current thought is that since I am getting this deep into the whole thing, I am going to rebuild both side walls starting with just the frame. That way I can cut the windows to the correct size.

Also, I am thinking of repairing the fiberglass by rebuilding it. Around the windows where needed, and where the PO’s cut it into 2 pieces. (Also, the small tears I may have inflicted on the siding while removing it. :eek:
 
So far this is my to-do list:

1. Remove both sides and completely rebuild them. Interior wall, Foam-board Insulation, Exterior Luan, reattach fiberglass panels and repair fiberglass cracks, cuts, and seams.

2. Repair roof sag at door. Cut a piece of steel plate to mount on the interior upper sides of the door and over the door to the ceiling. Once in place, the roof should hold its shape and shouldn’t be a problem going forward.

3. Remove ceiling and roof, replace all materials including radius curve.

4. Rebuild a little bit of the rear bathroom window frame where moisture rotted some of the radius curves. (Pictures later.)

5. I am sure I will find other issues as I continue. Stay tuned!

I know I will be tearing out some ‘good’ material here and there along with the rotted material, but instead of trying to mix and match, I want to make sure that everything will be good for the ?? years. I don’t want to have to redo this again.
 

Attachments

  • 9288BF8C-B785-43E1-97EC-3C2A61A2751C.jpg
    9288BF8C-B785-43E1-97EC-3C2A61A2751C.jpg
    189.4 KB · Views: 19
  • E7B88963-A6F1-44FC-9F6C-5403411CB0B5.jpg
    E7B88963-A6F1-44FC-9F6C-5403411CB0B5.jpg
    306 KB · Views: 24
  • FBCD7717-75F7-4795-95BD-3A9A536BB8CC.jpg
    FBCD7717-75F7-4795-95BD-3A9A536BB8CC.jpg
    222.5 KB · Views: 16
Last edited:
Welcome to the forum.

Congratulations on such a big rebuild job. DH and I had to rebuild walls due to water damage. I agree it is a love hate relationship!! Nice place you have to work in. As you have found out others have gone before you with repairs. Keep the questions coming. We will cheer you on.
 
Congratulations on such a big rebuild job. DH and I had to rebuild walls due to water damage. I agree it is a love hate relationship!! Nice place you have to work in. As you have found out others have gone before you with repairs. Keep the questions coming. We will cheer you on.

Thanks!! I appreciate the encouragement! And of course the support! I wouldn’t have even considered this without all the advise and information on this forum.

Rahn
 
Thanks!! I appreciate the encouragement! And of course the support! I wouldn’t have even considered this without all the advise and information on this forum.

Rahn

Goodness, those damaged walls look all too familiar…. Good luck, your doing it right, this is going to be great when you’re done! Holler at me or any of us as you go.
 
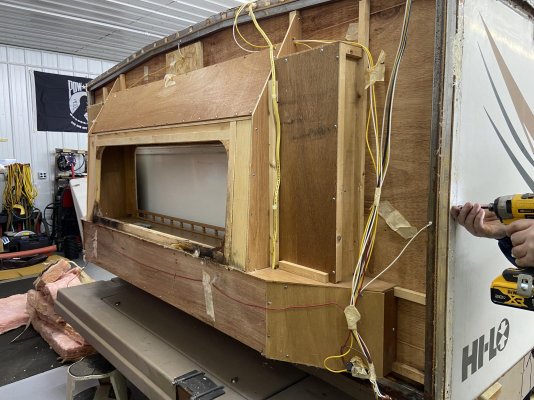
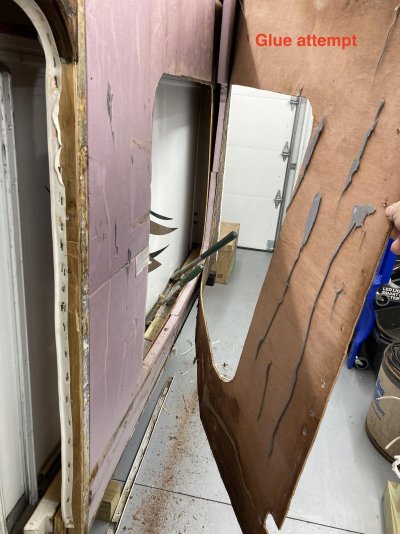
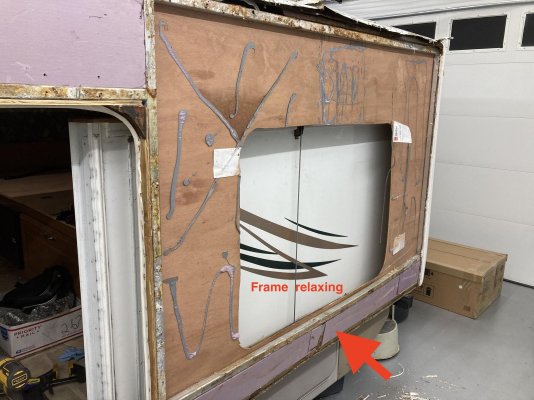
Yesterday was another demo day. I was expecting the worst when it came to trying to tear apart a former repair. I figured it would be almost, if not, impossible to get apart being newer glue and panels. Much to my surprise, the repair was the easiest part of the demo so far. The panels and insulation board never stuck together. About all the glue did was to dent the insulation board.

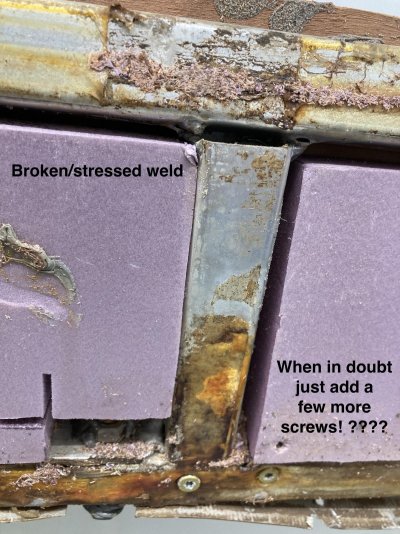
The most disturbing part was how the frame under the front window was twisted. And to think that 1/4 of the roof was depending on this attachment point. Cracked weld and extra screws to hold it all together. Nice!! :rolleyes:
 

Attachments

  • 57234F34-A354-430F-8FCC-FA8860474B30_1_201_a.jpg
    57234F34-A354-430F-8FCC-FA8860474B30_1_201_a.jpg
    235.6 KB · Views: 23
  • 8DB4D582-A4BD-41C4-8F58-8F9E0EEE9FAA_1_201_a.jpg
    8DB4D582-A4BD-41C4-8F58-8F9E0EEE9FAA_1_201_a.jpg
    234.6 KB · Views: 28
  • B7DBF1B9-F4F3-4F16-8F84-99AAF35DEA42_1_201_a.jpg
    B7DBF1B9-F4F3-4F16-8F84-99AAF35DEA42_1_201_a.jpg
    333.2 KB · Views: 28
Those old repairs look awful! I wonder if the PO did them or, if the repairs were done at an RV shop. My experiences with RV repair shops has been less than wonderful. I won't take my trailer to an RV shop for any reason now.

- Jack
 
And since that came apart so quickly, I decided to start on the interior ceiling.

Last week I was trying to pull the aluminum roof off. That was not going well at all, so I decided to sneak up on the roof from below. I didn’t necessarily ‘have’ to remove all the ceiling but my logic seemed to tell me that:

1. If I don’t inspect it all, what am I missing that will haunt me down the road?

2. It seems that replacing the whole ceiling wouldn’t be much harder than trying to scab/fit multiple pieces here and there. (I have experience making that mistake with sheetrock scraps. And other learning experiences. What a headache that can become!)

I was impressed how most of the roof frame was in excellent condition. Just a little surface rust here and there.
 

Attachments

  • C3BDB885-9CC6-4AC5-855F-E95AA6DA92D4_1_201_a.jpg
    C3BDB885-9CC6-4AC5-855F-E95AA6DA92D4_1_201_a.jpg
    264.5 KB · Views: 20
  • D4EC2E80-1AD1-4FC0-9B8E-CFC4AB66FF40_1_201_a.jpg
    D4EC2E80-1AD1-4FC0-9B8E-CFC4AB66FF40_1_201_a.jpg
    252.5 KB · Views: 26
  • 3E32989E-BC4B-480C-8B7F-3540792C4BE8_1_201_a.jpg
    3E32989E-BC4B-480C-8B7F-3540792C4BE8_1_201_a.jpg
    252.4 KB · Views: 29
Those old repairs look awful! I wonder if the PO did them or, if the repairs were done at an RV shop. My experiences with RV repair shops has been less than wonderful. I won't take my trailer to an RV shop for any reason now.

- Jack

I am positive the last PO that had the camper did not do the repair. He knew it was beyond him. He did say he had someone replace the cables for him and few other issues.

I agree, I will spend a few bucks for some tools before I let others learn at my expense. (Disclaimer: There are some great mechanics and craftsmen out there, and they are worth their weight in gold. I just enjoy trying to figure out how to fix and repair things, and do it like I will own it forever. )

Like my dad always said, “If you don’t have time to fix it right, when are you going to find time to fix it again?"
 
Yesterday was another demo day. I was expecting the worst when it came to trying to tear apart a former repair. I figured it would be almost, if not, impossible to get apart being newer glue and panels. Much to my surprise, the repair was the easiest part of the demo so far. The panels and insulation board never stuck together. About all the glue did was to dent the insulation board.

The most disturbing part was how the frame under the front window was twisted. And to think that 1/4 of the roof was depending on this attachment point. Cracked weld and extra screws to hold it all together. Nice!! :rolleyes:

I’d say that’s about 10% of the actual amount of glue needed. That could be generous…

I had to restart a section because the liquid nails was melting the foam and I wasn’t using enough anyway, the results looked like that. I switched products after and am choosing to believe that it’s still holding great!
 
Repairing HiLo

DH used a very generous amt. of heavy duty liquid nails on each sheet of paneling. DH used bondo to the inside of the fiberglass, Use a respirator. The foam.1/8th sheeting and paneling were used. Never had trouble with the Liquid nails eating the foam. DH used a floor roller to press on the walls to make sure each layer bonded. Any rusty metal was treated with Rustoleum. Another forum member used gorilla glue to replace interior ceiling panels.If my memory serves me well DH used a tube of Liquid Nails per 4x8 sheet of panel. Found my notes. Gary K used four ounces of Gorilla glue and 2tubes of HD liquid nails per ceiling panel. My 1990 HiLo has held up well and is still being used by the new owner.Keep us updated.
 
Thanks Leland and Sam for the suggestions and advice. I have also been researching an adhesive called Stabond T-440C for sticking luan to fiberglass and Stabond E-183 for sticking luan to foam board. The videos I have seen on it are quite impressive, but not cheap. I will keep you all posted on what I decide to do and use. (At this point, getting to that part of the process seems like nothing more than a dot on the horizon.)
 
I went back and checked and ended up with this stuff:

https://www.lowes.com/pd/Titebond-G...dhesive-Actual-Net-Contents-448-Fl-Oz/3227253

Tite-bond FRP adhesive. Cleaned up with water and went down well. I spread it with one of those grooved spreaders and then held things together by various methods until it dried. I think I went through at least a couple of those cans. There may be some even better stuff out there though - and it's not that far off. Once the old stuff is off, the rust is sanded down and primed a bit as suggested, and you're then on to the glue - start.

Keep at it, but obviously pace yourself. There were days where I just had enough and walked away for a bit. No shame in that :)
 
Thanks for the suggestion, I will check it out. Stabond is very expensive, and the Titebond looks a lot more reasonably priced.

Yeah, I have already had a day or two where it was much more enjoyable to not work on it and to read about other people and their projects.

Thanks!
Rahn
 
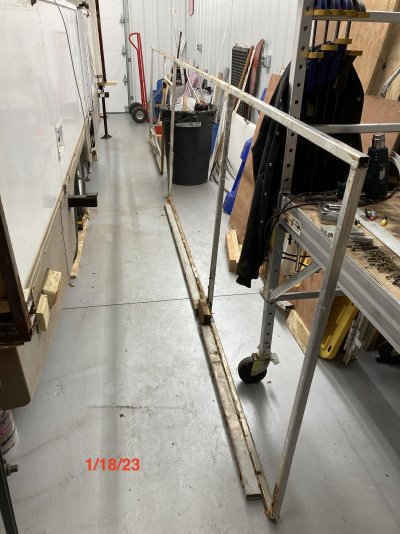
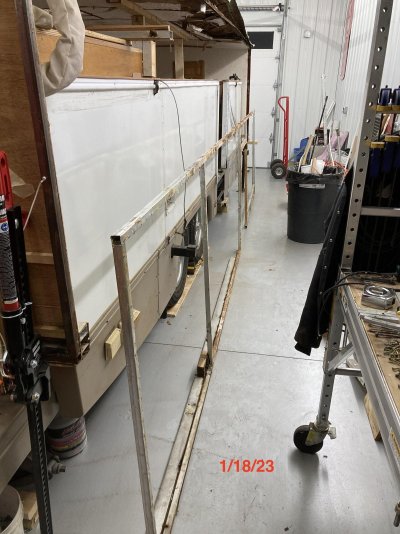
Today went differently than I expected. I was working on getting the seal and bottom board off the side wall. I was also thinking through just how I was going to start reattaching everything once I had everything cleaned up.

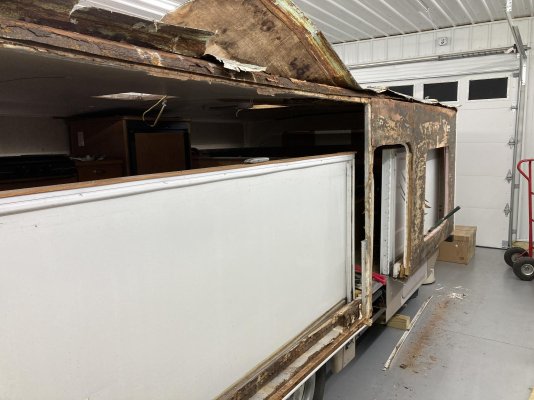
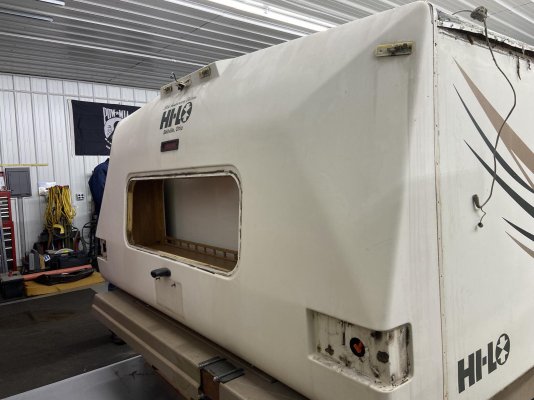
At some point it seemed very evident that the roof wasn’t currently fastened to the wall, and neither was the backend after I removed the cap. Luckily the thought came to me before I pulled the front cap off, that there would be very little support holding everything up. I braced up the ceiling, and what was left of the right side wall came off the camper. Now I can work on this section, get it squared up and attach all the hard-to-get-to things.

It seems like a win for me, but we will see.
 

Attachments

  • 8E8CE11F-3D9A-4F9C-87FC-2FA1B45BDF1C_1_201_a.jpg
    8E8CE11F-3D9A-4F9C-87FC-2FA1B45BDF1C_1_201_a.jpg
    254.6 KB · Views: 25
  • 752A4C71-DA95-4DBB-80D2-D99C883F39F7_1_201_a.jpg
    752A4C71-DA95-4DBB-80D2-D99C883F39F7_1_201_a.jpg
    247.6 KB · Views: 21
HiLo repairs

Our on our rehab DH didn't have to do anything with the roof or the interior ceiling. Good thought on bracing the interior. Towlites are in need of bracing with major repairs.
 
Our on our rehab DH didn't have to do anything with the roof or the interior ceiling. Good thought on bracing the interior. Towlites are in need of bracing with major repairs.

That saved you a lot of headache being able to use your current roof.

At first I was going to leave the roof as it looked pretty good. But when I removed the upper drip edge, to remove the side walls, the steel radius curve and the aluminum roof had really started to corrode because of dissimilar metals and moisture. (The tape that was supposed to separate the two metals, which looked like masking tape, had pretty much dissolved and turned to crispy paper.) I could also tell the underlayment along the edge of the roof had delaminated and I could pull out handfuls of wood that I could basically pulverize in my hand. Then I noticed the roof above the door was covered in tiny little holes that probably acted like funnels when it rained. I pretty much decided at that point that it was all coming off, whether it wanted to or not.

I know down the road I will be thankful that I did change it out.
 

Try RV LIFE Pro Free for 7 Days

  • New Ad-Free experience on this RV LIFE Community.
  • Plan the best RV Safe travel with RV LIFE Trip Wizard.
  • Navigate with our RV Safe GPS mobile app.
  • and much more...
Try RV LIFE Pro Today
Back
Top