2007 23C Rebuild

Yes - I was surprised frequently at how things were put together. I understand a lot of it was done in the name of weight savings .... but cost savings show through too. I'm sure these HiLos aren't the only trailers to take cost savings into account though. Any 15 year old (10 year old?) trailers usually seem pretty worn and beat up, if you can find them at all. That speaks to the general build quality and materials.

Exactly, and the overall construction compared to other brands, HiLo still comes out on top.

If it hadn’t been for the water damage, this camper would still be rolling down the back roads and standing tall (at least when parked!) :D
 
Exactly, and the overall construction compared to other brands, HiLo still comes out on top.

If it hadn’t been for the water damage, this camper would still be rolling down the back roads and standing tall (at least when parked!) :D
True, built solid enough to withstand water soaking in like a sponge on ours and still lift without trouble when we got it way back when.
 
Lift spacer

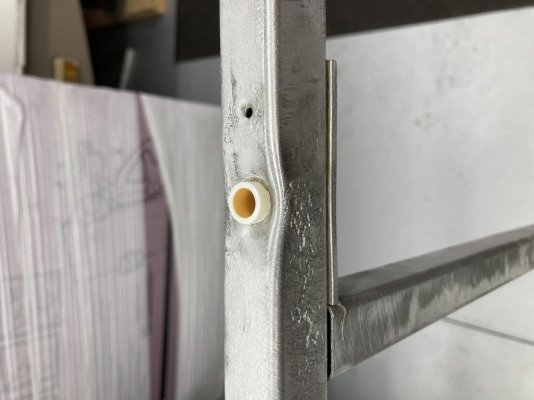
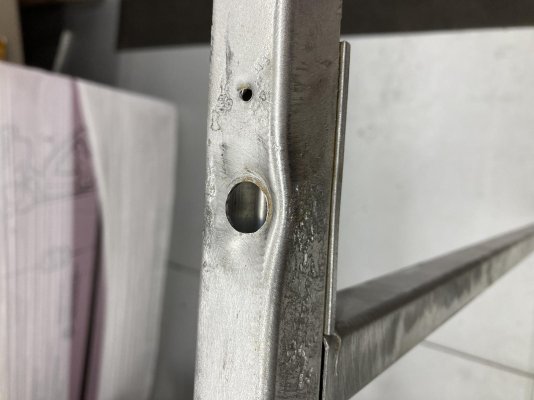
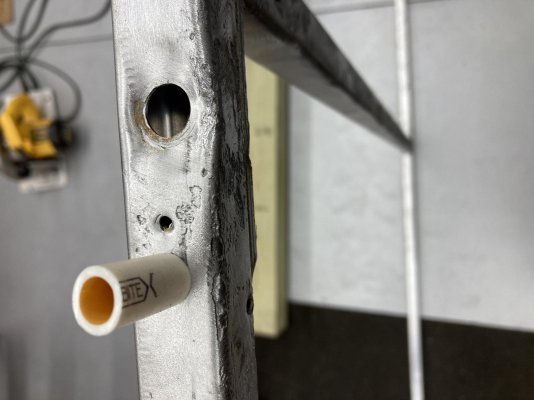
Finished cleaning up the right side frame rail today. While cleaning the rail (with time to think and look around) I was noticing just how squished the rail was from the lifting cable bolt.

I am rather confident that the somewhat crushed tube was not because of lifting stress but rather from a previous owner at some point tightening down the bolts way too tight.

My first inclination was to find a steel spacer to bridge the gap of the inside of the rail. But, being the rail is aluminum, the steel spacer would start to corrode where it comes in contact with the aluminum rail.
Oh, well then I will use an aluminum spacer! Nope, chances are the steel bolt would corrode in the spacer and that would cause numerous issues down the road.
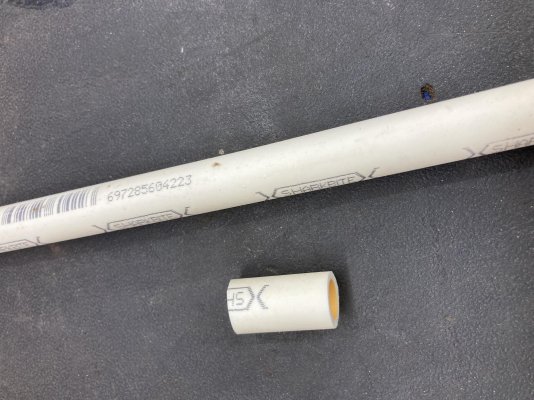
I started looking around and found I had a short piece of rigid 5/16 pex tubing. The outside diameter is 1/2” and the perfect size to bridge the gap. I am going to use this on all four cables/bolts to prevent any more damage. I think if I coat the bolts with anti-seize they should come out relatively easy some day into the future.
 

Attachments

  • 5ED817D6-986C-4B6B-A6F2-BD014DE4160C.jpg
    5ED817D6-986C-4B6B-A6F2-BD014DE4160C.jpg
    156.1 KB · Views: 12
  • 83C17643-6397-4F58-A2B6-C35AA4BA4319.jpg
    83C17643-6397-4F58-A2B6-C35AA4BA4319.jpg
    275.7 KB · Views: 8
  • A01CA4CC-4609-4F73-843D-72B6E56E3504.jpg
    A01CA4CC-4609-4F73-843D-72B6E56E3504.jpg
    149 KB · Views: 7
  • 6E7FA6C0-A327-4A5B-B9D4-098E28DEB86E.jpg
    6E7FA6C0-A327-4A5B-B9D4-098E28DEB86E.jpg
    155.7 KB · Views: 9
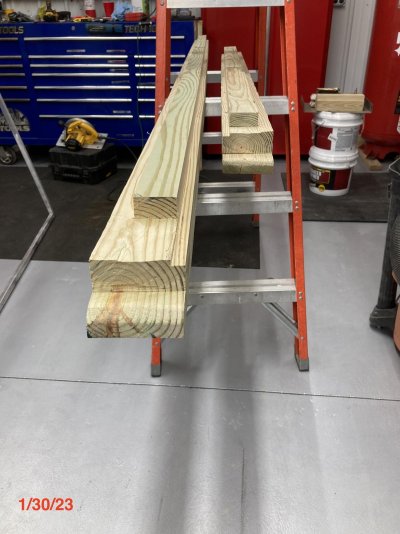
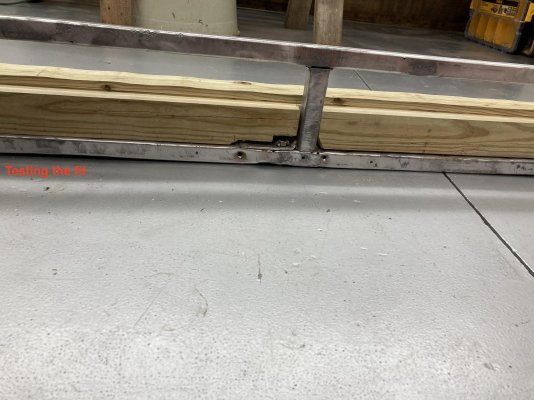
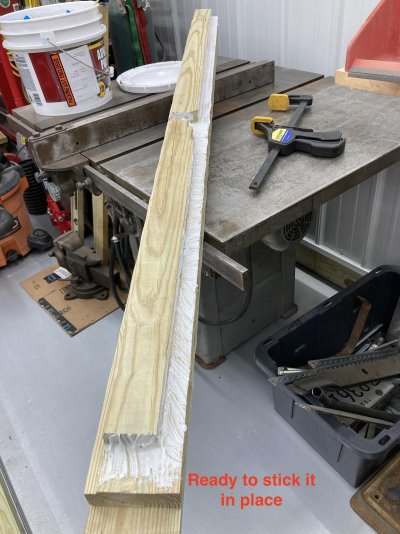
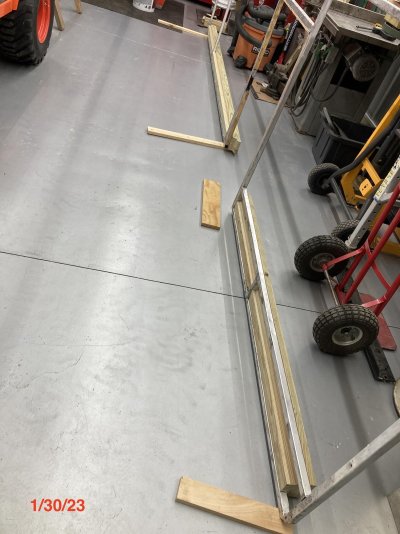
Yesterday was cutting the 10’ 4x4 for the right side rail behind the door. Once completed both 4x4’s were attached to the wall frame.
 

Attachments

  • A40440AF-9F5D-4633-9C88-05B06D204A52_1_201_a.jpg
    A40440AF-9F5D-4633-9C88-05B06D204A52_1_201_a.jpg
    188 KB · Views: 18
  • 8C90E77D-B736-4212-91D5-FB198DCA4E47_1_201_a.jpg
    8C90E77D-B736-4212-91D5-FB198DCA4E47_1_201_a.jpg
    219.3 KB · Views: 19
  • 01D844CD-660A-418B-8121-83101CC9749C_1_201_a.jpg
    01D844CD-660A-418B-8121-83101CC9749C_1_201_a.jpg
    234 KB · Views: 18
  • A958952B-0730-441C-AB3D-D6E9DA8A6726_1_201_a.jpg
    A958952B-0730-441C-AB3D-D6E9DA8A6726_1_201_a.jpg
    215.2 KB · Views: 25
It has been a couple days, here is what I have been up to.

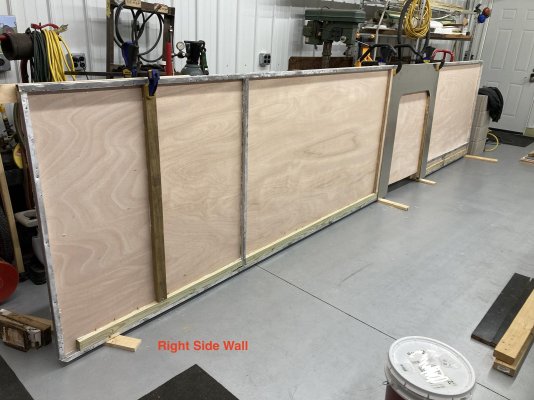
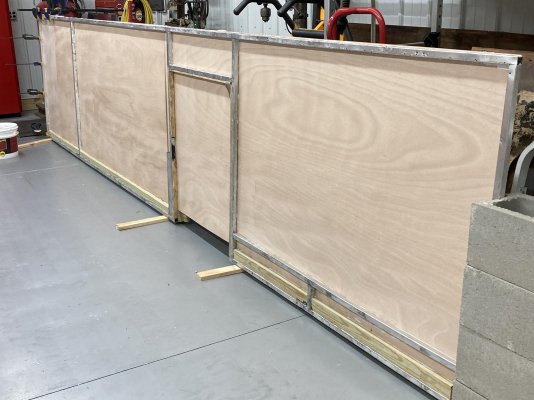
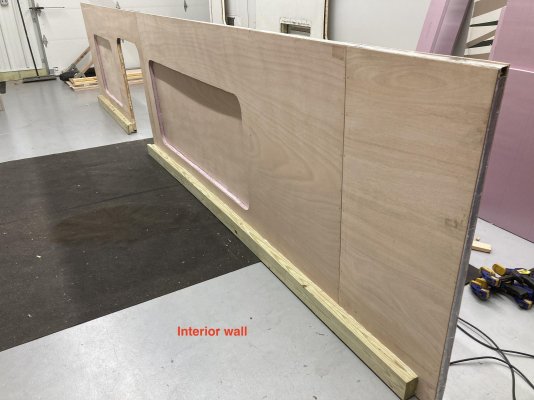
Cut and glued the interior 1/4" plywood to the aluminum frame.

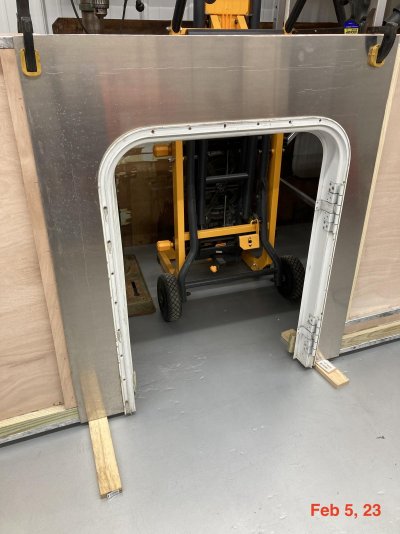
Cut the doorway opening.

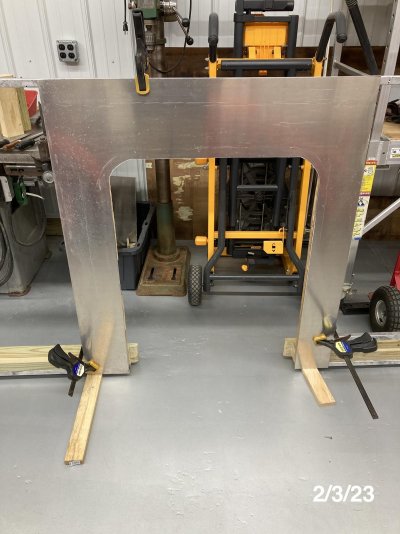
Fabricated a sheet of aluminum to surround the doorway for added strength in that area. I will butt the 1/4” plywood up to the aluminum sheet and sand the edge to make a gradual transition. (The 1/4” isn’t really 0.225” thick, it is closer to 0.200” and so the transition should be minimal.)

Trivia time: A 1/8" sheet of aluminum has the stiffness strength of a 1/2” sheet of plywood.

Since my wall frame is made out of aluminum, and the way one of the previous owners had the interior wall cut into little pieces, it allowed the roof to sag and the doorway to spread at the bottom. I think if I would have just used solid 1/4” plywood on both sides of the wall, it would have been fine. But, I am also confident that when I get this aluminum fastened to the frame, it will never sag at the doorway. (Steel would have been even stronger, but I would be back to dissimilar metals and corrosion again.) Plus it would weigh more.

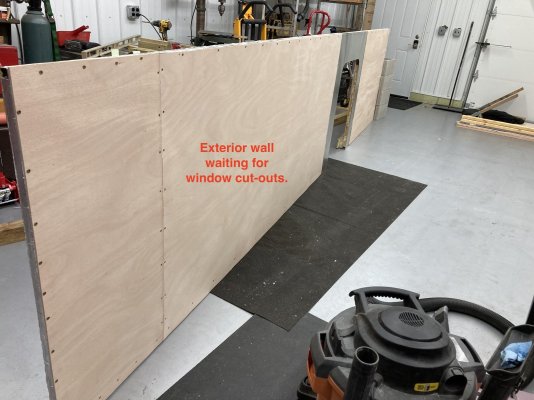
I will glue the outer fiberglass/filon wall/skin right to the aluminum and plywood.

Next step is to cut the windows, and then insulate, and install the outer wall.

(the door frame was just a ‘dry’ fit, the Filon siding will go under the edge of it.)
 

Attachments

  • 1D99BE5C-5401-4BC5-AB7B-8566CFFA82FB_1_201_a.jpg
    1D99BE5C-5401-4BC5-AB7B-8566CFFA82FB_1_201_a.jpg
    199.6 KB · Views: 13
  • E0614C0A-6E0D-42AD-9D6E-8A2CF5498726_1_201_a.jpg
    E0614C0A-6E0D-42AD-9D6E-8A2CF5498726_1_201_a.jpg
    226.9 KB · Views: 13
  • 7365B3F7-F945-43E2-A709-5143A9CAE326.jpg
    7365B3F7-F945-43E2-A709-5143A9CAE326.jpg
    197.4 KB · Views: 13
  • 11295CF3-5DBD-49D9-B956-157D64DAACF5_1_201_a.jpg
    11295CF3-5DBD-49D9-B956-157D64DAACF5_1_201_a.jpg
    206.3 KB · Views: 13
Just some thoughts

J&R repair shop told me to use bondo on the inside of my fiberglass skins. The logic being that it would seal up amy pinpoint holes that you can't even see. I also used stain on both sides of my plywood. Stain stains seals and protects. Some questioned why i did this. I didn't want to have to repair water damage again. You are right to reinforce around the door. Any opening creates a weak point. Trailers with tipouts create a weak point. It has been a number of years since our repairs and the new RV tech owner says he has had to do nothing in the way of further repairs. You should be camping by spring time.
 
J&R repair shop told me to use bondo on the inside of my fiberglass skins. The logic being that it would seal up amy pinpoint holes that you can't even see. I also used stain on both sides of my plywood. Stain stains seals and protects. Some questioned why i did this. I didn't want to have to repair water damage again. You are right to reinforce around the door. Any opening creates a weak point. Trailers with tipouts create a weak point. It has been a number of years since our repairs and the new RV tech owner says he has had to do nothing in the way of further repairs. You should be camping by spring time.

Thanks Sam! I hadn’t thought about staining the plywood, interesting idea though.
I also hadn’t thought about the pinholes that may be present in the fiberglass. And I also hadn’t thought about the wall/roof weakness on campers that have the tip out.

I guess there is a lot of things I haven’t thought about, and I’m sure a few things that i have over-thought. :D
 
Good thinking on the door and sag problem. That remains an area where I consider going back in and fixing up better, I love the aluminum use there.
 
Good thinking on the door and sag problem. That remains an area where I consider going back in and fixing up better, I love the aluminum use there.

Yes! That's a brilliant idea! I wish I had the skill/tools/knowledge to do something like that.

- Jack
 
Insulation Day

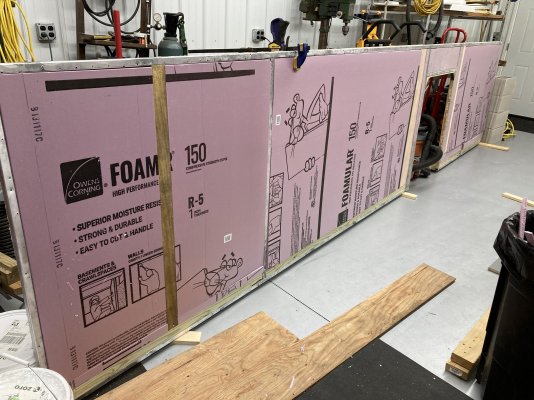
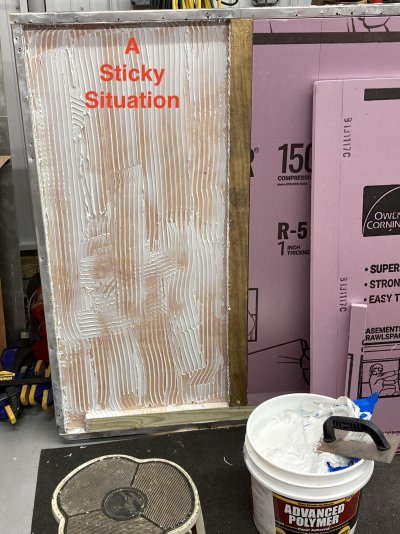
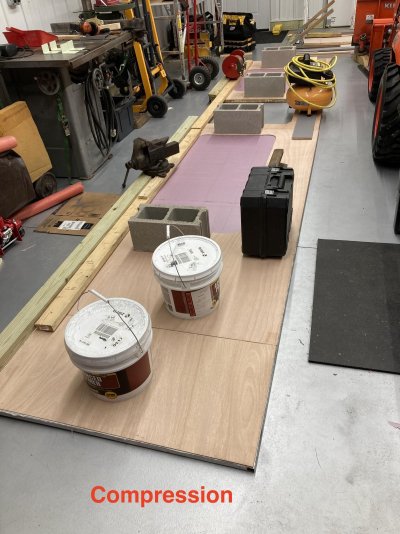
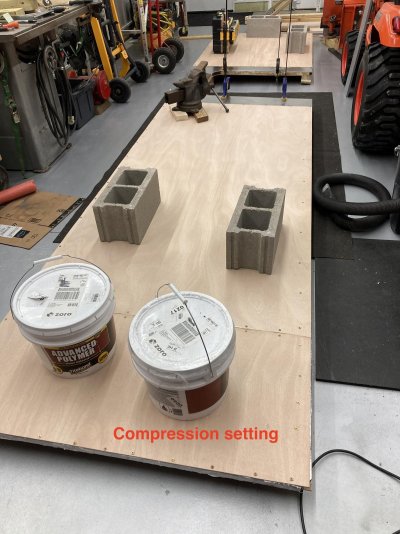
Today was cutting foam board to fit, gluing it, and then weighing it down with just about anything heavy I could find.
 

Attachments

  • 3559D10D-3E55-4E17-9338-41002FA7FC23.jpg
    3559D10D-3E55-4E17-9338-41002FA7FC23.jpg
    280.5 KB · Views: 10
  • 56FBA55C-9804-40BD-9CD0-80CB5AF08C5F_1_201_a.jpg
    56FBA55C-9804-40BD-9CD0-80CB5AF08C5F_1_201_a.jpg
    300.4 KB · Views: 17
  • BC0339CC-520D-4E8A-957E-A56631C16224_1_201_a.jpg
    BC0339CC-520D-4E8A-957E-A56631C16224_1_201_a.jpg
    264.9 KB · Views: 11
What kind of glue or caulk are you using? Be sure to use very generous amts. Keep the pictures coming

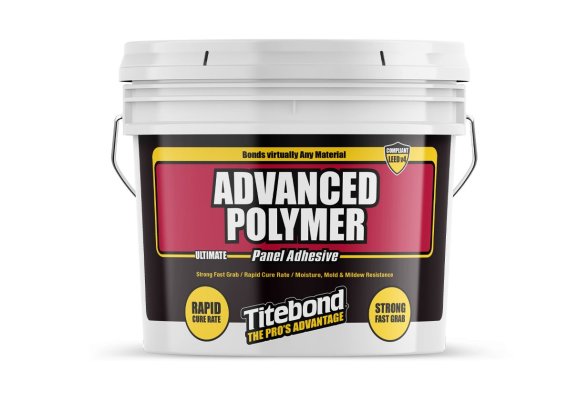
I am using TiteBond Advanced Polymer, so far I have been impressed at how good it sticks. And I am using it unsparingly.

This adhesive is fast, strong, water-resistant, mold and mildew resistant.
 

Attachments

  • 1EC36C3A-8A3E-4369-933D-F48FE19BF523.jpeg
    1EC36C3A-8A3E-4369-933D-F48FE19BF523.jpeg
    70.7 KB · Views: 6
In your "sticky situation" photo - It looks to me like you are applying it correctly. I think you're gonna end up with the best built trailer ever!

- Jack
 
In your "sticky situation" photo - It looks to me like you are applying it correctly. I think you're gonna end up with the best built trailer ever!

- Jack

Well, I hope it will be as good as it was originally, if I happen to exceed beyond original that will just be a bonus. :)

I currently have the exterior 1/4” plywood glued and fastened, along with my aluminum doorway brace. It looks like I will have to very little sanding of the plywood to get down to flush on the 1/8” aluminum.
 

Attachments

  • 7A0B4832-A504-42DD-B619-FFA81B6D0913_1_201_a.jpg
    7A0B4832-A504-42DD-B619-FFA81B6D0913_1_201_a.jpg
    247.5 KB · Views: 8
  • C3010134-22F3-4F22-A342-ADE92D102018_1_201_a.jpg
    C3010134-22F3-4F22-A342-ADE92D102018_1_201_a.jpg
    193.6 KB · Views: 8
  • 1212975C-EB8F-46E1-8DF0-DB6FCC517589_1_201_a.jpg
    1212975C-EB8F-46E1-8DF0-DB6FCC517589_1_201_a.jpg
    201.3 KB · Views: 11
New Guide Blocks!

Our daughter works at a place where she has to know how all the tech machines work and how to give limited instruction on them. She isn’t hired to ‘train’ people, but part of her job is to give limited assistance and instruction when needed.

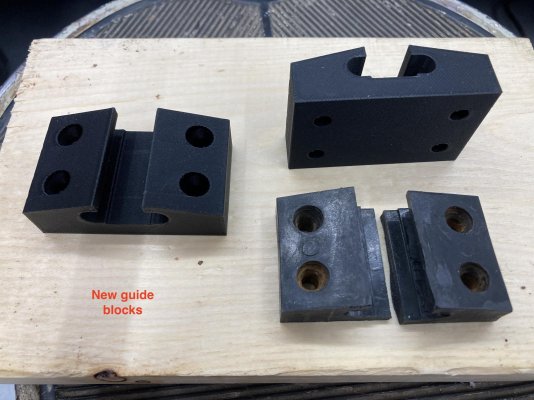
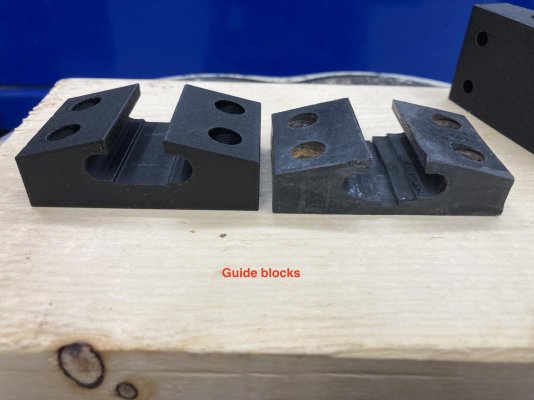
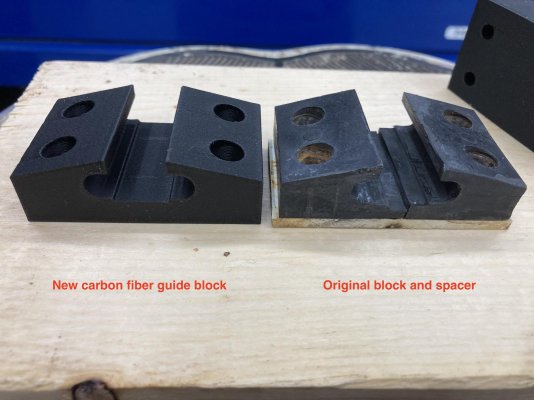
During my rebuild, I have noticed that all of my guide blocks are cracked/broken! Not sure if it was a result of the top twisting at some previous time and the lateral movement cracking the blocks. Or just because the center of the blocks, were for some reason, made thinner so that would be the weakest link in a failure. (Not sure what the reasoning was for that design.)

All of my blocks also had a 1/8” spacer behind them to bump them out to the right distance.

So, I gave my daughter a broken guide block and the spacer info. She then designed a CAD drawing of the block incorporating the 1/8” spacer into the block.

Once the drawing was complete, she sent it to the 3-D printer and made a test block. It looked great and so she made 6 more.

They are made out of Carbon Fiber, and I am hoping that it will work out great. I am not sure at what point, if twisted, they will break, or if they will do damage to something like ripping the rail off the lower half of the camper. (Hopefully, I will never have that experience to find out.)

Over all, I am very pleased of the out come.
 

Attachments

  • 29B7017F-21EE-4AD5-A005-239C819E6699_1_201_a.jpg
    29B7017F-21EE-4AD5-A005-239C819E6699_1_201_a.jpg
    205.8 KB · Views: 17
  • 574B9A30-49E6-4675-B365-B5A1C7325660_1_201_a.jpg
    574B9A30-49E6-4675-B365-B5A1C7325660_1_201_a.jpg
    139.9 KB · Views: 12
  • C0C9D752-59AF-42E0-AAB8-DBE0F884E2A7_1_201_a.jpg
    C0C9D752-59AF-42E0-AAB8-DBE0F884E2A7_1_201_a.jpg
    169.7 KB · Views: 11
Those look great, Rahn! I don't think you'll need to worry about the guide blocks causing damage to the rail mounting and, if they're made of carbon fiber, they should be much more durable. I also think the design of the new ones is far superior to the old ones.

Congrats on having such a talented Daughter!

- Jack
 
Making parts

Good your daughter was able to make the guide blocks for you. DH is a retired sheet metal fabricator. On our 1990 25ft. Classic he took the door striker part to work. The holes had elongated. The cad operator was able to make a batch of new striker parts. They were made out of scrap brass. I gave out some at a HiLo Rally. Some went to our HiLo dealer and some to J&R. J&R was thrilled to get these as they had to take one off his personal HiLo. One went to a family in Canada. The door would not stay latched as they were traveling down the highway. You could make extra parts and sell them.
 

New posts

Try RV LIFE Pro Free for 7 Days

  • New Ad-Free experience on this RV LIFE Community.
  • Plan the best RV Safe travel with RV LIFE Trip Wizard.
  • Navigate with our RV Safe GPS mobile app.
  • and much more...
Try RV LIFE Pro Today
Back
Top