Getting into the repairs Major rebuild !!!!

Tow lite repairs

Charlie,good to get an update. Love what you did with your "NoLo". I would call it a man cave!! Do you have it totaly finished?
 
It's all done with the exception of removing the hydraulics and putting the new tires on and de-winterizing when the time comes. I also need to get the furnace working, I think I have a dirty sensor and I need to remove the whole unit to get to it.
 
Charlie, that's great work, sir! You are a genuine craftsman, and I applaud what you've done.

I wish many happy camping days and nights in your new home on wheels for you and your Wife.

- Jack
 
Thanks Jack.
I took so long to repair it because I was trying to figure how I could doit and still keep it as a hi-lo. once I decided what I was going to do It was a fairly quick job. I had fixtures that had seen very little use, but when I saw how the frame in the roof had rusted I knew that had been going on for years, and there was evidence of previous repairs and with the lower beams sagging I just bit the bullet.
We are looking forward to a long trip this summer if all works out and we can leave the darned doctors behind for a while. :)
 
Furnice repairs

DH says if yours is like our you take the cover off and you can get to the flame sensor without having to remove the whole unit. I hope this is the case for you. One time DH called Jay at Mantelli trailer sales and he told him to tweak the flame sensor. It has worked real good for many years!!... Hope it keeps going.
 
Wow Charlie - really fun to see a creative solution applied! I'd never heard of the canvas trick (though it immediately made sense - kind of like doping an old wooden aircraft skin).

Curious - was there a reason you chose 1/4 ply over perhaps luaun? I'm not criticising your choice - in fact 1/4 ply is a great choice - incredibly strong for the weight - just like to understand the rationale (good for learning).

Again - well done, and great pics!
 
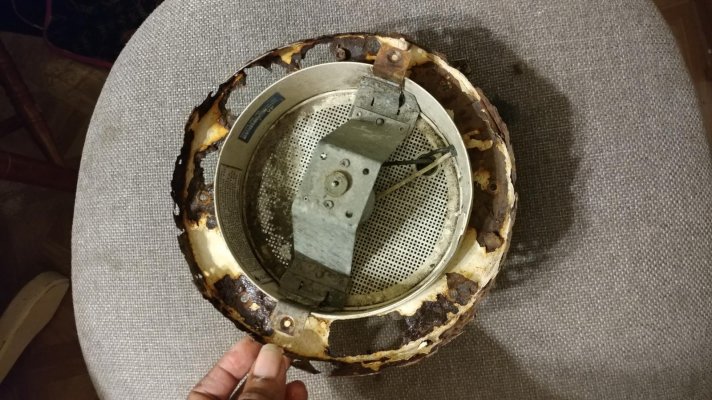
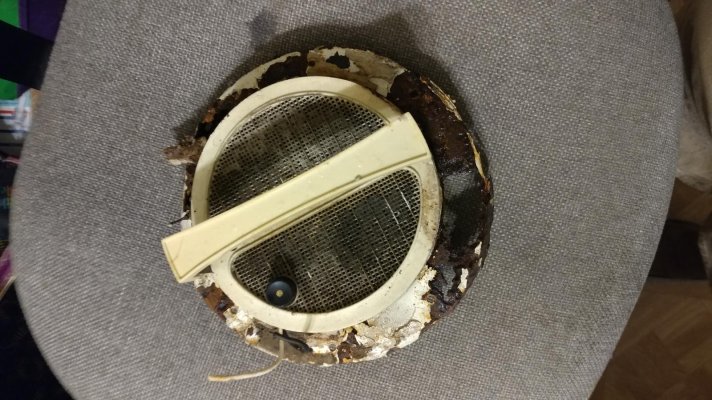
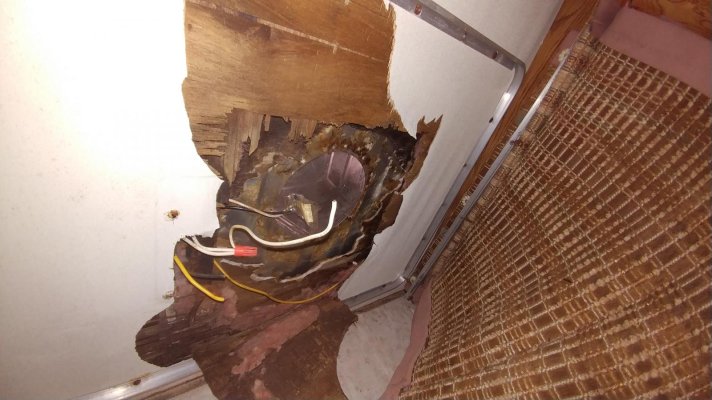
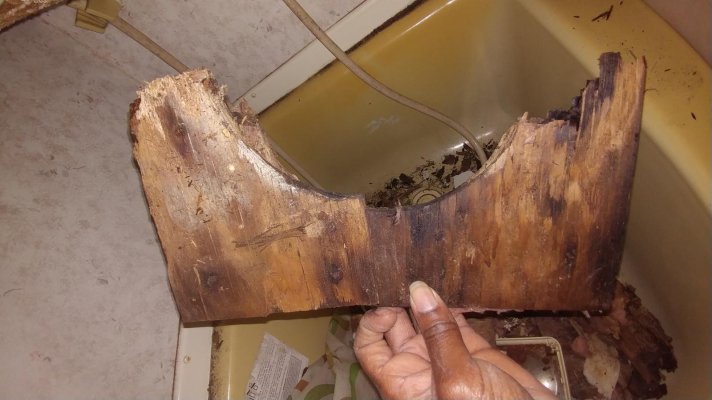
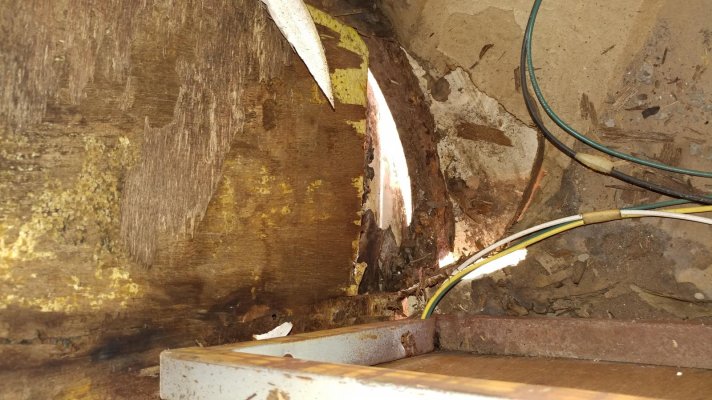
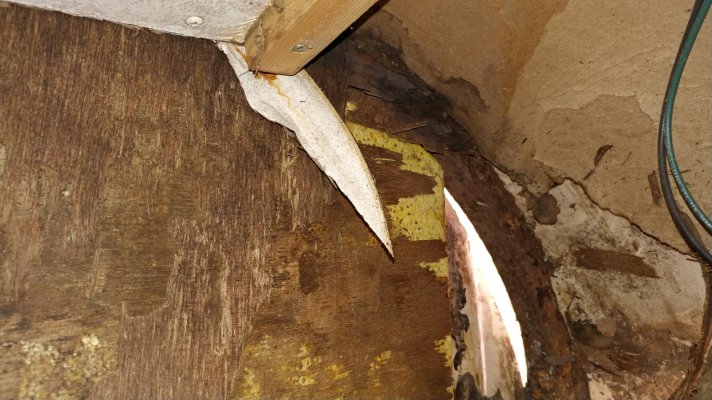
decided to tackle the leaking roof vent fan over the tub, and boy boy to my surprise it TOTALLY rotted up there. As I was trying to remove the screws all but one broke off in the roof (it is totally rusted). I removed it and was able to look into the roof and underneath the top is rotted. the wood is like wafer paper and just comes aloose in my hand. I have no idea how to fix this issue. Guess I would need to tear the ceiling out over the tub and replace it. But I do not know with what type of wood since it feels like paneling to me?
 

Attachments

  • 20170329_104049.jpg
    20170329_104049.jpg
    268.7 KB · Views: 9
  • 20170329_104030.jpg
    20170329_104030.jpg
    250 KB · Views: 8
Wow Charlie - really fun to see a creative solution applied! I'd never heard of the canvas trick (though it immediately made sense - kind of like doping an old wooden aircraft skin).

Curious - was there a reason you chose 1/4 ply over perhaps luaun? I'm not criticising your choice - in fact 1/4 ply is a great choice - incredibly strong for the weight - just like to understand the rationale (good for learning).

Again - well done, and great pics!

Actually I used laun, 1/4 but I should have used the plywood because the quality of the laun that was available was not the best. I was to 3 different stores and should have opted for the 1/4 plywood at the first store. I do realize that I have to remain on my toes to avoid leaks because water won't take long to destroy the hard work we put in this.
 
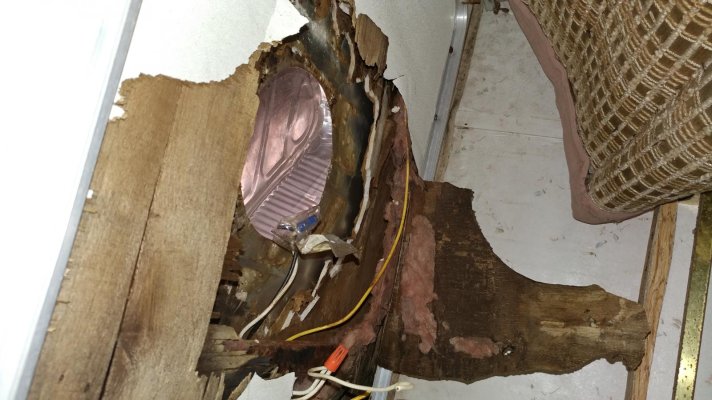
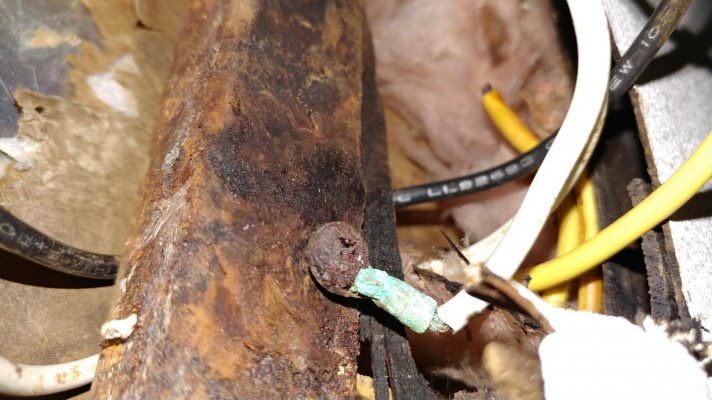
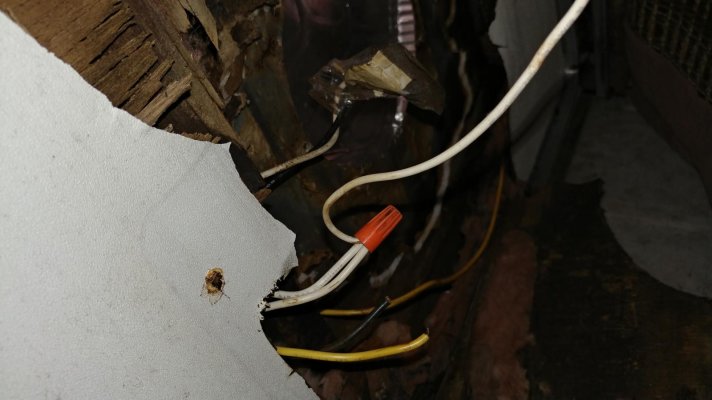
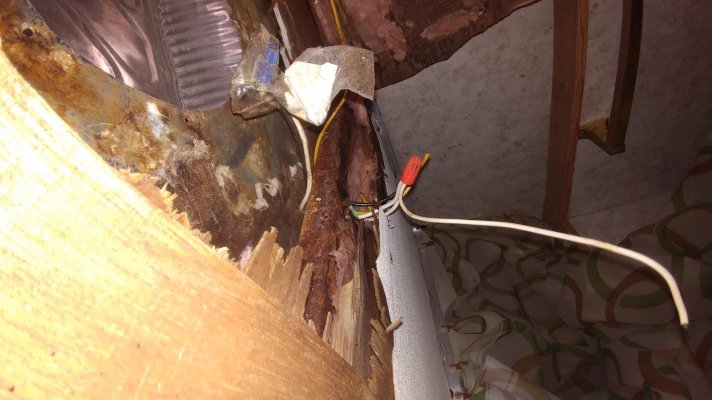
Tore out the ceiling over the tub and found that it was all rotted as well from the roof vent leaking (caulking was totally dry and pulled away from roof). These are some pictures of the roof. Even the light had fallen from the ceiling and was hanging. The ground screw is very rusty. I am wondering if I should brush with a wire brush and try and reground the switch (vent fan and light over the tub)?
 

Attachments

  • 20170330_165416.jpg
    20170330_165416.jpg
    185.6 KB · Views: 9
  • 20170330_165738.jpg
    20170330_165738.jpg
    185.6 KB · Views: 11
  • 20170330_165441.jpg
    20170330_165441.jpg
    174.2 KB · Views: 10
  • 20170330_165523.jpg
    20170330_165523.jpg
    128 KB · Views: 9
  • 20170330_165627.jpg
    20170330_165627.jpg
    153.1 KB · Views: 9
  • 20170330_165648.jpg
    20170330_165648.jpg
    162.1 KB · Views: 9
Hi Lisa - It's painful to see so much damage!

Yes, I'd try to fix that ground (and any other you find in similar condition). If you have a grinder, that would be the easiest way to get down to bare metal on the beam. I think I'd buy some rust neutralizing primer/paint and apply it to any rusty framework you have.

The connection on the wire should simply be replaced. You can find them at ACE hardware or automotive supply stores. You need ones that work with 16-18 gauge wire I think. They just crimp onto bare wire and crimpers are often part of wire strippers, which can also be bought where you find the connectors.

- Jack
 
Mr. Jack hello. Yes it is very painful and I want to cry sometimes. But I think of my father who passed away last year. He ALWAYS said "daughter don't ever give up"

I just did not know it had so much damages when I purchased it. I in good heart cannot sale the trailer knowing this. I said I will just try and fix it up. I asked myself what would my daddy do and that day I found this forum. Thanks for telling me about the rust neutralizer.
 
It DOES give you something to do, that will keep you from getting "bored". Think of the feeling of accomplishment you'll have when you get it fixed up!

This is what I was thinking of: Loctite 10.25 oz Extend Rust Neutralizer Spray-633877 - The Home Depot You should be able to find it at Home Depot, and possibly ACE or Lowes. I'd still try to remove most of the heavy rust accumulation first though. You might find it easier to do with a circular wire brush attachment on a drill, or, a grinding wheel would be even quicker.

Doing it with a hand brush would be agony!

Don't give up! You'll learn a lot as you progress and you'll have gained a bunch of new skills!

- Jack
 
Just searched this on the Home Depot Website and they have it here in Houston. The 6 pack case is $34.02. Shoot with all the rust I have I might need 2 cases (just a little humor to keep from crying).
 
Thanks. My frame is really bad. The front driver side has broken on the curve side. No idea how to fix that.
 

Attachments

  • 20161228_140834.jpg
    20161228_140834.jpg
    250 KB · Views: 15
  • 20161228_140842.jpg
    20161228_140842.jpg
    238.8 KB · Views: 10
Last edited:
Roof repairs

Jack and charlie have given you good correct advice. If you have metal frame that is broken then you might have to get that welded. You are not the first person to have major roof repairs. Put a piece of cardboard in the bath to protect it. Keep us posted.
 
Jack and charlie have given you good correct advice. If you have metal frame that is broken then you might have to get that welded. You are not the first person to have major roof repairs. Put a piece of cardboard in the bath to protect it. Keep us posted.

Hi Lisa and all,

I'm digging through the roof on my 24' Classic, and I know what you're feeling Lisa. Every time I take a chunk out it makes me queasy about how bad it is. Then I start slowly putting stuff back in that's not rotten and it keeps slowly getting better. But I also understand and admire not wanting to just get rid of it in its current condition. This world needs more of that.

Now let me through this idea out there, and you can all consider it. Since the trailer is lifting okay, and the frame is already damaged, my view is that anything to help is making it better and more secure even if it's not quite completely fixing it. There could be ways to "buttress" or shore up the metal without trying to figure out how to tow it to somewhere where they could fire up the welder. How accessible is that area even to a welder?

Is it possible to cut a board to the right shape, or even a metal strap, and using the correct epoxy and metal screws, "band aid" over the damaged frame? I guess I would take a wire brush to it, cleaning it up as well as I can. Then use Rustoleum Rust Converter on it, and then put that new material in place. It isn't perfect, it isn't "like new" but it could make it secure enough for comfort and get the rig rolling.

Thoughts?
 

Try RV LIFE Pro Free for 7 Days

  • New Ad-Free experience on this RV LIFE Community.
  • Plan the best RV Safe travel with RV LIFE Trip Wizard.
  • Navigate with our RV Safe GPS mobile app.
  • and much more...
Try RV LIFE Pro Today
Back
Top