You are using an out of date browser. It may not display this or other websites correctly.
You should upgrade or use an alternative browser.
You should upgrade or use an alternative browser.
The beginning of major remodel
- Thread starter misfit429-HILO
- Start date
-
- Tags
- hilo
Garry-HILO
Senior Member
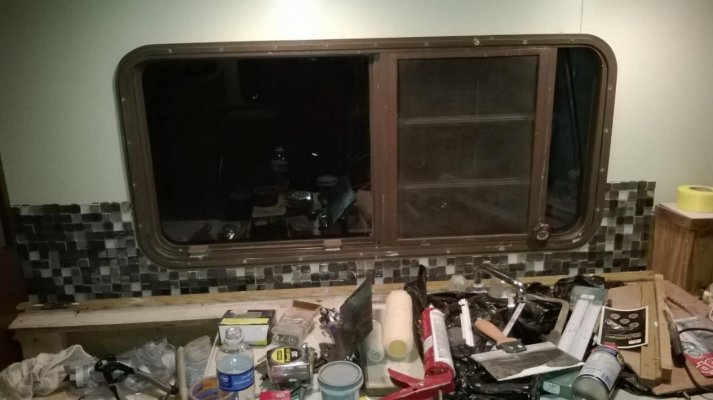
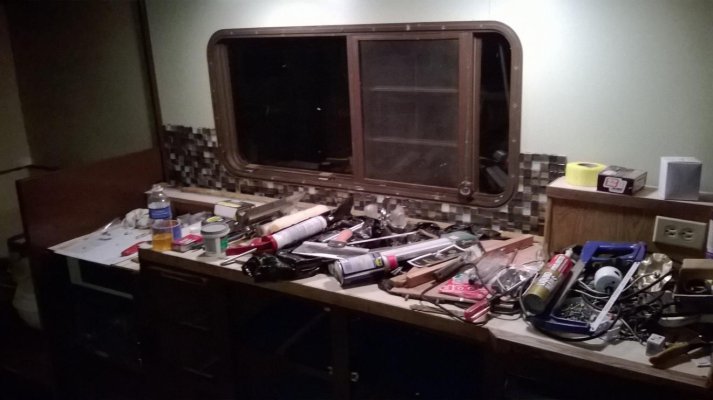
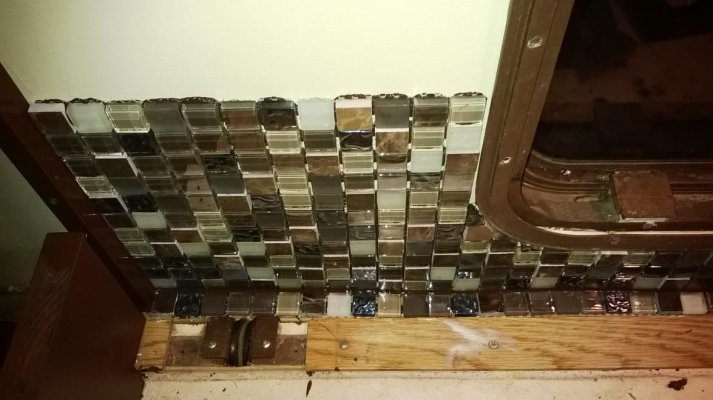
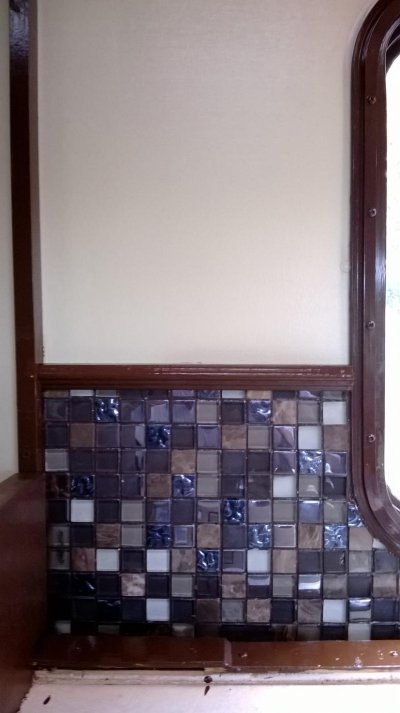
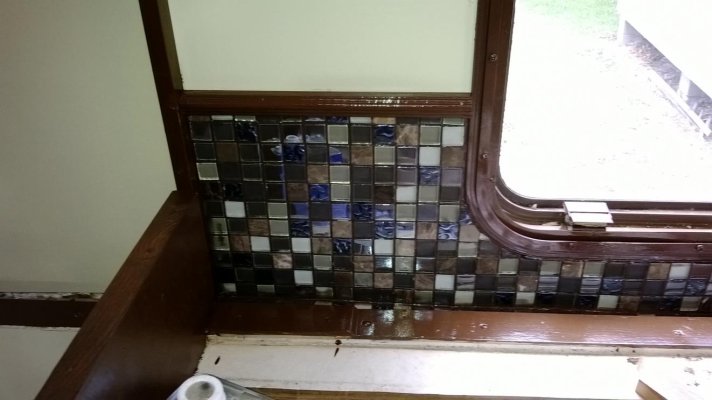
Just don't take your trailer on the AlCan Highway.Decided to add a tile backsplash.
")
misfit429-HILO
Senior Member
Garry-HILO
Senior Member
I thought it looks great, just would hate to see it get lost on a rough road.I will keep that in mind Garry!. LOL. Set tile in silicone and grouted with silicone so hoping it will be flexible enough. It's what they use in RV's now. Looks pretty good!
RCREYES
Senior Member
I will keep that in mind Garry!. LOL. Set tile in silicone and grouted with silicone so hoping it will be flexible enough. It's what they use in RV's now. Looks pretty good!
Have you figured out how much more weight will be added with the tile install?
misfit429-HILO
Senior Member
Only about 20 lbs. Overall with the flooring and tile, I'm adding around 60 lbs. But I changed the toilet to an all plastic model and shaved a little weight and I will probably remove the furnace also as I really don't trust it and it seldom gets cold here so I probably won't need it. That will shave a little more weight. So all in all I'm not adding much weight in the end.
sam-HILO
Senior Member
saving weight
Misfit429, If you have electric and it gets cold you can always use some type of electric heater. Vaccum out and inspect the furnace then try it before you uninstall. Our furnace in our 1990 Classic works fine and it is the original. We only use it a couple nights a year.
Misfit429, If you have electric and it gets cold you can always use some type of electric heater. Vaccum out and inspect the furnace then try it before you uninstall. Our furnace in our 1990 Classic works fine and it is the original. We only use it a couple nights a year.
misfit429-HILO
Senior Member
I was told that it does work, but that its so hot it will roast you alive. I'm more leary of the entire gas system. It has been disconnected from the front and nothing inside the trailer runs on it but the furnace. The water heater went out at some point and the guy I bought it from came up with a kinda ingenious way of using a propane on demand water heater that has a bracket you slide it onto on the trailer tongue and hooks up to the trailer with 2 washing machine hoses. It works great and you don't run out of hot water like the little onboard water heaters. And the heaters are only a little over $100 as compared to around $600 for a replacement. I just need to build a vented housing for it in case it rains and to block some of the wind off of it.
misfit429-HILO
Senior Member
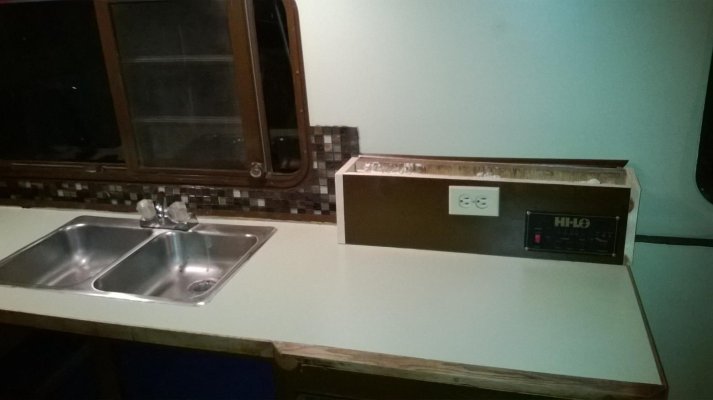
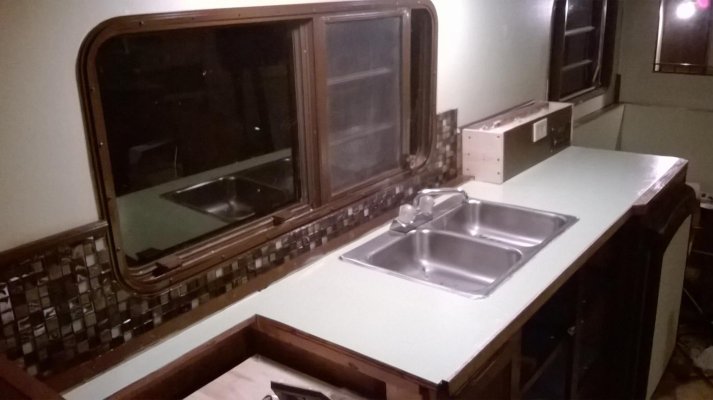
I found this Rustoleum countertop paint and thought I would give it a shot. I'm very impressed! Countertops look brand new and I was able to come very close to my wall color. I would highly recommend it if you're looking for a cheap easy fix for worn countertops. But beware! This stuff is extremely strong. The vapors will make you dizzy and give you a headache. Thins and cleans with Xylene so watch out!
Attachments
Garry-HILO
Senior Member
That looks great! And such a good match.I found this Rustoleum countertop paint and thought I would give it a shot. I'm very impressed! Countertops look brand new and I was able to come very close to my wall color. I would highly recommend it if you're looking for a cheap easy fix for worn countertops. But beware! This stuff is extremely strong. The vapors will make you dizzy and give you a headache. Thins and cleans with Xylene so watch out!
misfit429-HILO
Senior Member
The pictures don't really show the colors well. The walls and countertop are actually a light green with everything else about a chocolate brown. Tile has elements of both colors with a few other colors mixed in. The upholstery will be spruce green suede.
misfit429-HILO
Senior Member
Ordered the ceiling tile and a "Jack" antenna for the trailer tonight. That should be the last purchase to give me everything I need to complete the remodel. But you just never know what I may dream up next! LOL. On a different note, I was looking at the pics of the trailers that the RV sales place has listed on the forum and noticed the interior lip of the upper section sits flush with the top of the wall on the lower section. Mine doesn't. And the difference in the amount that it doesn't flush up is different in the front and the back. It's lower in the back. Do you think I should jack the top up and just adjust the cables or could the cables be stretched and in need of replacement? Once the inside is done I'm going to work on the outside and that will be the top priority. No pun intended. Thanks everyone!
sam-HILO
Senior Member
cable adjustment
Post pictures of the outside front and back ends. This will give us an idea if you need cable adjustment.
Post pictures of the outside front and back ends. This will give us an idea if you need cable adjustment.
guitarman023
Senior Member
Sounds like they need adjusted. Mine were off by 4 inches in the front, and 5 in the back. I took the turnbuckles off underneath and shortened the cables a bit, it was quite a job, not hard, just tedious and annoying for one person.
misfit429-HILO
Senior Member
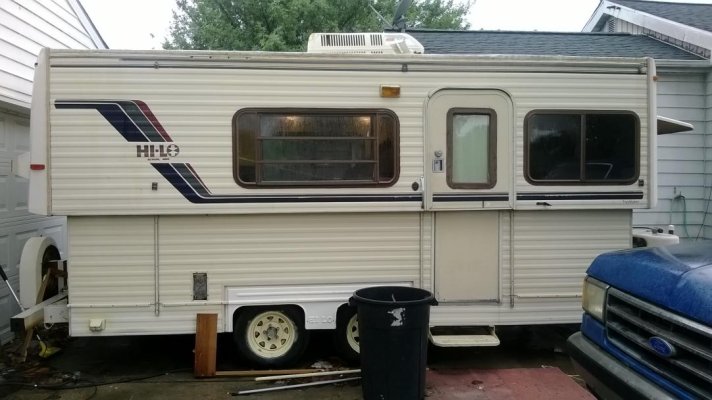
Here are some pics Sam. Kinda hard to tell from the outside. Probably the best pics are of the door opening. Front looks like it could go up a bit but I can live with where it is now. Back needs to go up another inch or 2. I tried to take pics from the inside but you can't tell the difference in the photo. No depth perception in a flat pic.
Attachments

sam-HILO
Senior Member
cable adjustment
Had DH look at your pictures. You defeniately need cable adjustment. Unscrew the skirt on the drivers side of RV. You will see four screws and nuts. Loosen the jam nut(ist nut). Back off on quite a few threads on the first nut. Then hold the end of the bolt with pliers(so it doesn't turn). Now tighten the inner nut as needed. You will be going back and forth on all the bolts until the desired height is reached. The seal should touch at the bottom of the seal stop. White strip at the top of the lower section. Your #2 pictures clearly shows the seal stop. Your cables should be lubed with Break Free spray. It can be purchased in the gun(sporting goods Dept. at Walmart). Buy two cans. This was a tip from another forum member. Hopefully,some one can point out a post describing how to position the trailer for lubing. If your grey seals are crumbling orange shreds of old foam then they need replacing. Another eight hour job. DIY. Have fun.
Had DH look at your pictures. You defeniately need cable adjustment. Unscrew the skirt on the drivers side of RV. You will see four screws and nuts. Loosen the jam nut(ist nut). Back off on quite a few threads on the first nut. Then hold the end of the bolt with pliers(so it doesn't turn). Now tighten the inner nut as needed. You will be going back and forth on all the bolts until the desired height is reached. The seal should touch at the bottom of the seal stop. White strip at the top of the lower section. Your #2 pictures clearly shows the seal stop. Your cables should be lubed with Break Free spray. It can be purchased in the gun(sporting goods Dept. at Walmart). Buy two cans. This was a tip from another forum member. Hopefully,some one can point out a post describing how to position the trailer for lubing. If your grey seals are crumbling orange shreds of old foam then they need replacing. Another eight hour job. DIY. Have fun.
misfit429-HILO
Senior Member
Thanks Sam. When exactly does the fun part of Hi Lo ownership start? LOL. Just kidding. I've gotta have some project to work on. Not much of one to just sit around and watch TV.
sam-HILO
Senior Member
Fun projects
Once the fun starts it never ends. When we did our major water damage I thought we were done. Wrong-then the section of upper wall beyond the door saged because the metal pipe support had broken. Major tear out of the wardrobe and repair. Then many sessions of separating the trailer halves and replacing the seal between the halves. Our expensive time consuming hobby.
Once the fun starts it never ends. When we did our major water damage I thought we were done. Wrong-then the section of upper wall beyond the door saged because the metal pipe support had broken. Major tear out of the wardrobe and repair. Then many sessions of separating the trailer halves and replacing the seal between the halves. Our expensive time consuming hobby.
sam-HILO
Senior Member
Fun times with the HiLo
Yesterday DH and DD got to mow the lot where we park our HiLo. Finally got a dry spell so the mowing went fast. Then I stayed in the HiLo reading the latest edition of Motor Home magazine. We don't watch a lot of TV either. The previews for the new shows don't appeal to me. If you get cable TV this is for you, Flippin RVS on Sept. 3rd on the great American country channel. It airs in the evening. I don't have cable. If I remember I can catch it at my neighbors.
Yesterday DH and DD got to mow the lot where we park our HiLo. Finally got a dry spell so the mowing went fast. Then I stayed in the HiLo reading the latest edition of Motor Home magazine. We don't watch a lot of TV either. The previews for the new shows don't appeal to me. If you get cable TV this is for you, Flippin RVS on Sept. 3rd on the great American country channel. It airs in the evening. I don't have cable. If I remember I can catch it at my neighbors.
misfit429-HILO
Senior Member
I may have to check that out. You may also be able to watch that show online after it airs on that channels website.
Similar threads
- Tumblestuff
- Hi-Lo's for sale
- Replies: 8
- Views: 2K
Try RV LIFE Pro Free for 7 Days
- New Ad-Free experience on this RV LIFE Community.
- Plan the best RV Safe travel with RV LIFE Trip Wizard.
- Navigate with our RV Safe GPS mobile app.
- and much more...