2007 23C Rebuild

Happy Camper!

I know this has been covered in a different section on this sight, but for those who are following my progress, or lack of progress here, I will briefly explain my last conquest. (Even though others have explained it better and in more detail in other locations.)

After getting the four lift cables reattached and running the top up and down a couple of times, I was a little disappointed in how my "P" Bulb seal was lining up, as well as the camper top not really level at the top when raised. (Right front corner was about one inch low and the full left side was off just a little as well.) Did I get the P Bulb in the wrong place, is the 4x4 not right, wonder what I did wrong?

After thinking about it I lowered the top onto the outriggers, went to the pump and opened the Release Valve one turn.
I loaded my creeper with a light, ratchet strap, and me, and rolled back under between the two axles.

I hooked the ratchet strap to the hydraulic ram plate and over to the frame and tightened the strap until the ram was completely closed/compressed. I then unhooked the strap, and loaded everything up and rolled on out to fresh air and daylight.

I closed the Release Valve and went around to the left/driver's side axles/tires and pulled on the adjusting bolts for the cables. One was rather snug, two were loose, and the last one was real loose (like an inch of movement.) I pulled each bolt out with one hand and spun the nut tight with the other hand. Once I had all four bolts snug and unable to pull them out any farther, I stopped adjusting them.

Walked around to the camper doorway, sat down, said a prayer, and hit the lift/up button. I ran it all the way up and the safety bar clanked into place just as the pump motor started to strain. I stopped and stood up to assess the situation.

Right side, sighting both directions from the doorway, the top half 4x4 was in perfect alignment with lower half rail. The seal was snug and tight full length.

I walked around to the left side and stuck my head into the open window hole and that side was at the perfect height from front to back. Tight seal and level between the lower side rail and 4x4.

The smile that crept onto my face became huge as I realized that I had placed the seal in the correct location on the 4x4. And when raised, the lower and upper halves together look like a ledge and not a cliff.

I am pretty sure the smile was still there as I walked into the house, because my DW looked at me and asked what I was up. I explained what I did, but I think the magnitude of the situation was lost somewhere in the translation.

But actually, I'm still smiling! :D
 
Cable adjustment is tricky.

On our first HiLo we changed the seals. Very sure the job wasn't perfect. On our second HiLo we splurged and J&R changed the seals. We still get a small amt. of dirt after travel. Take a sharpie and mark where the nut lands on the adjustment bolt. Then if you have to adjust the cables again you have a reference point.
 
Hi RahnA,

Couple of questions if I can ask.

First, where did you place the new bulb seal on the 4x4? I am about to tackle replacing mine and not sure where to secure the new seal along the length of the "beam".

Second, how heavy would you say your new walls were when you installed them? I am considering doing a similar rebuild and trying to gauge how heavy the wall units are minus the windows and other trim. Any thoughts?

Thanks for your input!

I do have a few thoughts, and some are good, some are even valid.

First, the bulb part of the seal is just below the top of the 4x4. Maybe 1/8” down, and the stapled flange of the seal is below that. Hopefully the attached picture will help.

Second, the wall with the door way cutout, I had my wife steady the wall as I picked up one side of the wall and set it on the outrigger and then did the same at the other end. My concern on that wall was that I might flex it with the opening (but it was pretty solid.)
The left side I did put it in place by myself, and picked up the wall by myself. I did do the one outrigger - two outrigger setting in place system but if I was to guess, I would say the wall was under 100 pounds. (And like you said, no windows installed, just the bare wall.)

The heaviest part of the complete wall would be the 4x4. The only thing I would possibly change if I was doing it again, I possibly would use a cedar 4x4. It is lighter the a treated 4x4, and it could potentially last longer. (Not sure about the last longer part, but if memory serves my correctly, it is lighter.)

Hope that helps you out.
 

Attachments

  • IMG_4361.jpg
    IMG_4361.jpg
    102.7 KB · Views: 14
The reports of my demise have been greatly exaggerated.

Looking back, I thought I had been missing a lot longer than a month. But even the length of time I was missing flew by!
I seemed to have been caught up in helping the DW prepare the garden, spent 10 days at our daughter’s place watching her cat as they traveled around the Netherlands. Did some projects for some other people and finally, I am back in the shop!
Another reason I wasn’t straining at the bit to get back into the shop, was that I shut the outdoor woodstove down in April. Partially because it was starting to warm up and partially because I ran out of wood. So that left the shop with no heat and temps in there in the 50’s. Not really what I wanted for curing adhesive.

So, today I went back to work on it (I really should give it a name,) It sounds so impersonal.

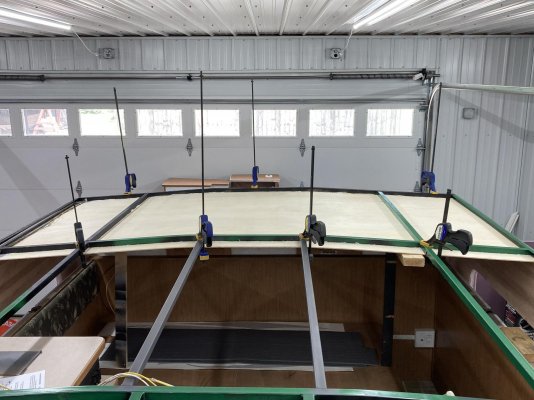
I went back and forth on whether to install the ceiling before the roof panels, and decided to do one ceiling panel first. I don’t think it will make much difference, I just felt it may be easier running the wires, and installing lights in the ceiling and sticking down the foam insulation with a solid ceiling.

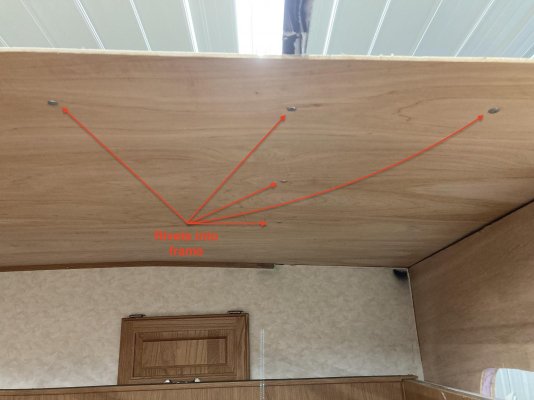
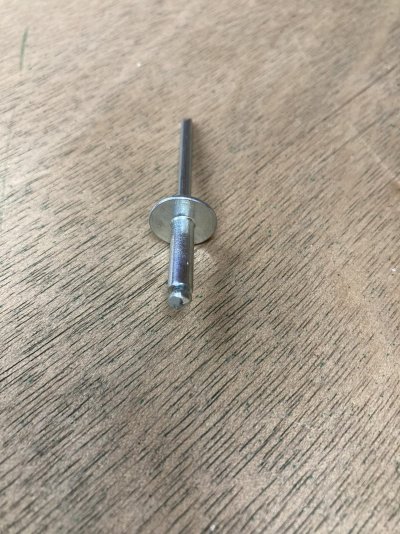
It seems most people stick the ceiling panels up and everything good. I decided to pop rivet the panels (along with adhesive) to hold everything up. The (large head) rivets will also hold the ceiling tight to the frame while the adhesive sets up. I am considering, once the first panel has cured to run my wires in that section, stick the foam down and then the roof panel. Then move on to the next 4’ section. That way I can do everything while standing on the floor or a step stool and doesn’t require climbing on top until I install the actual roofing material.

Glad to be back at it, and moving forward again.
 

Attachments

  • 5F7B2CB0-04C3-4A5D-B15C-71577F722266.jpg
    5F7B2CB0-04C3-4A5D-B15C-71577F722266.jpg
    218.1 KB · Views: 11
  • 16E02932-0D28-414F-8386-D951413E1867_1_201_a.jpg
    16E02932-0D28-414F-8386-D951413E1867_1_201_a.jpg
    146.1 KB · Views: 14
  • C8D4EB85-3DB2-4941-BD3C-17A2228035EF 1.jpg
    C8D4EB85-3DB2-4941-BD3C-17A2228035EF 1.jpg
    330.2 KB · Views: 10
Pretty work, as usual! Blind rivets are pretty handy, aren't they? RivetNuts are also useful, it you need to insert screws/bolts into places where you don't have access to the backside.

- Jack
 
Pretty work, as usual! Blind rivets are pretty handy, aren't they? RivetNuts are also useful, it you need to insert screws/bolts into places where you don't have access to the backside.

- Jack

Yes, very handy indeed!!

We used Rivnuts a lot in the military aircraft, as well as blind rivets.
 
Repairing HiLo.

Kinda wondered where you were. Some times it is good to take a break . DH finished putting in the garden today. It is 20x20. Way more than we can use. He enjoys giving it out to our neighbors. Let me know if you need any upholstery buttons,lampshades or raise lower switches. I will be listing more items for sale soon.
 
Wire raceway channels

Work has been progressing and I thought I would show you some progress.

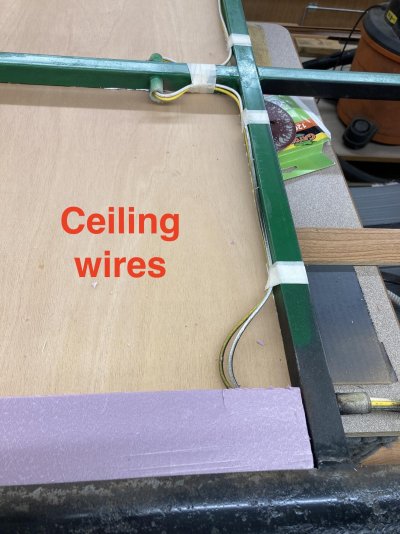
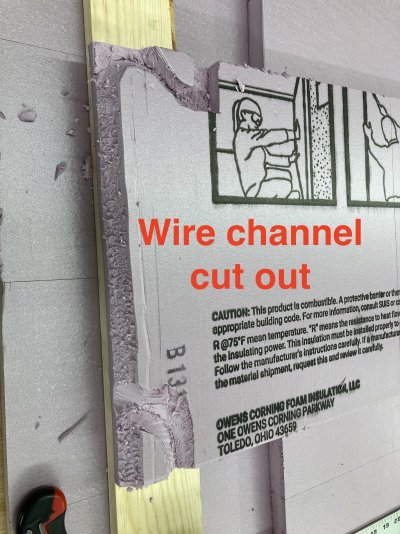
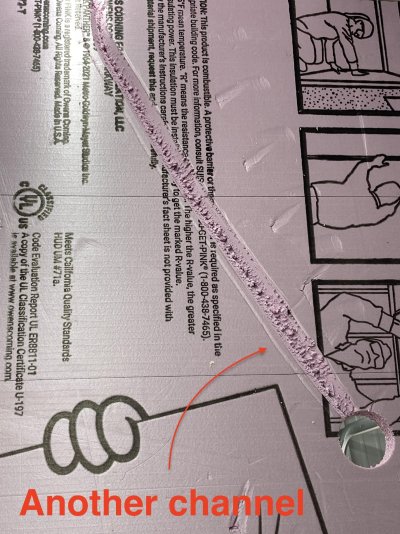
I am going to the trouble of channeling my electrical wires. The original build they had cut a complete track out any place the wires ran. The white styrofoam insulation in the ceiling had at least a 1” gap where no styrofoam was installed. (I know I am not explaining this very well, and I regret not taking a picture of the original build. But picture a full sheet of styrofoam and then a wire running diagonally from corner to far corner. You know that is where the wire needs to run so you cut the styrofoam from corner to corner and remove 1” of styrofoam full length. Your wire lays in that 1” wide raceway but there is no insulation where the styrofoam was removed.) Granted, there are a few arguments here. One being that there really isn’t much for insulation when you are talking about 1” of styrofoam anyway. Second, we are talking about mass producing an item and time is money. So, that being said, I get it!
Since some days I have much more time than money (every day I guess!) I am taking the time to cut a partial channel into the foam board so that there is relatively no break in the roof insulation. Will I notice a difference in heating or cooling, probably not. But why do it the easy way when there is a harder option available. :D

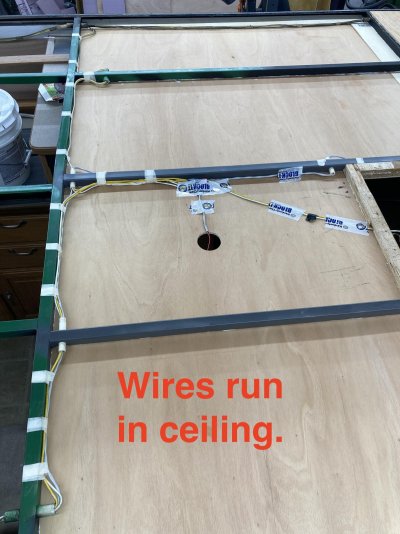
I also included a couple of pictures of how the wires are run in the ceiling, if anyone is curious about what’s going on above your head.
 

Attachments

  • 570403C9-C8EE-4E03-8EC8-EE0C99F1D7EB_1_201_a.jpg
    570403C9-C8EE-4E03-8EC8-EE0C99F1D7EB_1_201_a.jpg
    253.6 KB · Views: 4
  • C05C23B5-C6F1-4ADE-98D0-3B1897FE93C7_1_201_a.jpg
    C05C23B5-C6F1-4ADE-98D0-3B1897FE93C7_1_201_a.jpg
    382.9 KB · Views: 6
  • 0834B4BD-71E2-4837-8831-7E7727573AF4_1_201_a.jpg
    0834B4BD-71E2-4837-8831-7E7727573AF4_1_201_a.jpg
    229.9 KB · Views: 8
  • 82ACA985-D46F-4992-AC7D-782B0C4D24AE_1_201_a.jpg
    82ACA985-D46F-4992-AC7D-782B0C4D24AE_1_201_a.jpg
    325.7 KB · Views: 5
Completing more ceiling/roof bays

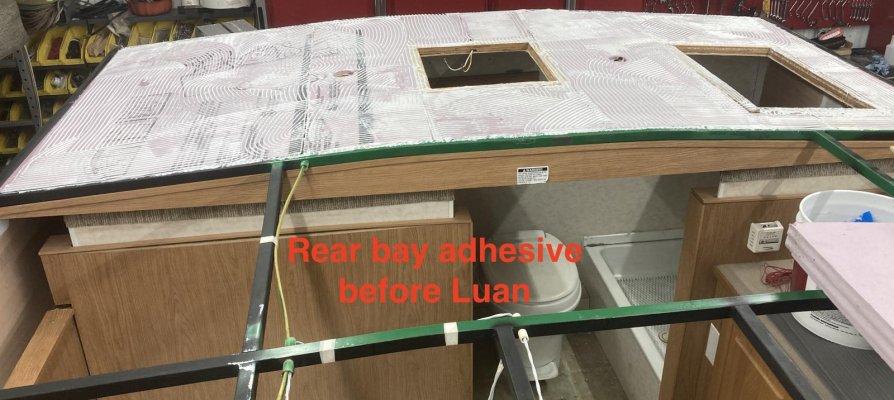
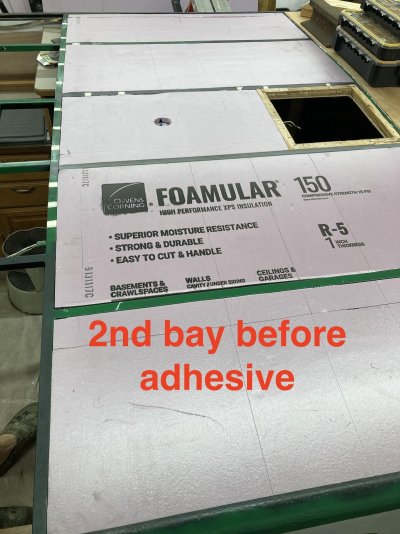
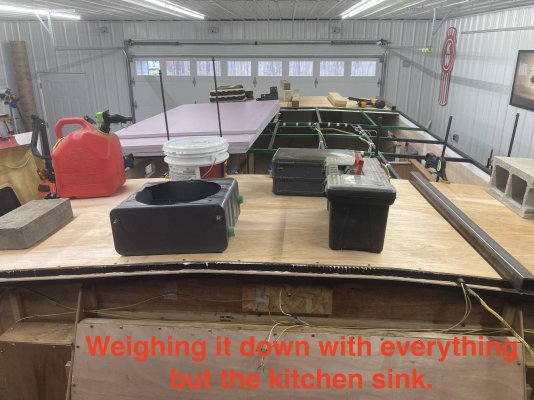
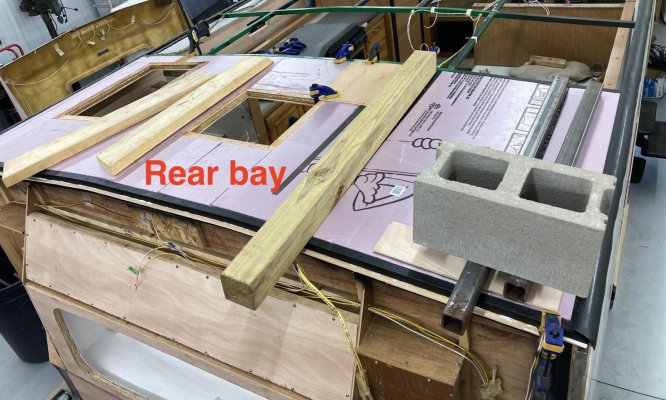
I have made progress on completing the ceiling/roof bays as well. I have the front two sections completed as well as the rear bay. Just another bay and a half and I will be ready for a roof and also turn my attention to the inside area.
 

Attachments

  • 2DA1A002-4740-4A7B-BAD8-1CF8A2C6EDC1_1_201_a.jpg
    2DA1A002-4740-4A7B-BAD8-1CF8A2C6EDC1_1_201_a.jpg
    180.6 KB · Views: 5
  • 282DF6E6-60C0-46B3-BA58-B261CA7D30D9_1_201_a.jpg
    282DF6E6-60C0-46B3-BA58-B261CA7D30D9_1_201_a.jpg
    274.3 KB · Views: 8
  • 15AF943A-0BFC-449A-B79A-12575467A683_1_201_a.jpg
    15AF943A-0BFC-449A-B79A-12575467A683_1_201_a.jpg
    233.8 KB · Views: 4
  • 34BDF529-BADB-4525-BEA9-7A53D170DC8E_1_201_a.jpg
    34BDF529-BADB-4525-BEA9-7A53D170DC8E_1_201_a.jpg
    257.2 KB · Views: 8
  • 847FC126-6B82-4982-88A7-FB90EE59BCA0_1_201_a.jpg
    847FC126-6B82-4982-88A7-FB90EE59BCA0_1_201_a.jpg
    380.9 KB · Views: 7
  • 95A23311-B789-49D2-AB88-4686B8D4DC5F_1_201_a.jpg
    95A23311-B789-49D2-AB88-4686B8D4DC5F_1_201_a.jpg
    181.3 KB · Views: 9
Concrete blocks seem a dandy way to put weight on a project! I like your idea of not simply cutting the insulation out for the wires. I'd do it your way too, if I were rebuilding my roof/ceiling. That trailer's gonna be SO much better than it was when it was fresh from the factory!

- Jack
 
Thanks guys!! I should finish the last bay this week. It is actually starting to resemble a camper again.
 
Thanks for the roof repairs/write up.

I need to save this as our 1996 roof is getting tired on the outside. No leaks!! I was wondering how the rebuild was coming along.
 
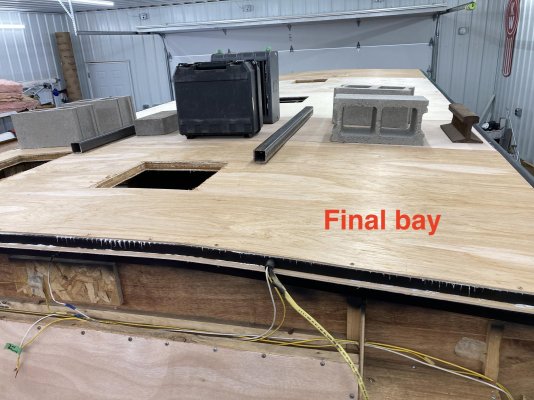
The final bay is complete and finished!!

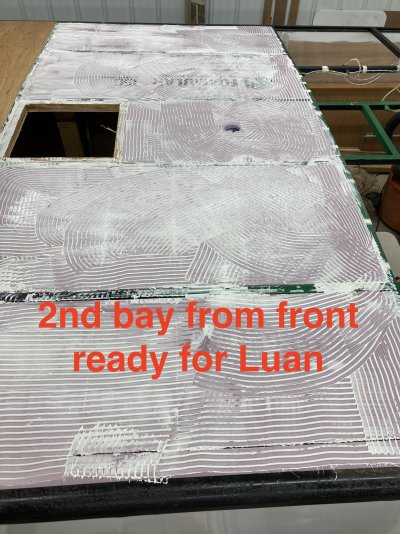
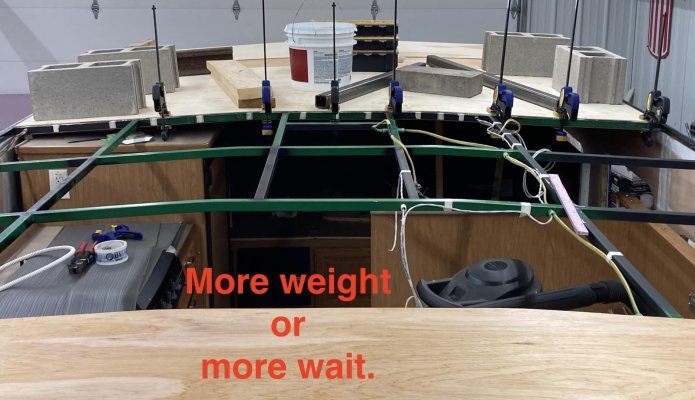
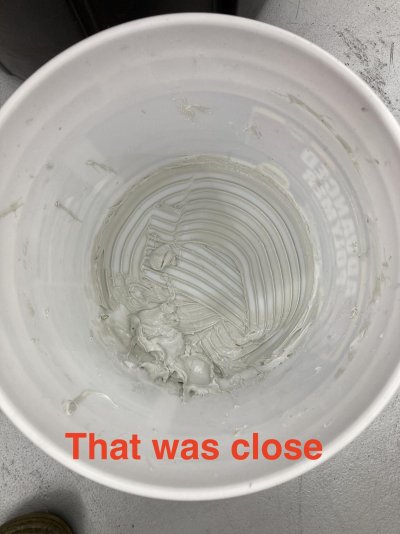
I won’t lie, I was getting really concerned, the closer I came to the last bay that I might run out. In fact I was sweating! (It was also hot and humid that day, so that may have been the reason for some of the sweat!) I was scraping the bottom of the bucket on the last panel.

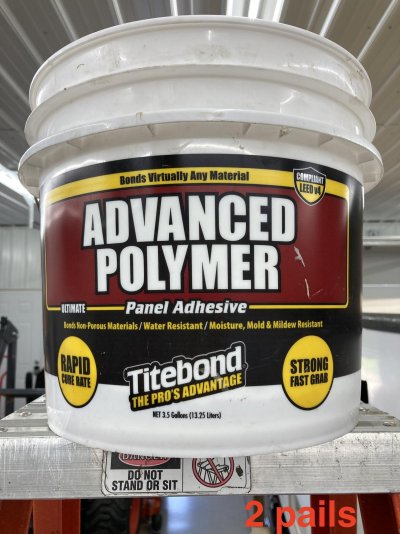
It took 2 pails of adhesive to build 2 side walls (3 levels on each side) and the ceiling/roof (top and bottom.)

This is not an endorsement, and I only mention it as a possibility to save someone a few dollars. I bought both buckets from Zoro with a 20% coupon and free shipping! (Once you buy something from them, you will receive a coupon or two every month in your email.) The Zoro sight still shows the earlier design on the pails, but I was sent the latest and greatest adhesive pails. It works really well and I pity the guy that has to tear this camper apart next time! :D

Oh, and for the people that wonder why I place some random text on each photo. It is so the photo will stay with the bottom side down and not randomly rotate the picture on me.

Hope everyone has a safe and enjoyable Labor Day weekend!!
 

Attachments

  • 50866982-3BB0-4E76-B855-C7E872703BCF_1_201_a.jpg
    50866982-3BB0-4E76-B855-C7E872703BCF_1_201_a.jpg
    270.7 KB · Views: 7
  • 5BC62573-91F9-49F7-8556-EA4443690200_1_201_a.jpg
    5BC62573-91F9-49F7-8556-EA4443690200_1_201_a.jpg
    166.9 KB · Views: 2
  • DE1379C9-4C13-41FD-B121-A4BCAB6D4AAB_1_201_a.jpg
    DE1379C9-4C13-41FD-B121-A4BCAB6D4AAB_1_201_a.jpg
    214.2 KB · Views: 5
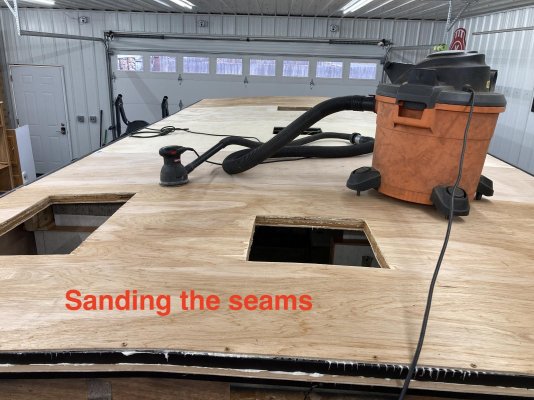
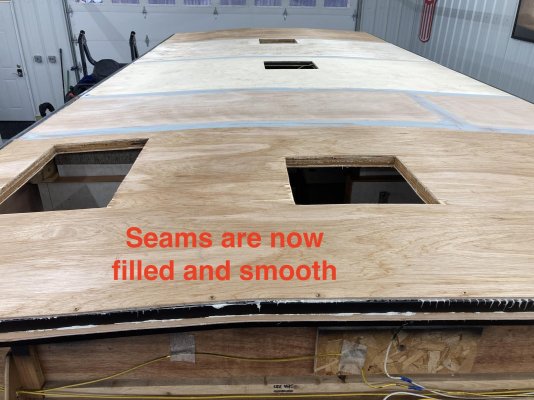
Started back to work on my project. The last few days I sanded the seams to smooth out the edges and then I used Bondo to level the seams and fill any seam cracks.

A little sanding and I should ready to put the roof on.
 

Attachments

  • IMG_5055 2.jpg
    IMG_5055 2.jpg
    275.9 KB · Views: 6
  • IMG_5057 2.jpg
    IMG_5057 2.jpg
    258.7 KB · Views: 6

Try RV LIFE Pro Free for 7 Days

  • New Ad-Free experience on this RV LIFE Community.
  • Plan the best RV Safe travel with RV LIFE Trip Wizard.
  • Navigate with our RV Safe GPS mobile app.
  • and much more...
Try RV LIFE Pro Today
Back
Top